Brother International ULT-2003D Sewing Guide - Page 4
UTILITY STITCHES, Back to Basics-the Sewing Side
 |
View all Brother International ULT-2003D manuals
Add to My Manuals
Save this manual to your list of manuals |
Page 4 highlights
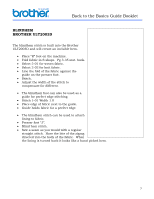
Back to the Basics Guide Booklet UTILITY STITCHES Back to Basics-the Sewing Side The Brother ULT2003D has the features and benefits needed for all your sewing and embroidery needs. • Stitch number 1-01 is a straight stitch left needle position. Backstitch reinforcement can be added by touching the backstitch key. • Stitch number 1-03 is straight stitch center needle position. Backstitch reinforcement can be added by touching the backstitch key. • Stitch numbers 1-02 and 1-04 are left needle and center needle position respectively. When the backstitch button is touched the needle will stitch in place several reinforcement stitches. • Hint: Stitch numbers 1-01 and 1-02 needle positions can be changed in increments of .5mm by touching the + in the width adjustment. • Needle position on stitch 1-07 and 1-08 can also be changed by touching the + on the width control. • Note: On page 2 the letters S, P or Q beside the stitch number suggests the stitch be used with the side cutter or for piecing or quilting. • Tabs near the bottom of the screen will open additional screens. Separate guide sheets are included. 2
-
 1
1 -
 2
2 -
 3
3 -
 4
4 -
 5
5 -
 6
6 -
 7
7 -
 8
8 -
 9
9 -
 10
10 -
11
-
12
-
13
-
14
-
15
-
16
-
17
-
18
-
19
-
20
-
21
-
22
 |
 |