Brother International VX-940 Users Manual - English - Page 38
Cording
 |
View all Brother International VX-940 manuals
Add to My Manuals
Save this manual to your list of manuals |
Page 38 highlights
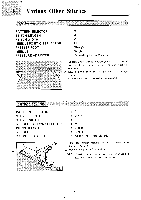
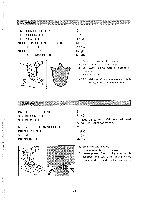
Applique PATTERN SELECTOR STITCH LENGTH STITCH WIDTH NEEDLE POSITION SELECTOR PRESSER FOOT NEEDLE PRESSURE ADJUSTER : 2 : F^ 2 1 3 : M : Zigzag : Single : Middle 1. Baste cut design to the material . 2. Sew carefully following design. 3. Cut away surplus material outside of stitching. 4. Remove basting. NOTE: Make reinforceMent straight stitch at beginning and ending stitches. Cording PATTERN SELECTOR STITCH LENGTH STITCH WIDTH NEEDLE POSITION SELECTOR PRESSER FOOT NEEDLE PRESSURE ADJUSTER : 2 : F- 2 In accordance with thickness of cord being used, set stitch width. : M Zigzag : Single : Middle 1. Set Stitch Width Knob. 2 Place cord on fabric to be sewn. 3 Lower presser foot making sure cord is centered and sew using zigzag stitch. Guide cord by hand to where you desire it. - 36 -
-
 1
1 -
2
-
3
-
4
-
5
-
6
-
7
-
8
-
9
-
10
-
11
-
12
-
13
-
14
-
15
-
16
-
17
-
18
-
19
-
20
-
21
-
22
-
23
-
24
-
25
-
26
-
27
-
28
-
29
-
30
-
31
-
32
-
 33
33 -
 34
34 -
 35
35 -
 36
36 -
 37
37 -
 38
38 -
 39
39 -
 40
40 -
 41
41 -
 42
42 -
 43
43 -
44
-
45
-
46
-
47
 |
 |
