Brother International WP700D Owners Manual - English - Page 156
installed.
 |
View all Brother International WP700D manuals
Add to My Manuals
Save this manual to your list of manuals |
Page 156 highlights
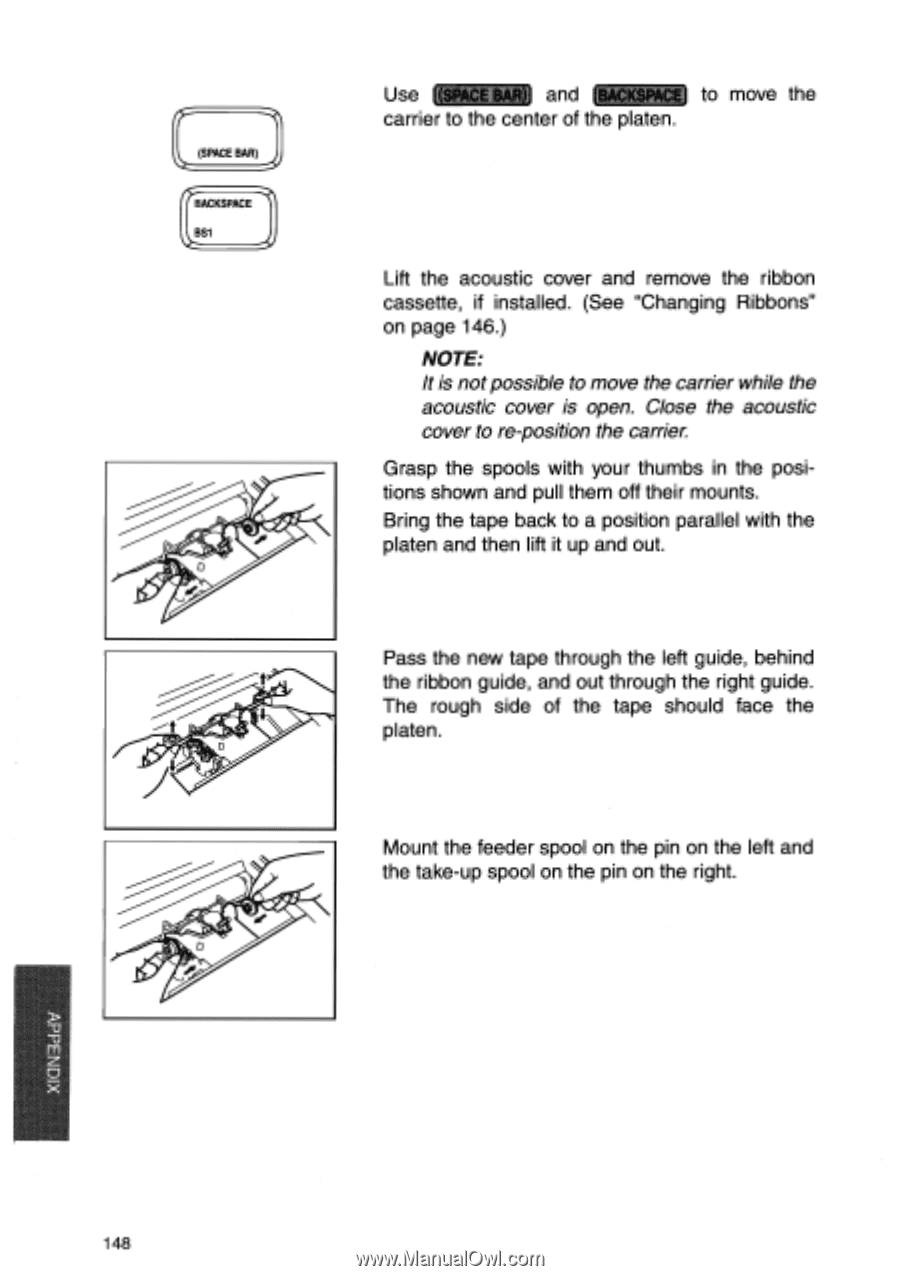
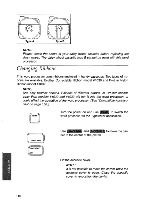
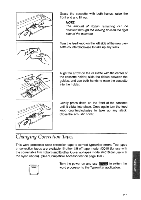
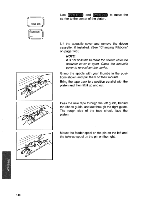
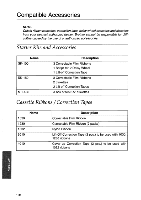
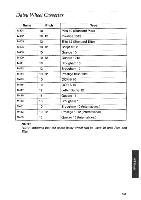
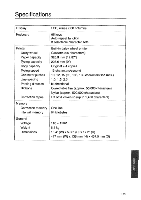
(SPACE BAR) BACKSPACE ti 4 Use t(SPACE BAR) and (BACKSPACE) to move the carrier to the center of the platen. Lift the acoustic cover and remove the ribbon cassette, if installed. (See "Changing Ribbons" on page 146.) NOTE: It is not possible to move the carrier while the acoustic cover is open. Close the acoustic cover to re-position the carrier. Grasp the spools with your thumbs in the positions shown and pull them off their mounts. Bring the tape back to a position parallel with the platen and then lift it up and out. Pass the new tape through the left guide, behind the ribbon guide, and out through the right guide. The rough side of the tape should face the platen. Mount the feeder spool on the pin on the left and the take-up spool on the pin on the right. m z 0 148
-
 1
1 -
2
-
3
-
4
-
5
-
6
-
7
-
8
-
9
-
10
-
11
-
12
-
13
-
14
-
15
-
16
-
17
-
18
-
19
-
20
-
21
-
22
-
23
-
24
-
25
-
26
-
27
-
28
-
29
-
30
-
31
-
32
-
33
-
34
-
35
-
36
-
37
-
38
-
39
-
40
-
41
-
42
-
43
-
44
-
45
-
46
-
47
-
48
-
49
-
50
-
51
-
52
-
53
-
54
-
55
-
56
-
57
-
58
-
59
-
60
-
61
-
62
-
63
-
64
-
65
-
66
-
67
-
68
-
69
-
70
-
71
-
72
-
73
-
74
-
75
-
76
-
77
-
78
-
79
-
80
-
81
-
82
-
83
-
84
-
85
-
86
-
87
-
88
-
89
-
90
-
91
-
92
-
93
-
94
-
95
-
96
-
97
-
98
-
99
-
100
-
101
-
102
-
103
-
104
-
105
-
106
-
107
-
108
-
109
-
110
-
111
-
112
-
113
-
114
-
115
-
116
-
117
-
118
-
119
-
120
-
121
-
122
-
123
-
124
-
125
-
126
-
127
-
128
-
129
-
130
-
131
-
132
-
133
-
134
-
135
-
136
-
137
-
138
-
139
-
140
-
141
-
142
-
143
-
144
-
145
-
146
-
147
-
148
-
149
-
150
-
 151
151 -
 152
152 -
 153
153 -
 154
154 -
 155
155 -
 156
156 -
 157
157 -
 158
158 -
 159
159 -
 160
160 -
 161
161 -
162
-
163
-
164
-
165
-
166
-
167
-
168
-
169
-
170
-
171
-
172
 |
 |