Canon 3000F PhotoBase_manual.pdf - Page 6
Editing Images, Acquiring Images, Capturing Video, Importing Files - windows 7 driver
 |
UPC - 013803028430
View all Canon 3000F manuals
Add to My Manuals
Save this manual to your list of manuals |
Page 6 highlights
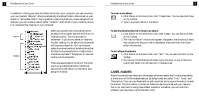
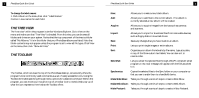
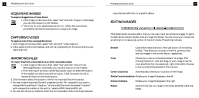
9 PhotoBase Quick Start Guide ACQUIRING IMAGES To acquire images from a Twain device: 1. Click Image on the menu,then select "Get" and click "Acquire." Alternately, you can click Acquire on the Toolbar. 2. The driver for your selected device will run. Follow the instructions provided by the device manufacturer to acquire an image. CAPTURING VIDEO To capture video from a compatible device: 1. Click Image on the menu,then select "Get" and click "Video Capture." 2. Video capture options will appear, and will vary depending on the device that you are capturing from. IMPORTING FILES To import files from a mounted drive or other removable media: 1. Click Image on the menu,then select "Get" and click "Import from Removable Media." Alternately, you can click Import on the Toolbar. 2. From the Import window, use the Source pull-down to select the location of the media from which you wish to import. Click Format to format or remove all files from the media source. 3. Click Browse to select the location to which the imported files will be sa ved. 4. You can rename imported files with a standard p refix. For example,if you were to change the file prefixes to "Vacation," all imported files would be named "Vacation" with a sequential number at the end,i.e., Vacation0000, Vacation0001, etc. 5. You can also choose to delete the files from the removable media once they have been PhotoBase Quick Start Guide 10 imported,and add them to a specific album. EDITING IMAGES PhotoBase has an extensive editor that you can use to alt er and enhance images. To get to the Edit Screen,simply double-click an image thumbnail. You can move your mouse over an editing tool to see a p op-up box of the tool's name. The editing tools are: Browse: Opens the browse buttons in the right se ction of the editing toolbar. They allow you to jump to the first, previous,next, and last images in the current album, respectively. Crop: Allows you to cut out unwanted areas of an image. After clicking this button, click and drag on your image to set the crop area.Once the crop area is set, right-click within the area to cut out everything outside of the crop box. Center Crop Area: Automatically centers your crop box on the image. Rotate Counterclockwise: Rotates your image 90 degrees to the left. Rotate Clockwise: Rotates your image 90 degrees to the right. Resize: Alters the size of your image to the newly specified width and height.
-
 1
1 -
 2
2 -
 3
3 -
 4
4 -
 5
5 -
 6
6 -
 7
7 -
 8
8 -
 9
9 -
 10
10
 |
 |
