Canon 3000F PhotoBase_manual.pdf - Page 9
The Hotlink Bar, Printing
 |
UPC - 013803028430
View all Canon 3000F manuals
Add to My Manuals
Save this manual to your list of manuals |
Page 9 highlights
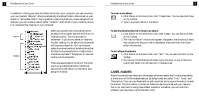
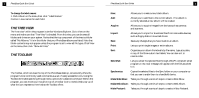
15 PhotoBase Quick Start Guide PRINTING PhotoBase allows you to print individual image files, or entire albums. To print an individual image: 1. Click Album on the menu,then click "Print." Alternately, you can click Print on the Toolbar. From the window that pops up, click "Print the currently selected image." 2. When your image comes up in the preview, you can click and drag the image about the page to any location. 3. Check the Add Title box to include a text title on the print.On the preview, double- click in the text box to add/edit the title.Drag the text box to the desired location. 4. Check the Add Frame box if you would like a black outline around your image when it prints. 5. Check the appropriate Center boxes to center the image and/or the title. 6. Use the slider to adjust the print size. Above the slider, the width,height,and output (DPI) will be listed. 7. Check the 5x5 Jewel Case Label box to format the print for use as a jewel case insert. 8. Click Print Setup to view and edit your printer properties; click Print to print. To print thumbnail contact sheets: 1. Click Album on the menu,then click "Print." Alternately, you can click Print on the Toolbar. From the window that pops up, click "Print multiple thumbnails or album." 2. Choose to either print all thumbnails,selected thumbnails, or thumbnails in a specified range. 3. Next, choose your desired frame and background options. Including frames and backgrounds is entirely optional. 4. You can include up to three text fields underneath the printed thumbnails. You can PhotoBase Quick Start Guide 16 choose from the three custom text labels,and the file names of the thumbnails. Also, you can choose to include the descriptions of the added fields. At this stage, you can also type in a custom header and footer. 5. Next, you can select the size of the thumbnails (small,medium, or large). You can also have the thumbnails print at a consistent size. Printed page numbers are also optional. Preview each page,if desired, before finally printing. THE HOTLINK BAR The HotLink Bar, which rests at the bottom of the PhotoBase desktop, provides quick access to other applications. Right-click the HotLink Bar to o pen its properties. To add a program to the HotLink Bar: 1. Click Add. 2. Browse to the directory that contains the program file you wish to add. 3. Highlight the file, then click Open. 4. Click Apply when you're finished. This will save the changes you've made to the HotLink Bar. To remove a program from the HotLink Bar: 1. Highlight the program you wish to remove. 2. Click Remove.
-
 1
1 -
2
-
3
-
 4
4 -
 5
5 -
 6
6 -
 7
7 -
 8
8 -
 9
9 -
 10
10
 |
 |
