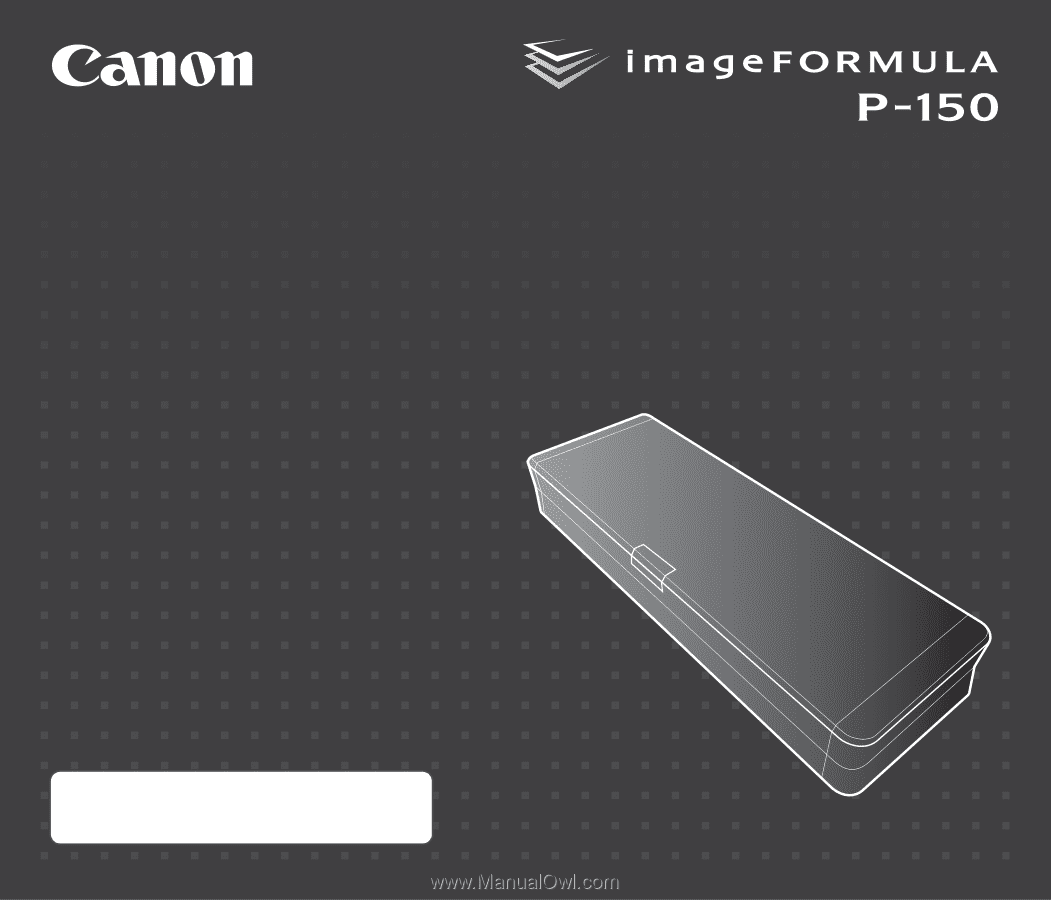
Canon 4081B007 User Manual
Canon 4081B007 Manual
 |
View all Canon 4081B007 manuals
Add to My Manuals
Save this manual to your list of manuals |
Canon 4081B007 manual content summary:
- Canon 4081B007 | User Manual - Page 1
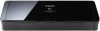
User Manual • Please read this manual before operating this scanner. • After you finish reading this manual, store it in a safe place for future reference. - Canon 4081B007 | User Manual - Page 2
reproduce and include the copyright notice on the back-up copy. 3. SUPPORT AND UPDATE: Canon, Canon's affiliate, their distributor or dealer is not Canon's affiliate, their distributor or dealer will not guarantee uninterrupted service, or absence or correction of errors. Therefore, the SOFTWARE is - Canon 4081B007 | User Manual - Page 3
CANON, CANON'S AFFILIATE, THEIR DISTRIBUTOR OR DEALER SHALL HAVE NO OBLIGATION TO INDEMNIFY YOU AGAINST ANY CLAIM OR SUIT BROUGHT BY A THIRD PARTY ALLEGING THAT THE SOFTWARE, ACCOMPANYING DOCUMENTATION OR THE USE THEREOF INFRINGES ANY INTELLECTUAL PROPERTY OF SUCH THIRD PARTY. THE ABOVE IS CANON'S - Canon 4081B007 | User Manual - Page 4
used in accordance with the instructions, may cause harmful interference to or modifications to the equipment unless otherwise specified in the manual. If such changes or modifications should be made, you scheme or your household waste disposal service. For more information regarding return and - Canon 4081B007 | User Manual - Page 5
Für EMVG Dieses Produkt ist zum Gebrauch im Wohnbereich, Geschäfts-und Gewerbebereich sowie in Kleinbetrieben vorgesehen. Für 3. GPSGV "Maschinenlärminformations-Verordnung 3. GPSGV: Der höchste Schalldruckpegel beträgt 70 dB(A) oder weniger gemäß EN ISO 7779" Model Names The following names may be - Canon 4081B007 | User Manual - Page 6
to the following location when the software is installed. Symbols Used in This Manual The following symbols are used in this manual to explain procedures, restrictions, handling precautions, and instructions that should be observed for safety. WARNING Indicates a warning concerning operations that - Canon 4081B007 | User Manual - Page 7
Layout of This Manual This manual contains the following information. ■ Preparation This section describes to clean the scanner and replace consumable parts. ■ Troubleshooting This section describes how to resolve problems when trouble occurs. ■ Appendix This section contains information related to - Canon 4081B007 | User Manual - Page 8
of Contents Introduction 6 Symbols Used in This Manual 6 Layout of This Manual 7 Important Safety Instructions 9 Installation Location 9 Moving the Scanner 59 Resetting the Counters 60 Troubleshooting 61 Common Problems and Solutions 61 Software Troubleshooting 63 Questions and Answers 64 - Canon 4081B007 | User Manual - Page 9
Instructions adapter (not supplied) to power the unit, make sure to read the operating manual for the AC adapter. ● Use only recommended AC adapters. In addition, do power supply, contact your local authorized Canon dealer or service representative for further information. Handling WARNING ● Never - Canon 4081B007 | User Manual - Page 10
the feed tray, turn the scanner OFF, and disconnect the USB cable or power supply USB cable. Then, contact your local authorized Canon dealer or service representative for further information. ● Before moving the scanner, make sure to close the feed tray, turn the scanner OFF, and disconnect the USB - Canon 4081B007 | User Manual - Page 11
of steps and which is performed by registering a job. Color and Grayscale Support The scanner is capable of scanning a document in 24-bit color or 256level grayscale . Two-Sided Scanning The scanner supports one-sided and two-sided scanning. Using the skip blank pages - Canon 4081B007 | User Manual - Page 12
Prescan This feature allows you to scan just the first page of a document, confirm the scanned image and adjust the brightness and contrast, and then scan the remaining pages of the document. Scan First Pressing the Start button on the scanner automatically starts CaptureOnTouch and scans the - Canon 4081B007 | User Manual - Page 13
. B Document Feed Tray This tray is for feeding documents. Open it when scanning documents. C Document Guides These guides ensure documents are fed straight (one on the left and right sides). Raise the guides when loading a document, and then align them to both sides of the document to be scanned - Canon 4081B007 | User Manual - Page 14
External Dimensions Diagram 7.96" (202.2 mm) 4.74" (120.4 mm) AB C D A USB Connector Connect the USB cable supplied with the scanner (or one that supports Hi-Speed USB 2.0). B Auto Start Switch Use this switch to change the operation mode of the scanner. C Kensington Slot Connect a key chain to - Canon 4081B007 | User Manual - Page 15
or higher Drive capable of reading DVDs Operating System • Microsoft Windows 2000 Professional with Service Pack 4 or later • Microsoft Windows XP with Service Pack 3 or later • Microsoft Windows XP x64 Edition with Service Pack 2 or later (32-bit and 64-bit editions) • Microsoft Windows Vista with - Canon 4081B007 | User Manual - Page 16
Hint When you want to reinstall software that you previously uninstalled, select [Custom Installation] and specify the uninstalled software. 4 Click [Install]. 6 Read the license agreement, and click [Yes] if you agree to it. 5 Click [Next]. 7 Click [Next]. 16 - Canon 4081B007 | User Manual - Page 17
8 Click [Finish] when installation of the driver is complete. 10 Read the license agreement, and click [Yes] if you agree to it. 9 Click [Next]. 11 Click [Next]. 17 - Canon 4081B007 | User Manual - Page 18
12 Click [Finish] when installation of CaptureOnTouch is complete. 14 Click [Finish] when installation of the User's Manual is complete. 13 Click [Next]. 15 Click [Exit] to finish the software installation. 16 Remove the software setup disc from the DVD drive. 18 - Canon 4081B007 | User Manual - Page 19
Connecting the Scanner to a Computer Use the supplied USB cable to connect the scanner to a computer. When you connect the scanner, the Auto Start switch on the scanner needs to be turned ON or OFF depending on how you will use the scanner. Auto Start Switch There is an Auto Start switch at the - Canon 4081B007 | User Manual - Page 20
the scanner as described below. Turning ON the Power 1 Press the feed tray release lever, and lift the areas indicated below. 3 Raise the document guides and feed extension guides. LTRA4 B5 A5 A5 B5 A4 LTR 2 Open the feed tray. The scanner turns ON, and the power indicator lights. LTRA4 B5 A5 - Canon 4081B007 | User Manual - Page 21
3 Push the section (front cover) at the front of the feed tray to close it. IMPORTANT Do not close the feed tray while the document guides are spread open. This can damage to the scanner and result in malfunction. IMPORTANT • When not using the scanner, close the scanner's Document Feed Tray - Canon 4081B007 | User Manual - Page 22
Using an Auxiliary Power Supply Since this scanner is bus-powered, scanning can be performed with a single USB cable. However, scanning can be performed at a higher speed if you use the power supply USB cable or an AC adapter (sold separately). Connect the power supply USB cable or AC adapter (sold - Canon 4081B007 | User Manual - Page 23
Documents Types of Document You Can Scan The scanner can scan documents that satisfy the following conditions. Type of paper: Plain paper Width: 2.75" to 8.5" (70 mm to 216 mm) Length: 2" to 14.02" (50.8 mm to 356 mm) Thickness: 14 to 32 lb bond (52 g/m2 to 128 g/m2) 0.0024" to 0.0059" (0.06 mm to - Canon 4081B007 | User Manual - Page 24
Loading a Document 1 Open the feed tray. A4 LTR B5 A5 A5 B5 A4 LTR 2 Raise the document guides and feed extension plates. Feed Extension Plates LTRA4 B5 A5 A5 B5 A4 LTR Document Guide (Left) Document Guide (Right) 24 - Canon 4081B007 | User Manual - Page 25
face down and the top of the document pointing down. • Align the document guides with both edges of the loaded document. • Up to 20 pages of plain sure that the document does not exceed the loading limit marks ( ) on the document guides. A4 LTR B5 A5 A5 B5 A4 LTR • If the document is curved, - Canon 4081B007 | User Manual - Page 26
Scanning Procedure Supplied Software The scanner comes with the following software. CaptureOnTouch Lite This scanning application comes preinstalled in the scanner. It enables scanning to be started without installing software, so the scanner can be shared without limiting it to specific computers. - Canon 4081B007 | User Manual - Page 27
with CaptureOnTouch Lite, do not close the feed tray until you have finished saving image files. 3 Click [CaptureOnTouch Lite]. You can follow the instructions on the screen to scan a document and save the scanned images in any file format. Scanning Procedure 1 Set the Auto Start switch at the - Canon 4081B007 | User Manual - Page 28
4 Set the scanning conditions. Click [Scanner setting], and set the scanning conditions in the dialog box that appears. [Default] Returns all settings to their default values. When you have finished configuring the settings, click [OK] to close the dialog box. Hint When splitting up multiple - Canon 4081B007 | User Manual - Page 29
Hint If the [Enable continuous scanning] check box was selected, the confirmation screen appears when scanning of the whole document is completed. • If you clear the [Use file name settings dialog box] check box, the file name field becomes blank and you can enter any file name. • If you click [ - Canon 4081B007 | User Manual - Page 30
• PDF 8 Set the location to save the scanned images. In [Multi-pdf settings], specify whether to save the scanned images as a single multi-page file ("Save all pages as one file"), or to create separate files for each batch of a specified number of pages ("Create a file for each specified number - Canon 4081B007 | User Manual - Page 31
When Scanning is Finished After the scanned images have been saved, you can perform the following operations. Environmental Settings Click [Environmental Settings] on the main screen to display the [Maintenance] dialog box. • When you want to scan another document, click [Return to main screen]. • - Canon 4081B007 | User Manual - Page 32
Quitting CaptureOnTouch Lite Use the following procedure to quit CaptureOnTouch Lite. 1 Click "X" (close button). CaptureOnTouch Lite closes. 2 Close the feed tray. LTRA4 B5 A5 A5 B5 A4 LTR The scanner turns OFF, and the power indicator goes out. 3 Disconnect the USB cable from the scanner and - Canon 4081B007 | User Manual - Page 33
to scan the document and then select the output method and configure the necessary settings. You can easily scan a document by just following the instructions on the screen. Select Scan Job Print Print with specified printer. Open by application Open scanned image file with specified application - Canon 4081B007 | User Manual - Page 34
This method allows you to register the scanning procedure from the scanning conditions to the output method as one job, and then scan a document by just selecting the job that suits your purpose. This is convenient when you want to repeat scanning using a set procedure. Scan with Start Button Scan - Canon 4081B007 | User Manual - Page 35
Setting Scanning Conditions Set various scanning conditions such as the scanning method and document size. The scanning condition items are common to [Scan First] and [Select Scan Job]. For [Scan First] When using [Scan First], configure the scanner settings before scanning begins. For [Select Scan - Canon 4081B007 | User Manual - Page 36
Scanning Side Specify whether to scan only one side of a document or both sides. If you select [Skip blank page] and a blank page is detected within the document during scanning, the blank page will be skipped. The driver settings are used for the density threshold at which blank pages are skipped. - Canon 4081B007 | User Manual - Page 37
for the image files to be attached to email. To use this feature, an e-mail application such as Windows Mail or Outlook Express that supports MAPI (Microsoft Messaging Application Programming Interface) needs to be specified as the default program of the operating system. Allows you to save the - Canon 4081B007 | User Manual - Page 38
When Using PaperPort • PaperPort, which is supplied with the scanner, uses the [Documents] folder as the default folder. Therefore, when sending an image file to PaperPort, specify [Documents] (or a folder in [Documents]) as the save destination folder. Specifying any other folder may result in an - Canon 4081B007 | User Manual - Page 39
3 Click [Scanner setting] to display the [Scanner setting] dialog box, and configure the scanner settings. The document is scanned. While scanning is in progress, the number of pages scanned is displayed in addition to the scanner settings. When scanning is finished, the [Output method] screen - Canon 4081B007 | User Manual - Page 40
5 Specify the output method. 6 Configure the settings related to output, and then click the output button to output the scanned images. Hint • Clicking [Return to main screen] returns to the main screen of Scan First. • When [Save to folder] is selected as the output method, you can click [Open - Canon 4081B007 | User Manual - Page 41
Select Scan Job Flow of Operation Register jobs ▼ Select a job ▼ Scan a document ▼ Output the scanned images Registering and Editing Jobs In CaptureOnTouch, up to 10 jobs can be registered for use with Select Scan Job. 1 Click the [Select Scan Job] tab. The main screen of [Select Scan Job] appears. - Canon 4081B007 | User Manual - Page 42
[Output settings] tab Configure settings related to the output method. The setting items displayed differ depending on the specification for [Output method]. [Button assignment] tab Configure the settings for assigning the job to a job button on the scanner. If the [Assign scanner Start button to - Canon 4081B007 | User Manual - Page 43
Selecting a Job and Scanning 1 Load the document into the scanner. (See p. 24.) 2 Click the [Select Scan Job] tab. 4 Click the [Start] button. The main screen of [Select Scan Job] appears. 3 Select a job in [Job list]. The document is scanned. While scanning is in progress, the number of pages - Canon 4081B007 | User Manual - Page 44
Hint • Clicking [Return to main screen] returns to the main screen of Select Scan Job. • If a job with the output method set to [Save to folder] was executed, you can open the folder in which the image file was saved by clicking [Open storage folder]. Starting Select Scan Job with the Start Button - Canon 4081B007 | User Manual - Page 45
Environmental Settings To configure environmental settings for CaptureOnTouch, click the [Environ. Settings] button in the main screen and open the [Environmental settings] dialog box. The [Environmental settings] dialog box is composed of the [Basic settings] tab and [E-mail settings] tab. The - Canon 4081B007 | User Manual - Page 46
[E-mail settings] Tab The [E-mail settings] tab allows you to set the size limit for image files that can be attached to e-mails. [Maximum size of attached file] If the [Display confirmation message if file size exceeds the above] check box is selected and an attached file exceeds the size limit, a - Canon 4081B007 | User Manual - Page 47
Scanner Driver Settings When you scan a document in an ISIS compatible or TWAIN compatible application (CaptureOnTouch, etc.), open the scanner driver and configure the scanning conditions and other settings. This section describes the configuration and functions of the scanner driver. Configuration - Canon 4081B007 | User Manual - Page 48
Hint When the tab is accessed from an ISIS compatible application, [Reverse image] is not displayed. [Others] Tab Mode Select the scanning mode. Set the operation of the scanner for scanning. Basic Scanning Condition Settings This section provides an overview of the basic setting items that are - Canon 4081B007 | User Manual - Page 49
Dots per inch Select the scanning resolution. Higher resolutions provide clearer images, but produce larger files. Scanning Side Select which page side(s) to scan. If the scanning side is set to [Skip blank page], the images of blank pages are deleted when images are saved. Scanning Documents of - Canon 4081B007 | User Manual - Page 50
If [Skip blank page] is selected, the [Setting] button is enabled, and you can adjust the level for judging whether pages are blank. When you want to enhance contours in images Adjust the [Edge emphasis] setting on the [Image processing] tab. When you do not want to scan colored lines and - Canon 4081B007 | User Manual - Page 51
When you want to enhance text that is difficult to read because of factors such as the background of the scanned document Select [Advanced Text Enhancement II] in the mode setting on the [Basic] tab. The background behind the text is removed or processed so that the text is emphasized for better - Canon 4081B007 | User Manual - Page 52
Functions Restricted by the Mode Setting Depending on the [Mode] setting on the [Basic] tab, some setting items on each tab of the driver are disabled as shown below. [Brightness] Tab Setting Value Auto Color Detection Black and White Error Diffusion Advanced Text Enhancement II 256-level Gray 24- - Canon 4081B007 | User Manual - Page 53
[Others] Tab Setting Value Prescan Auto Color Detection X Black and White O Error Diffusion O Advanced Text Enhancement II O 256-level Gray O 24-bit Color O (O: Available for setting, X: Not available for setting) 53 - Canon 4081B007 | User Manual - Page 54
Scan Panel Scan Panel is software for controlling scanning operations such as feeding documents and stopping scanning when scanning multiple documents one after the other. It is usually resident in the taskbar. Double-click the icon in the taskbar to display Scan Panel. Stop Button Start Button Scan - Canon 4081B007 | User Manual - Page 55
Maintenance Daily Maintenance Clean the scanner on a regular basis as described below to maintain scanning quality. WARNING • For safety reasons, make sure you close the feed tray, turn OFF the power, and disconnect the USB cable before cleaning the outside and inside of the scanner. • Do not use - Canon 4081B007 | User Manual - Page 56
2 Open the feeder cover. PULL 3 Remove any dirt from the scanning glass, separation pad and rollers inside the scanner (parts shown in the figure). Use a clean dry cloth to wipe off any dirt on the scanning glass. Wipe off any dirt on the rollers with a cloth that has been dampened with water - Canon 4081B007 | User Manual - Page 57
when cleaning or replacing them. 1 Open the feed tray. Separation Pad: 10,000 sheets 2 Open the feeder cover. PULL This message only serves as a rough guide for when to replace the feed roller and separation pad. They may wear out sooner if, for example, a lot of paper with rough surfaces is - Canon 4081B007 | User Manual - Page 58
place. Make sure to close the roller cover so that it clicks into place. Failure to securely close the feed cover will cause document feed problems. 58 - Canon 4081B007 | User Manual - Page 59
9 Close the feeder cover. 3 Remove the separation pad. Replacing the Separation Pad Use the following procedure to replace the separation pad. 1 Open the feed tray. 4 Attach the new separation pad. 2 Open the feeder cover. 5 Close the feeder cover. PULL 59 - Canon 4081B007 | User Manual - Page 60
Resetting the Counters Make sure to reset the scanner's internal counters using the following procedure whenever you replace the feed roller and separation pad. IMPORTANT This section describes the procedure to use when the Auto Start switch on the rear panel of the scanner is set to the "OFF" - Canon 4081B007 | User Manual - Page 61
to the computer with a USB cable. (2) Confirm that the scanner is turned ON. See the previous problem (1) if the scanner does not turn ON. (3) The computer's USB interface may not support the scanner. The scanner cannot be guaranteed to work with all USB interfaces. (4) Confirm that the supplied - Canon 4081B007 | User Manual - Page 62
Problem 5 Solutions Problem 6 Solutions Problem 7 Solutions Documents fed askew are causing scanned images to be slanted. (1) Align the document guides Canon dealer or service representative. Problem 8 Pages are is because the JPEG format does not support black and white binary images. If - Canon 4081B007 | User Manual - Page 63
Scan First] check box in the main screen. Problem 15 The scanner makes unusual noise while feeding documents. does not indicate a malfunction. Software Troubleshooting Scanning takes a long time. as multi-page TIFF files, an application that supports this format is required. (2) Even if scanned - Canon 4081B007 | User Manual - Page 64
file. In the case of saving scanned images in PDF or TIFF format, you can specify either multi- or single-page files. See also Problem 12 of "Common Problems and Solutions". Can I copy or back up the scanner settings? In CaptureOnTouch, if you back up the settings in the environmental settings, the - Canon 4081B007 | User Manual - Page 65
How do I print scanned data? • In the case of Scan First of CaptureOnTouch, select [Print] in the output method selection screen. • In the case of Select Job Scan of CaptureOnTouch, select [Print] for [Output method] when registering the job. How do I save scanned data in a shared folder? • In the - Canon 4081B007 | User Manual - Page 66
Clearing a Paper Jam When paper jams during scanning, use the following procedure to clear the jammed paper. WARNING Be careful when removing jammed paper. You may unexpectedly injure yourself by, for example, cutting your hand on an edge of the paper. 1 Remove any documents remaining in the feed - Canon 4081B007 | User Manual - Page 67
Hint If a paper jam occurs when [Rapid recovery system] is enabled in the scanner driver, the image of the jammed page is not saved and scanning stops. This allows you to continue scanning from the document that caused the paper jam. 67 - Canon 4081B007 | User Manual - Page 68
Uninstalling the Software If CaptureOnTouch and the scanner driver are not operating properly, you may be able to solve the problem by uninstalling them and then using the software setup disc to reinstall them. In such a case, use the following procedure to uninstall them. IMPORTANT Before - Canon 4081B007 | User Manual - Page 69
Hint When the [User Account Control] dialog box appears, click [Continue]. 4 Click [Yes]. 5 Click [Finish]. Uninstallation of the software is now complete. 69 - Canon 4081B007 | User Manual - Page 70
Appendix Specifications Main Unit Type Desktop sheet-fed scanner Scanning Document Size Size Width: 2" to 8.5" (50.8 mm to 216 mm) Thickness Length: 2.75" to 14.02" (70 mm to 356 mm) 14 to 32 lb bond (52 g/m2 to 128 g/m2) 0.0024" to 0.0059" (0.06 mm to 0.15 mm) Feeding Method Auto - Canon 4081B007 | User Manual - Page 71
supply. Allows better scanning speed than when using the USB cable by itself. For details on replacement parts, contact your local authorized Canon dealer or service representative. 71 - Canon 4081B007 | User Manual - Page 72
, Connecting 19 Consumables 57 71 Contrast 28 Custom Page Size 49 D , Deskew 28 36 Document Loading 24 Type 23 Document Feed Tray 13 , Document Guides 13 25 , Dots per inch 28 35 E Eject Outlet 13 Environmental Settings 31 F Feed Extension Plate 13 Feed Inlet 14 Feed Roller 57 Feeder - Canon 4081B007 | User Manual - Page 73
, , , Separation Pad 59 Start Button 14 34 40 44 System Requirements 15 T , Text orientation recognition 28 36 U Uninstalling 68 USB Connector 14 73 - Canon 4081B007 | User Manual - Page 74
CANON ELECTRONICS INC. 1248, SHIMOKAGEMORI, CHICHIBU-SHI, SAITAMA 369-1892, JAPAN CANON U.S.A. INC. ONE CANON PLAZA, LAKE SUCCESS, N.Y. 11042, U.S.A. CANON CANADA INC. 6390 DIXIE ROAD, MISSISSAUGA, ONTARIO L5T 1P7, CANADA CANON EUROPA N.V. BOVENKERKERWEG 59-61, P.O.BOX 2262, 1180 EG AMSTELVEEN, THE
-
 1
1 -
 2
2 -
 3
3 -
 4
4 -
 5
5 -
 6
6 -
 7
7 -
8
-
9
-
10
-
11
-
12
-
13
-
14
-
15
-
16
-
17
-
18
-
19
-
20
-
21
-
22
-
23
-
24
-
25
-
26
-
27
-
28
-
29
-
30
-
31
-
32
-
33
-
34
-
35
-
36
-
37
-
38
-
39
-
40
-
41
-
42
-
43
-
44
-
45
-
46
-
47
-
48
-
49
-
50
-
51
-
52
-
53
-
54
-
55
-
56
-
57
-
58
-
59
-
60
-
61
-
62
-
63
-
64
-
65
-
66
-
67
-
68
-
69
-
70
-
71
-
72
-
73
-
74
 |
 |
User Manual
• Please read this manual before operating this scanner.
• After you finish reading this manual, store it in a safe
place for future reference.