Canon 4081B007 User Manual - Page 29
Set the file name for the scanned images to be saved.
 |
View all Canon 4081B007 manuals
Add to My Manuals
Save this manual to your list of manuals |
Page 29 highlights
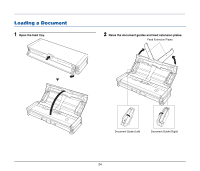
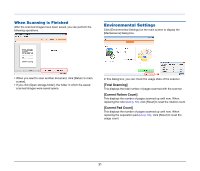
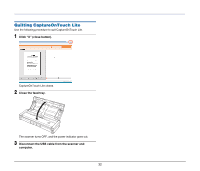
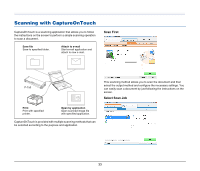
Hint If the [Enable continuous scanning] check box was selected, the confirmation screen appears when scanning of the whole document is completed. • If you clear the [Use file name settings dialog box] check box, the file name field becomes blank and you can enter any file name. • If you click [File name settings], you can specify how to assign the file name. 7 Set the file format for the scanned images to be saved. Load the next document, and then click [Continue scanning] to start scanning the document. If you have finished scanning all documents, click [Continue to next step]. 6 Set the file name for the scanned images to be saved. You can select the file format from the [File type] drop-down list. When a file format other than BMP is selected, you can click [Detail Settings] and set more advanced settings. The following shows the advanced settings by file format. [File name] displays the file name for the scanned images to be saved. You can use one of the following methods to change the file name. 29
-
 1
1 -
2
-
3
-
4
-
5
-
6
-
7
-
8
-
9
-
10
-
11
-
12
-
13
-
14
-
15
-
16
-
17
-
18
-
19
-
20
-
21
-
22
-
23
-
 24
24 -
 25
25 -
 26
26 -
 27
27 -
 28
28 -
 29
29 -
 30
30 -
 31
31 -
 32
32 -
 33
33 -
 34
34 -
35
-
36
-
37
-
38
-
39
-
40
-
41
-
42
-
43
-
44
-
45
-
46
-
47
-
48
-
49
-
50
-
51
-
52
-
53
-
54
-
55
-
56
-
57
-
58
-
59
-
60
-
61
-
62
-
63
-
64
-
65
-
66
-
67
-
68
-
69
-
70
-
71
-
72
-
73
-
74
 |
 |
