Canon S450 User Manual
Canon S450 - BJC Color Inkjet Printer Manual
 |
View all Canon S450 manuals
Add to My Manuals
Save this manual to your list of manuals |
Canon S450 manual content summary:
- Canon S450 | User Manual - Page 1
- Canon S450 | User Manual - Page 2
Trademarks How to Use This Manual Safety Precautions Parts and Functions of the Printer Front View Rear View Inside the Printer Operation Panel Paper Handling Paper and Other Print Media Setting the Paper Thickness Lever Printing Area Notes on Handling Print Media Printing on Special Media Types - Canon S450 | User Manual - Page 3
the Windows 98/95 Printer Driver Using Maintenance Functions Using the Macintosh Printer Driver Printer Driver Basics Preparing and Executing a Print Job Print Mode Settings Executing Special Functions Printer Maintenance Routine Maintenance Prolonging the Service Life of the Printer BJ Cartridges - Canon S450 | User Manual - Page 4
The POWER Light Flashes Orange An Error Message Appears Other Problems Before You Call for Help Getting Help From Canon Specifications General Specifications System Requirements Using the Optional IS-32 Color Image Scanner Cartridge Using the Scanner Using the Scanner With Windows Using the Scanner - Canon S450 | User Manual - Page 5
Introduction Welcome Copyright Disclaimer Trademarks How to Use This Manual Safety Precautions Introduction 5 - Canon S450 | User Manual - Page 6
for purchasing the Canon S450 Series Color Bubble Jet™ Printer. This User's Manual provides complete explanations of the features and functions of the printer. To maximize the life of your printer, it's a good idea to familiarize yourself fully with all of its functions. This User's Manual uses the - Canon S450 | User Manual - Page 7
any form, in whole or part, without the prior written consent of CCSI. © 2000 Canon Computer Systems, Inc. Disclaimer Canon Computer Systems, Inc. has reviewed this manual thoroughly in order that it will be an easy-to-use guide to your Canon S450 Color Bubble Jet Printer. All statements, technical - Canon S450 | User Manual - Page 8
, BCI, BJ, and Bubble Jet are trademarks, and SelectExchange is a service mark of Canon Inc. Print Planet is a service mark of Canon Computer Systems, Inc. Mac and the Mac logo are trademarks of Apple Computer, Inc., registered in the U.S. and other countries. All other product and brand - Canon S450 | User Manual - Page 9
this button in the tool bar, and then click within the screen of the User's Manual. Use this button to display the previous page of the User's Manual. Use this button to display the next page of the User's Manual. Use this button to return to the page you were viewing previously. This button - Canon S450 | User Manual - Page 10
button when you wish to search for a word. This column displays a table of contents for the User's Manual. Click the desired item to jump to the topic. Click the + (or ) symbol when you wish to see detailed headings for each chapter. Click the - (or M) symbol when you wish to return to the original - Canon S450 | User Manual - Page 11
not described in this manual as this could result in unforeseen printer faults or cause a fire or electric shock. Turning off the printer Choosing a location Power supply Working around the printer Cleaning the printer BJ® cartridges and ink tanks Using the printer near appliances such as fluorescent - Canon S450 | User Manual - Page 12
very humid or dusty, in direct sunlight, or close to a heating appliance or fireplace. To avoid the risk of fires or electric shocks, install the printer in a location with an ambient temperature range of 41 to 95°F (5 to 35°C) and humidity of 10 to 90% (no condensation). Introduction 12 - Canon S450 | User Manual - Page 13
. Any obstacles could prevent you from unplugging the printer when a printer fault occurs and thereby cause a fire or electric shock. When you are carrying the printer, always use both hands and hold the printer by both ends. When you are moving the printer to another location, keep it stable so that - Canon S450 | User Manual - Page 14
close to flammable solvents such as alcohol or thinner. If flammable solvents come in contact with electrical components inside the printer, such substances could cause a fire or electric shock. I Power supply The socket-outlet shall be installed near the equipment and shall be easily accessible - Canon S450 | User Manual - Page 15
Safety Precautions Do not use a power supply voltage other than that supplied in the country of purchase. Using the incorrect voltage could cause a fire or electric shock. The correct power supply voltage and frequency is: USA/Canada: AC 120V, 60Hz Do not attempt to plug the power cord into the power - Canon S450 | User Manual - Page 16
smoke, unusual odors or strange noises around the printer, immediately press the POWER button to turn off the printer and always unplug the power cord. Continuing to use the printer in these circumstances could cause a fire or electric shock. Call the Canon Customer Care Center. Getting Help From - Canon S450 | User Manual - Page 17
cause a fire or electric shock if they come in contact with electrical components inside the printer. Do not put your hands or fingers in the printer while it is printing. The printer contains moving parts that could cause injury. Do not place metal objects (paper clips, staples, etc.) or containers - Canon S450 | User Manual - Page 18
If any foreign objects (metal or liquid) enter the printer, turn off the printer, unplug the power cord, and call the Canon Customer Care Center. Getting Help From Canon Continued use of the printer when a foreign object has fallen into the printer could cause a fire or electric shock. I Cleaning the - Canon S450 | User Manual - Page 19
and suffer injury. Do not attempt to disassemble or modify the printer. The printer contains high-voltage components that could cause a fire or electric shock. I BJ® cartridges and ink tanks For safety reasons, store BJ cartridges and ink tanks out of the reach of small children. If a child - Canon S450 | User Manual - Page 20
vibration. Safety Precautions This could cause the ink to leak out and stain your clothing or the surroundings. Do not touch the metal contacts on a BJ cartridge after printing. The metal parts may be very hot and could cause burns. I Using the printer near appliances such as fluorescent lamps - Canon S450 | User Manual - Page 21
Parts and Functions of the Printer Front View Rear View Inside the Printer Operation Panel Parts and Functions of the Printer 21 - Canon S450 | User Manual - Page 22
support the paper, especially a larger paper size. Auto Sheet Feeder Holds multiple sheets of paper or other media, which are automatically fed into the printer one sheet at a time. Paper Thickness Lever Adjusts the gap between the print heads and the surface of the paper you are printing on. Parts - Canon S450 | User Manual - Page 23
a USB interface cable to the printer. Power Connector Provides a connection point for connecting the power cord to the AC power outlet. Printer Cable Connector (Parallel Interface) Provides a connection point for connecting a parallel interface cable to the printer. Parts and Functions of the - Canon S450 | User Manual - Page 24
. Cartridge Holder Contains two slots: • The left slot holds the BC-30e Black BJ Cartridge (provided), BC-32e Photo BJ Cartridge (optional), or the IS-32 Color Image Scanner Cartridge (optional). • The right slot holds the BC-31e Color BJ Cartridge (provided). Parts and Functions of the Printer 24 - Canon S450 | User Manual - Page 25
(green) Standby status or print job in progress. Flashing (orange) Printer error. Remove the cause of the error, then press RESUME to continue printing. Flashing (orange and green) Service error. Contact the Canon Customer Care Center. Getting Help From Canon Parts and Functions of the - Canon S450 | User Manual - Page 26
the Print Heads • If you release the button after the light flashes twice: A Nozzle Check Pattern is printed out. Printing a Nozzle Check Pattern • You can also perform these tasks from the printer driver. Windows Using Maintenance Functions Macintosh Printer Maintenance Parts and Functions - Canon S450 | User Manual - Page 27
Paper Handling Paper and Other Print Media Setting the Paper Thickness Lever Printing Area Notes on Handling Print Media Printing on Special Media Types Printing Photographs Paper Handling 27 - Canon S450 | User Manual - Page 28
Paper and Other Print Media Plain paper and Canon Specialty Papers are recommended for use with the printer. Refer to any instructions provided with special media for details about handling and printing. |||| @ @ @ @@ @ @ @ E | ||@||E@||@|||E | | | | | | I Ordinary Paper • Plain Paper - Canon S450 | User Manual - Page 29
surface that produces incredibly brilliant colors and dark, crisp black text. This paper works great for everyday use, as well as proposals, color presentations, color charts and graphs, flyers, and newsletters. You can print on both sides of the sheet. (In the printer driver, select Plain Paper for - Canon S450 | User Manual - Page 30
) The Canon Bubble Jet Paper has been developed for high quality printing with minimal or no smearing or running when in contact with water or damp surfaces, making it a good choice for damp or rainy environments. The paper is specially coated and printable on both sides. (In the printer driver - Canon S450 | User Manual - Page 31
type with the optional BC-32e Photo BJ Cartridge.) • High Resolution Paper This medium is extra smooth for sharp text, brilliant graphics, and professional quality images. It is ideal for printing photographs or business documents that include color charts and graphs. • Magnet Sheets This medium - Canon S450 | User Manual - Page 32
Media Types You Cannot Use With the Printer To avoid poor print quality and possible damage to the printer, do not use the media types listed Reply-paid postcards (such as double postcards) • Postcards with a photograph printed on the reverse side • Postcards with a photograph or sticker pasted on - Canon S450 | User Manual - Page 33
Paper and Other Print Media I Media Sizes You Can Use With the Printer The following table lists the standard paper sizes that you can use with the printer. Paper Letter Legal A4 A5 B5 Envelope (US Com. #10) Envelope (European DL) Canon 4" × 6" Custom Size Width × Height 8.5 in. × 11.0 in. 8.5 in - Canon S450 | User Manual - Page 34
Paper and Other Print Media I Landscape and Portrait There are two methods of orientation you can use to load the printer, depending on the type of media you intend to load. • When the short edge of the paper is fed into the auto sheet feeder, this - Canon S450 | User Manual - Page 35
on the whiter (glossy) side. • Greeting Cards (1/4-fold) Must be loaded with the words "Canon Greeting Cards" face down. • Greeting Cards (1/2-fold) Can be printed on either side. • High Gloss Photo Film Must be loaded and printed with the glossy side facing up and the cut corner at top right - Canon S450 | User Manual - Page 36
the paper stack is not higher than the load limit mark ( | ) on the auto sheet feeder. L Media type Plain Paper Artist Canvas Back Print Film Banner Paper Glossy Photo Cards Glossy Photo Paper Greeting Cards High Gloss Photo Film High Resolution Paper Magnet Sheets Transparency Envelopes Maximum - Canon S450 | User Manual - Page 37
set the paper thickness lever as listed below. Paper Thickness Lever Adjusts the gap between the print head and the surface of the paper you are printing on. Media type Plain Paper Artist Canvas Back Print Film Banner Paper Glossy Photo Cards Glossy Photo Paper Greeting Cards High Gloss Photo Film - Canon S450 | User Manual - Page 38
the printer requires a margin along each edge of the media. The printing area, which varies according to the media size, is the paper size minus the margins. There is both a printing area (recommended) and a printable area (possible). Printing area (dark gold) Canon recommends that you print within - Canon S450 | User Manual - Page 39
(width × height) 8.0 in. × 10.69 in. 8.0 in. × 13.69 in. 1.26" Printing Area Note 0.20" 0.25" 0.25" 0.91" Recommended printing area Printable area where it is possible to print.* * Printing in this area can adversely affect the print quality or the paper feed precision. Paper Handling 39 - Canon S450 | User Manual - Page 40
mm × 289.0 mm 141.2 mm × 202.0 mm 175.2 mm × 249.0 mm 32.0 mm Printing Area Note 5.0 mm 3.4 mm 3.4 mm 23.0 mm Recommended printing area Printable area where it is possible to print.* * Printing in this area can adversely affect the print quality or the paper feed precision. Paper Handling 40 - Canon S450 | User Manual - Page 41
I Glossy Photo Cards Media Type Glossy Photo Cards Printable Area (width × height) 4.31 in. × 6.30 in. 1.10" Printing Area 1.10" 0.20" 0.16" Recommended printing area (The printable area is identical to the printing area.) Paper Handling 41 - Canon S450 | User Manual - Page 42
I US Com. #10 Envelope Media Type US Com. #10 0.12" Printable Area (width × height) 8.0 in. × 3.81 in. 0.20" 0.25" 1.25" Recommended printing area (The printable area is identical to the printing area.) Printing Area Paper Handling 42 - Canon S450 | User Manual - Page 43
I European DL Envelope Media Type European DL 3.0 mm Printable Area (width × height) 203.2 mm × 102.0 mm 7.0 mm 6.4 mm 10.4 mm Recommended printing area (The printable area is identical to the printing area.) Printing Area Paper Handling 43 - Canon S450 | User Manual - Page 44
73" (18.5 mm) 0.12" (3.0 mm) ( ) ( ) 0.13" 3.4 mm Letter A4 Min. 2 sheets Max. 6 sheets Recommended printing area Printable area where it is possible to print.* Printing Area Note * Printing in this area can adversely affect the print quality or the paper feed precision. Paper Handling 44 - Canon S450 | User Manual - Page 45
edges and avoid touching the print side. Any scratching or soiling on the print side will adversely affect the print quality. • When storing your place. • After printing, do not touch the print side until the ink is dry. If water gets on the printed media, do not touch the print side until the media - Canon S450 | User Manual - Page 46
Printing on Special Media Types Artist Canvas Back Print Film Banner Paper Glossy Photo Cards Glossy Photo Paper Greeting Cards High Gloss Photo Film High Resolution Paper Magnet Sheets Transparencies Envelopes Paper Handling 46 - Canon S450 | User Manual - Page 47
Printing on Special Media Types I Artist Canvas 1 Make sure that the printer is turned on and the paper thickness lever is set to the Down position. Raise the paper rest. Paper rest Paper thickness lever Paper Handling 47 - Canon S450 | User Manual - Page 48
Choose Print Mode box under the Main tab. Select High Resolution Paper in the Media Type box. Also make sure that the BJ Cartridge setting matches the BJ cartridge installed in the printer. For Page Size, select Custom and set it to 9.5" × 14". Using the Windows 98/95 Printer Driver Paper Handling - Canon S450 | User Manual - Page 49
the media type (High Resolution Paper), and the BJ cartridge installed in the printer. Using the Macintosh Printer Driver 4 Start the print job. 5 Remove each printed sheet as it is ejected from the printer. Do not touch the printed side until the ink is completely dry. About 15 minutes are required - Canon S450 | User Manual - Page 50
Printing on Special Media Types I Back Print Film 1 Make sure the printer is turned on and the paper thickness lever is set to the Up position. Raise the paper rest. Paper rest Paper thickness lever Paper Handling 50 - Canon S450 | User Manual - Page 51
film is curled, bend it slightly in the opposite direction of the curl to straighten it. Note • The matte side of the film is the print side which should be loaded face up. • To avoid touching the print surface, always handle the sheets by the edges. Unclean or scratched - Canon S450 | User Manual - Page 52
appropriate icon in the Choose Print Mode box under the Main tab. Select Back Print Film in the Media Type box. Also make sure that the BJ Cartridge setting matches the BJ cartridge installed in the printer. Change the settings if necessary. Using the Windows 98/95 Printer Driver Paper Handling 52 - Canon S450 | User Manual - Page 53
Specify the media type (Back Print Film), and the BJ cartridge installed in the printer. Using the Macintosh Printer Driver 5 Start the print job. 6 Remove each printed sheet of Back Print Film as it is ejected from the printer. Do not touch the printed side until the ink is completely dry. About 15 - Canon S450 | User Manual - Page 54
Printing on Special Media Types I Banner Paper 1 Make sure the printer is turned on and the paper thickness lever is set to the Down position. Lower the paper rest. Paper rest Paper thickness lever Paper Handling 54 - Canon S450 | User Manual - Page 55
sure that you take one more sheet than you need for printing. (When you wish to print three sheets, tear off a length of four sheets-one more than you need for printing.) You can print on up to six sheets. If you want to print a banner of maximum length (six sheets), tear off a length of - Canon S450 | User Manual - Page 56
insert it into the sheet feeder until it stops. • Adjust the paper guide to the left side of the sheet. Print side up Note • You can print on either side of Banner Paper. • Neatly fold the unprinted paper behind the printer and do not allow it to hang over the edge of the table - Canon S450 | User Manual - Page 57
Printing on Special Media Types 4 Gently fold over the perforations between the first and second sheet. Paper Handling 57 - Canon S450 | User Manual - Page 58
Printing on Special Media Types 5 Be sure to provide ample space in front of the printer so each sheet is supported as it comes out of the printer and then allowed to hang over the edge of the table: Note A dense printout will require more time to dry. Be careful that wet ink does not stain the - Canon S450 | User Manual - Page 59
Media Types 6 Start the print job. Windows In the Windows driver, you select Banner Printing on the Page Layout tab. Printing on Banner Paper Macintosh When using a Macintosh, select Banner Printing before creating a document using an application program. Printing on Banner Paper Paper Handling - Canon S450 | User Manual - Page 60
Printing on Special Media Types I Glossy Photo Cards 1 Make sure the printer is turned on and the paper thickness lever is set to the Up position. Raise the paper rest. Paper rest Paper thickness lever Paper Handling 60 - Canon S450 | User Manual - Page 61
edges aligned against the right side of the sheet feeder. (For details, refer to the instructions provided with the Glossy Photo Cards package.) • Adjust the paper guide to the left side of the sheet. Loading Support Sheet A Glossy side Note • Do not remove the borders from the photo card before - Canon S450 | User Manual - Page 62
. Also make sure that the BJ Cartridge setting matches the BJ cartridge installed in the printer. Change the settings if necessary. Using the Windows 98/95 Printer Driver Macintosh Select the most appropriate icon that indicates the print mode in the Printer Properties dialog box. Specify the media - Canon S450 | User Manual - Page 63
Printer Driver 5 Start the print job. 6 Remove each printed card as it is ejected from the printer. Do not touch the printed side until the ink is completely dry. About two minutes are required for drying. 7 Tear away the strip of the Glossy Photo Card. For more details, see the instructions - Canon S450 | User Manual - Page 64
Printing on Special Media Types I Glossy Photo Paper 1 Make sure the printer is turned on and the paper thickness lever is set to the Up position. Raise the paper rest. Paper rest Paper thickness lever Paper Handling 64 - Canon S450 | User Manual - Page 65
them neatly. If the film is curled, bend it slightly in the opposite direction of the curl to straighten it. Note To avoid touching the print surface, always handle the sheets by the edges. Unclean or scratched - Canon S450 | User Manual - Page 66
edges aligned against the right side of the sheet feeder. (For details, refer to the instructions provided with the package.) • Adjust the paper guide to the left side of the stack. Print side (glossy side) up Loading Support Sheet A Note • You can load up to ten sheets in the sheet feeder. • Do - Canon S450 | User Manual - Page 67
. Also make sure that the BJ Cartridge setting matches the BJ cartridge installed in the printer. Change the settings if necessary. Using the Windows 98/95 Printer Driver Macintosh Select the most appropriate icon that indicates the print mode in the Printer Properties dialog box. Specify the media - Canon S450 | User Manual - Page 68
Printing on Special Media Types I Greeting Cards 1 Make sure the printer is turned on and the paper thickness lever is set to the Down position. Raise the paper rest. Paper rest Paper thickness lever Paper Handling 68 - Canon S450 | User Manual - Page 69
icon in the Choose Print Mode box under the Main tab. Select High Resolution Paper in the Media Type box. Also make sure that the BJ Cartridge setting matches the BJ cartridge installed in the printer. Change the settings if necessary. Using the Windows 98/95 Printer Driver Paper Handling 69 - Canon S450 | User Manual - Page 70
media type (High Resolution Paper), and the BJ cartridge installed in the printer. Using the Macintosh Printer Driver 4 Start the print job. 5 Remove each printed card as it is ejected from the printer. Do not touch the printed side until the ink is completely dry. Note Store unused Greeting Cards - Canon S450 | User Manual - Page 71
on Special Media Types Note Use only the BC-31e Color BJ Cartridge for printing on High Gloss Photo Film. Do not use the BC-32e Photo BJ Cartridge. 1 Make sure the printer is turned on and the paper thickness lever is set to the Up position. Raise the paper rest. Paper rest Paper thickness - Canon S450 | User Manual - Page 72
edge with the right side of the auto sheet feeder and insert the sheet into the auto sheet feeder. • Adjust the paper guide to the left side of the sheet. Print side (glossy side) up with the cut corner up and on the right Cut corner Note • If the sheet is curled - Canon S450 | User Manual - Page 73
Film in the Media Type box. The BJ Cartridge setting is automatically set to Color. Change the settings if necessary. Using the Windows 98/95 Printer Driver Note Macintosh Select the most appropriate icon that indicates the print mode in the Printer Properties dialog box. Specify the media type - Canon S450 | User Manual - Page 74
Printing on Special Media Types I High Resolution Paper 1 Make sure the printer is turned on and the paper thickness lever is set to the Up position. Raise the paper rest. Paper rest Paper thickness lever 2 Fan the - Canon S450 | User Manual - Page 75
the edges. Unclean or scratched print surfaces can adversely affect print quality. 3 Load the stack of paper with the whiter-side facing up: • Align the stack with the right side of the auto sheet feeder and insert it into the auto sheet feeder. • Adjust the paper guide to the left side of the - Canon S450 | User Manual - Page 76
make sure that the BJ Cartridge setting matches the BJ cartridge installed in the printer. Change the settings if necessary. Using the Windows 98/95 Printer Driver Macintosh Select the most appropriate icon that indicates the print mode in the Printer Properties dialog box. Specify High Resolution - Canon S450 | User Manual - Page 77
Printing on Special Media Types I Magnet Sheets 1 Make sure the printer is turned on and the paper thickness lever is set to the Down position. Raise the paper rest. Paper rest Paper thickness lever Paper Handling 77 - Canon S450 | User Manual - Page 78
Printing on Special Media Types 2 Place one sheet of plain paper behind one magnet sheet. Place both sheets on a hard surface to align the bottom edge - Canon S450 | User Manual - Page 79
dialog box, then select the most appropriate icon in the Choose Print Mode box under the Main tab. Select Glossy Photo Paper in the Media Type box. The BJ Cartridge setting is automatically set to Color. Change the settings if necessary. Using the Windows 98/95 Printer Driver Paper Handling 79 - Canon S450 | User Manual - Page 80
the media type (Glossy Photo Paper), and the BJ cartridge (Color). Using the Macintosh Printer Driver 5 Start the print job. 6 Remove the printed Magnet Sheet as it is ejected from the printer. Do not touch the printed side until the ink is completely dry. About 30 minutes are required for drying - Canon S450 | User Manual - Page 81
Printing on Special Media Types I Transparencies 1 Make sure the printer is turned on and the paper thickness lever is set to the Up position. Raise the paper rest. Paper rest Paper thickness lever Paper Handling 81 - Canon S450 | User Manual - Page 82
tap the edges against a flat surface to align them neatly. Note • To avoid touching the print surface, always handle the sheets by the edges. Unclean or scratched print surfaces can adversely affect print quality. • Do not remove transparencies from the package until you are ready to load them in - Canon S450 | User Manual - Page 83
most appropriate icon in the Choose Print Mode box under the Main tab. Select Transparency in the Media Type box. Also make sure that the BJ Cartridge setting matches the BJ cartridge installed in the printer. Change the settings if necessary. Using the Windows 98/95 Printer Driver Paper Handling 83 - Canon S450 | User Manual - Page 84
the media type (Transparency), and the BJ cartridge installed in the printer. Using the Macintosh Printer Driver 5 Start the print job. 6 Remove each printed transparency as it is ejected from the printer. Do not touch the printed side until the ink is completely dry. About 15 minutes are required - Canon S450 | User Manual - Page 85
on Special Media Types I Envelopes 1 Make sure the printer is turned on and the paper thickness lever is set to the Down position. Note Paper thickness lever • To avoid poor print results, do not attempt to print on envelopes with embossed or treated surfaces. • To avoid misfeeds and jams, do - Canon S450 | User Manual - Page 86
Printing on Special Media Types 2 Prepare the envelopes. • Press down firmly on the corners of the envelopes and all edges to flatten the envelopes and expel - Canon S450 | User Manual - Page 87
most appropriate icon in the Choose Print Mode box under the Main tab. Select Envelope in the Media Type box. Also make sure that the BJ Cartridge setting matches the BJ cartridge installed in the printer. Change the settings if necessary. Using the Windows 98/95 Printer Driver Paper Handling 87 - Canon S450 | User Manual - Page 88
print mode in the Printer Properties dialog box. Specify the media type (Envelope), and the BJ cartridge installed in the printer. Using the Macintosh Printer Driver 5 Windows application progam, change the setting here. Using the Windows 98/95 Printer Driver Macintosh Select "#10 Env. 9.50 × 4.12 - Canon S450 | User Manual - Page 89
Printing Photographs Tips for Printing Photographic Images About Photo Optimizer Paper Handling 89 - Canon S450 | User Manual - Page 90
downloaded from a home page on the Internet, follow these guidelines: • Use the combination of the BC-32e Photo BJ Cartridge and the BC-31e Color BJ Cartridge. • Use special media designed for reproducing photographs. • Use correct print settings in the printer driver. 1 Make sure that the printer - Canon S450 | User Manual - Page 91
Printing Photographs Windows 3 Open the Printer Properties dialog box and select SuperPhoto in the Choose Print Mode box under the Main tab. When SuperPhoto is selected, the BJ Cartridge setting automatically changes to Photo/Color so you can use the different types of inks provided by the BC-32e - Canon S450 | User Manual - Page 92
Photo Optimizer adjusts a photographic image created with a digital camera device when it is printed out. Use the Photo Optimizer to compensate unsatisfactory color balance and over- or underexposure before printing. Windows 1 Open the Printer Properties dialog box, then click the Main tab. 2 Click - Canon S450 | User Manual - Page 93
Printing Photographs Macintosh 1 Open the Photo Optimizer in the Quality panel. The Photo Optimizer feature works on the image that is edited using the edit menu such as Cut and Rotate in a graphics application program. Disabled Enabled Paper Handling 93 - Canon S450 | User Manual - Page 94
the Windows 98/95 Printer Driver Printer Driver Basics Windows 2000 and Windows NT Users Preparing and Executing a Print Job Getting to Know the Windows 98/95 Printer Driver Making the Most of the Windows 98/95 Printer Driver Using Maintenance Functions Using the Windows 98/95 Printer Driver 94 - Canon S450 | User Manual - Page 95
Printer Driver Basics The printer driver controls communication between the printer and your computer. To use the printer with your computer, you must install the printer driver. For instructions on installing the printer driver, refer to the Quick Start Guide. Using the Windows 98/95 Printer Driver - Canon S450 | User Manual - Page 96
procedures are not identical to Windows 98 and Windows 95, and some of the features are not supported. To open the S450 Properties dialog box from the Start menu, you click Start, Settings, and Printers. Highlight the Canon S450 icon and then select "Printing Preferences" from the File menu - Canon S450 | User Manual - Page 97
sure that the Paper Size setting in the Page Layout tab matches the setting in the application program. 6 Click the OK button to close the Printer Properties dialog box. 7 Click the OK button in the Print window. Printing begins. Using the Windows 98/95 Printer Driver 97 - Canon S450 | User Manual - Page 98
Getting to Know the Windows 98/95 Printer Driver Opening the Printer Properties Dialog Box Selecting the Print Mode Setting the Page Size Using Online Help Closing the Printer Properties Dialog Box Using the Windows 98/95 Printer Driver 98 - Canon S450 | User Manual - Page 99
(for example, Print or Print Setup from the File menu) in your application program. 2 Make sure that Canon S450 is selected in the Printer box. If another printer name is displayed, click the down-arrow and then select Canon S450 from the pull-down list. Using the Windows 98/95 Printer Driver 99 - Canon S450 | User Manual - Page 100
Getting to Know the Windows 98/95 Printer Driver 3 Click the Properties button. The Printer Properties dialog box opens. The Main, Page Layout, Stamp/Background, and Maintenance tabs are displayed in the Printer Properties dialog box. Using the Windows 98/95 Printer Driver 100 - Canon S450 | User Manual - Page 101
helpful when you wish to use maintenance functions such as print head cleaning without starting up an application program. 1 Click the Start button. Point to Settings, then click Printers. 2 When the Printers window is displayed, click the Canon S450 icon. Using the Windows 98/95 Printer Driver 101 - Canon S450 | User Manual - Page 102
dialog box. Note When you open the Printer Properties dialog box from the Start menu, some other tabs (such as General and Details) are added by the Windows operating system. For more details on these additional tabs, refer to your Windows documentation. Using the Windows 98/95 Printer Driver 102 - Canon S450 | User Manual - Page 103
of tone. Black/Color Black/Color Plain Paper High Resolution Paper Produces the best possible print quality for printing photographs. This print mode is also suitable for printing graphics with fine gradations of tone. Photo/Color Glossy Photo Paper Using the Windows 98/95 Printer Driver 103 - Canon S450 | User Manual - Page 104
BJ Cartridge and Media Type settings with the BJ cartridges and print media installed in the printer. 1 Open the Printer Properties dialog box, then click the Main tab. 2 Select the desired icon according to your print job in the Choose Print Mode box. Using the Windows 98/95 Printer Driver 104 - Canon S450 | User Manual - Page 105
settings are identical to the BJ cartridge and print media installed in the printer. Note When you change a default setting in the BJ Cartridge or Media Type box, the icon that indicates the current settings changes to User-modified. Current settings Using the Windows 98/95 Printer Driver 105 - Canon S450 | User Manual - Page 106
Getting to Know the Windows 98/95 Printer Driver You can start a print job with the User-modified icon, but you can also save and register the settings in the Choose Print Mode box under a new icon. Customizing the Print Settings in the Printer Driver (Creating an original print mode) I Setting the - Canon S450 | User Manual - Page 107
Getting to Know the Windows 98/95 Printer Driver Changing the page size (for regular paper sizes) 1 Click the Page Layout tab. 2 Click the down-arrow in the Page Size box, then select the appropriate page size from the pull-down list. Using the Windows 98/95 Printer Driver 107 - Canon S450 | User Manual - Page 108
Know the Windows 98/95 Printer Driver Changing the page size (for custom paper sizes) 1 Click the Page Layout tab. 2 Click the down-arrow in the Page Size box, then select Custom Size from the pull-down list. The Custom Paper Size dialog box is displayed. Using the Windows 98/95 Printer Driver 108 - Canon S450 | User Manual - Page 109
Getting to Know the Windows 98/95 Printer Driver 3 Select inch or mm (millimeter) for the unit of measurement in the Unit box, and enter the desired width and 9.50" (100.0 mm to 241.3 mm) Height: 3.94" to 23.0" (100.0 mm to 584.2 mm) 4 Click the OK button. Using the Windows 98/95 Printer Driver 109 - Canon S450 | User Manual - Page 110
Getting to Know the Windows 98/95 Printer Driver I Using Online Help When you want to learn about a particular topic, the online help function provides the necessary information on the screen of your computer. - Canon S450 | User Manual - Page 111
Getting to Know the Windows 98/95 Printer Driver Finding information on an operation procedure 1 Click the Help button on the lower right corner of the Printer Properties dialog box. 2 When the contents of the Canon BJ Printer Driver Help are displayed, select the desired item to learn more about - Canon S450 | User Manual - Page 112
Getting to Know the Windows 98/95 Printer Driver I Closing the Printer Properties Dialog Box After specifying the necessary print settings, close the Printer Properties dialog box and start your print job. 1 Make sure that the information on Direction, Feed, and Paper Thickness Lever in the - Canon S450 | User Manual - Page 113
the Windows 98/95 Printer Driver Printing Documents Enlarged/Reduced (Scaled Printing) Printing Multiple Pages on One Sheet (Page Layout Printing) Printing Documents Enlarged (Poster Printing) Printing on Banner Paper Changing the Print Order/Number of Copies Printing a Stamp Printing a Background - Canon S450 | User Manual - Page 114
Making the Most of the Windows 98/95 Printer Driver I Printing Documents Enlarged/Reduced (Scaled Printing) The Scaled Printing feature of the printer driver allows you to set a scaling value to print an enlarged or reduced page on a paper size that is larger or smaller than the paper size of the - Canon S450 | User Manual - Page 115
%), click Normal-size Printing. Setting a printer paper size different from the original page size 1 Open the Printer Properties dialog box and click the Page Layout tab. 2 Click Scaled Printing. The Scaling and Printer Paper Size settings are enabled. Using the Windows 98/95 Printer Driver 115 - Canon S450 | User Manual - Page 116
of the printout in the preview area and click the OK button. When you wish to revert to the original value (100%), click Normal-size Printing. Using the Windows 98/95 Printer Driver 116 - Canon S450 | User Manual - Page 117
Making the Most of the Windows 98/95 Printer Driver I Printing Multiple Pages on One Sheet (Page Layout Printing) By reducing the scale in a 2-Page Print or 4-Page Print layout, you can print multiple pages on one sheet. You can save the total amount of paper used for long documents. This feature is - Canon S450 | User Manual - Page 118
Windows 98/95 Printer Driver 3 Click the Specify button, as necessary. You can specify the detailed layout setting in the Page Layout Printing dialog box. Note Pages: Page Order: Frame Border: Click the down-arrow and select the 2-Page Print or 4-Page Print layout. The 2-Page Print setting prints - Canon S450 | User Manual - Page 119
Making the Most of the Windows 98/95 Printer Driver I Printing Documents Enlarged (Poster Printing) By dividing image data (such as a photographic image) and enlarging it for printing, you can print one page on multiple sheets. Pasting the pages after printing makes it possible to create a large- - Canon S450 | User Manual - Page 120
when you cut and paste each page after printing. Print Cut/Paste lines in margins: When Print Cut/Paste lines in margins is enabled, the printer prints lines for cutting along. Use these lines as a guideline when you cut and paste each page after printing. Using the Windows 98/95 Printer Driver 120 - Canon S450 | User Manual - Page 121
Making the Most of the Windows 98/95 Printer Driver 4 Confirm the layout of the printout in the preview area and click the OK button. • When you use Poster Printing, check that Background Printing is enabled in the Page Layout tab. • When you wish to revert Poster Printing to the original setting - Canon S450 | User Manual - Page 122
printing are given. • If you wish to skip over the detailed instructions on banner printing, click the OK button. 4 Confirm the preview area and click the OK button. When you wish to revert Banner Printing to the original setting, click Normal-size Printing. Using the Windows 98/95 Printer Driver - Canon S450 | User Manual - Page 123
Making the Most of the Windows 98/95 Printer Driver I Changing the Print Order/Number of Copies Based on the default settings of the printer driver, the printer starts printing one set of any document from the first page. When you print multiple copies of the same document, you need to specify the - Canon S450 | User Manual - Page 124
of the Windows 98/95 Printer Driver Collate: Use this setting when you print multiple copies of a multiple page document. When Collate is enabled, the printer prints the document and collates each copy from the first page to the last page. When Collate is disabled, the printer prints the document - Canon S450 | User Manual - Page 125
Making the Most of the Windows 98/95 Printer Driver I Printing a Stamp The printer driver allows you to print a stamp on your documents. Stamps are notations such as CONFIDENTIAL or IMPORTANT, which are frequently rubber-stamped on documents to alert readers. Several default stamps - Canon S450 | User Manual - Page 126
stamp printing, select None from the Stamp pull-down list. • When you wish to change settings such as size, color, or position of the stamp, click the Define Stamp button. Customizing the Print Settings in the Printer Driver (Creating an original stamp) Using the Windows 98/95 Printer Driver 126 - Canon S450 | User Manual - Page 127
the Most of the Windows 98/95 Printer Driver I Printing a Background The printer driver allows you to print a background on your documents, like a watermark. Two types of default backgrounds are available for immediate use. Printing a default background 1 Open the Printer Properties dialog box, then - Canon S450 | User Manual - Page 128
Note Making the Most of the Windows 98/95 Printer Driver 3 Specify whether to print the background on the first page of the document only, as necessary. Background first page only: Click this checkbox to print the background on the first page only. If you leave this box unchecked, the background is - Canon S450 | User Manual - Page 129
before printing. For example, you may want to use the Image Optimizer when you print a low-resolution image downloaded from a home page on the Internet. 1 Open the Printer Properties dialog box, then click the Main tab. 2 Click the Advanced button. Using the Windows 98/95 Printer Driver 129 - Canon S450 | User Manual - Page 130
the Most of the Windows 98/95 Printer Driver 3 Select Image Optimizer in the Quality tab to enable the Image Optimizer setting. Note 4 Click the OK button to return to the Main tab. 5 Click the OK button to close the Printer Properties dialog box and start the print job. • The Image Optimizer - Canon S450 | User Manual - Page 131
the Windows 98/95 Printer Driver I Photo Optimizer The Photo Optimizer adjusts a photographic image created with a digital camera when it is printed out. Use the Photo Optimizer to compensate unsatisfactory color balance and overor underexposure before printing. 1 Open the Printer Properties dialog - Canon S450 | User Manual - Page 132
for printing. • When Background Printing is disabled in the Page Layout tab, the Whole Page setting is grayed out and cannot be used. • When Banner Printing is enabled in the Page Layout tab, the Whole Page setting can be turned on but does not function. Using the Windows 98/95 Printer Driver 132 - Canon S450 | User Manual - Page 133
Making the Most of the Windows 98/95 Printer Driver I Using Special Effects The printer driver not only performs simple color adjustments to improve the quality of the original image, but also enhances images for artistic effect. Setting Simulate Illustration Use this artistic effect to simplify - Canon S450 | User Manual - Page 134
Printing is disabled in the Page Layout tab, the Simulate Illustration setting is grayed out and cannot be used. • When Black is Printer Properties dialog box, then click the Main tab. 2 Disable Grayscale Print by unchecking the Grayscale Print checkbox. Using the Windows 98/95 Printer Driver - Canon S450 | User Manual - Page 135
or Select Color. 7 When you select Select Color, drag the color slide bar until the desired monochrome image is displayed in the preview area. (You can also select the desired monochrome image by clicking the right or left arrow of the color slide bar.) Using the Windows 98/95 Printer Driver 135 - Canon S450 | User Manual - Page 136
Note Making the Most of the Windows 98/95 Printer Driver 8 Click the OK button to return to the Main tab. 9 Click the OK button to close the Printer Properties dialog box and start the print job. • The Monochrome Effects setting can be used with the Simulate Illustration setting. Setting Simulate - Canon S450 | User Manual - Page 137
Most of the Windows 98/95 Printer Driver I Changing the Print Quality (Halftoning) When your printouts are not satisfactory, the printer driver allows you to make fine adjustments to the print quality and halftoning settings. Setting the print quality/halftoning Note If there is a problem in the - Canon S450 | User Manual - Page 138
Randomly places ink dots of different colors. Use this setting for printing natural color images such as photographs. Auto: The printer driver automatically distinguishes among the types of image data, and switches to the most appropriate halftoning method. Using the Windows 98/95 Printer Driver 138 - Canon S450 | User Manual - Page 139
would do.) Adjusting the colors Before adjusting the color balance and intensity, make sure that Color Adjustment is enabled in the Colors tab under the Main tab. 1 Open the Printer Properties dialog box, then click the Advanced button in the Main tab. Using the Windows 98/95 Printer Driver 139 - Canon S450 | User Manual - Page 140
Making the Most of the Windows 98/95 Printer Driver 2 Click the Color tab and make sure that the Color Adjustment setting is enabled. 3 Set the following items as needed. Color Balance: Move the slide bars of the individual colors. For example, when blues are too strong in the printouts, drag the - Canon S450 | User Manual - Page 141
the Printer Properties dialog box. Depending on the application program you use, you can also use the ICM (Image Color Management) feature of the Windows 98 operating system. For more details, refer to the online Help for Windows or your Windows documentation. Using the Windows 98/95 Printer Driver - Canon S450 | User Manual - Page 142
Making the Most of the Windows 98/95 Printer Driver Adjusting the intensity The Intensity Setting specifies whether to make the overall printout darker or lighter. 1 Open the Printer Properties dialog box, then click the Advanced button in the Main tab. 2 Click on the Color tab. 3 Move the Intensity - Canon S450 | User Manual - Page 143
Making the Most of the Windows 98/95 Printer Driver I Customizing the Print Settings in the Printer Driver Changing the default properties of the Print Mode, Stamp, and Background settings makes it possible to use them as customized settings in the printer driver. You can also register your original - Canon S450 | User Manual - Page 144
Making the Most of the Windows 98/95 Printer Driver 3 Change the print settings in the Quality tab, if necessary. 4 Change the print settings in the Special Effects tab, if necessary. Using the Windows 98/95 Printer Driver 144 - Canon S450 | User Manual - Page 145
Making the Most of the Windows 98/95 Printer Driver 5 Change the print settings in the Color tab, if necessary. 6 Click the Save tab. You can save the desired print settings you made in steps 3, 4, and 5 here. Using the Windows 98/95 Printer Driver 145 - Canon S450 | User Manual - Page 146
Making the Most of the Windows 98/95 Printer Driver 7 To save the new print settings, enter a name for the desired print settings in the Title box of the Save tab. You can use up to eight characters. Please note that you cannot use a title that is pre-assigned in the printer driver (such as Draft or - Canon S450 | User Manual - Page 147
Making the Most of the Windows 98/95 Printer Driver Note • When User-modified is displayed to the left of the Choose Print Mode box of the Main tab, you can save the new print settings using the following procedure. (1) Right-click the User-modified icon, then select Save As from the pull-down menu. - Canon S450 | User Manual - Page 148
Making the Most of the Windows 98/95 Printer Driver 5 Click the OK button to return to the Main tab. Note You cannot move the icon back to its original position by clicking the Cancel button. Saving an original print mode as a file 1 Open the Printer Properties dialog box, then click the Advanced - Canon S450 | User Manual - Page 149
Making the Most of the Windows 98/95 Printer Driver Note You can save multiple print modes to a single file. Opening an original print mode that was saved as a file 1 Open the Printer Properties dialog box, then click the Advanced button. 2 Click the Save tab. 3 Click the Open button. This - Canon S450 | User Manual - Page 150
Making the Most of the Windows 98/95 Printer Driver Note 4 Click the Delete button. 5 When a confirmation message appears, click the OK button. The icon of the original print mode is deleted from the Saved Settings box in the Save tab. 6 Click the OK button to return to the Main tab. (The icon of - Canon S450 | User Manual - Page 151
Note Making the Most of the Windows 98/95 Printer Driver 2 When you wish to change the settings of a default stamp item, click the Stamp box and then select the item you wish to change from - Canon S450 | User Manual - Page 152
Making the Most of the Windows 98/95 Printer Driver 5 Specify original settings related to colors in the Color tab. 6 Specify original settings related to the stamp position in the Placement tab. Using the Windows 98/95 Printer Driver 152 - Canon S450 | User Manual - Page 153
7 Click the Save settings tab. Making the Most of the Windows 98/95 Printer Driver 8 Enter a name for the original stamp in the Title box of the Save settings tab. 9 Click the Save button. 10 When a confirmation message appears, - Canon S450 | User Manual - Page 154
Making the Most of the Windows 98/95 Printer Driver Note 3 Click the Save settings tab. 4 Select the stamp you wish to delete from the Title box. 5 Click the Delete menu. When you wish to create an original background, select None in the Background box. Using the Windows 98/95 Printer Driver 154 - Canon S450 | User Manual - Page 155
Making the Most of the Windows 98/95 Printer Driver 3 Click the Select Background button. The Background Settings Properties dialog box is displayed. 4 Click the Select File drive in which the bitmap file you wish to use as an original background is saved. Using the Windows 98/95 Printer Driver 155 - Canon S450 | User Manual - Page 156
Making the Most of the Windows 98/95 Printer Driver 6 Select the name of the folder in which the bitmap file you wish to use as an original background is saved. tab. 11 Enter a name for the original background in the Title box of the Save settings tab. Using the Windows 98/95 Printer Driver 156 - Canon S450 | User Manual - Page 157
Making the Most of the Windows 98/95 Printer Driver 12 Click the Save button. 13 When a confirmation message appears, click the OK button. 14 Click the OK OK button. 7 Click the OK button in the Save settings tab to return to the Stamp/ Background tab. Using the Windows 98/95 Printer Driver 157 - Canon S450 | User Manual - Page 158
the Most of the Windows 98/95 Printer Driver I Using Background Printing The print processing method that enables you to do other tasks simultaneously while printing documents is called background printing. Normally, the Canon BJ Printer Driver performs background printing. The BJ Background Monitor - Canon S450 | User Manual - Page 159
Making the Most of the Windows 98/95 Printer Driver BJ Background Monitor When a print command is sent to the printer, the BJ Background Monitor is launched automatically and is minimized on the Windows taskbar. To verify the print process, click the BJ Background Monitor icon minimized on the - Canon S450 | User Manual - Page 160
temporarily is required on the hard disk. (If sufficient hard disk space is not available, background printing cannot be performed.) To solve this problem, you need to change the directory that saves the print data temporarily, as described on the next page. Using the Windows 98/95 Printer Driver 160 - Canon S450 | User Manual - Page 161
Note Making the Most of the Windows 98/95 Printer Driver 1 Select Directory from the Option menu. 2 Select the drive and directory. 3 Click the OK button. • When you wish to open the BJ Background Monitor while the printer is not printing, follow these steps: (1) From the Start menu, select - Canon S450 | User Manual - Page 162
driver temporarily. When you wish to stop the print process of the printer driver temporarily for some reason, click the Pause button. While the print job is paused, the Pause button changes to the Resume button. Click the Resume button to start printing again. Using the Windows 98/95 Printer Driver - Canon S450 | User Manual - Page 163
. • Check that your printer cable (interface cable) supports bi-directional communications. When using the parallel or USB interface: • Check that the settings to support bi-directional communications are enabled in the Windows operating system. Using the Windows 98/95 Printer Driver 163 - Canon S450 | User Manual - Page 164
Most of the Windows 98/95 Printer Driver Note To check that the settings to support bi-directional communications are enabled in Windows, follow these steps: (1) Open the Printer Properties dialog box from the Start menu. (2) Click the Canon S450 icon in the Printers window, then select Properties - Canon S450 | User Manual - Page 165
Making the Most of the Windows 98/95 Printer Driver To verify the print process and the type of BJ cartridge, click the BJ Status Monitor icon minimized on the Windows taskbar. The following items are displayed. Printer Name: Shows the name of the printer you are using. Document Name: Shows the file - Canon S450 | User Manual - Page 166
currently installed in the printer. Left cartridge holder: -Black BJ Cartridge -Photo BJ Cartridge -Scanner Cartridge Right cartridge holder: -Color BJ Cartridge Low Ink: Shows the remaining ink warning icon when the ink is low. Error and warning display Using the Windows 98/95 Printer Driver 166 - Canon S450 | User Manual - Page 167
Note Making the Most of the Windows 98/95 Printer Driver • When you wish to open the BJ Status Monitor while the printer is not printing, follow these steps: (1) Open the Printer Properties dialog box. (2) Click the Maintenance tab. (3) Click the Start Status Monitor button. • You can select the - Canon S450 | User Manual - Page 168
the Windows 98/95 Printer Driver Error and warning display If an error occurs, the BJ Status Monitor launches automatically. Check the meaning of the error in the Status box of the Printer Status tab first. Then click the Guide tab and refer to the information on the solution. When the remaining ink - Canon S450 | User Manual - Page 169
Making the Most of the Windows 98/95 Printer Driver When the ink runs out, the low ink warning icon is replaced with the ink empty icon. For more details, click the Ink Information tab. Note Even after the ink runs out, the printer continues to print for a while. However, it is recommended that - Canon S450 | User Manual - Page 170
Making the Most of the Windows 98/95 Printer Driver Cancelling the print job You can cancel the print job using the BJ Status Monitor. To cancel the print job, open the BJ Status Monitor and then click the Cancel Printing button in the Printer Status tab. Switching the BJ Status Monitor When you are - Canon S450 | User Manual - Page 171
the Most of the Windows 98/95 Printer Driver I Using the BJ Printer Monitor The BJ Printer Monitor displays all Bubble Jet printers installed in your system. You can view information such as the printer status, printer port to which the printer is connected, and installed BJ cartridges. You can also - Canon S450 | User Manual - Page 172
Most of the Windows 98/95 Printer Driver Note To check that the settings to support bi-directional communications are enabled in Windows, follow these steps: (1) Open the Printer Properties dialog box from the Start menu. (2) Click the Canon S450 icon in the Printers window, then select Properties - Canon S450 | User Manual - Page 173
about the printer status. Cartridges: Shows the type of the installed BJ cartridges. Ink Information: Shows ink information when the remaining ink is running low or when it runs out. Jobs: Shows the number of print jobs that are currently being processed. Using the Windows 98/95 Printer Driver 173 - Canon S450 | User Manual - Page 174
Making the Most of the Windows 98/95 Printer Driver Other Information: Shows information such as paper size and the availability of options (when using the S450, no information is displayed). • The following printers are not displayed in the BJ Printer Monitor: A printer that is connected using - Canon S450 | User Manual - Page 175
Making the Most of the Windows 98/95 Printer Driver • To view a printer connected using a USB interface cable, click the USB Connected Printer tab (Windows 98 only). Note • When you wish to refresh the information display of the BJ Printer Monitor, select Refresh from the View menu. • To launch - Canon S450 | User Manual - Page 176
Using Maintenance Functions Cleaning the Print Heads Printing a Nozzle Check Pattern Aligning the Print Heads Turning the Printer On and Off Using the Special Settings Using ECP Mode Uninstalling the BJ Printer Driver Using the Windows 98/95 Printer Driver 176 - Canon S450 | User Manual - Page 177
the print heads consumes ink so clean the print heads only when necessary. Normal print head cleaning 1 Open the Printer Properties dialog box, then click the Maintenance tab. 2 Click the first (left) print head cleaning icon in the Print Head Cleaning box. Using the Windows 98/95 Printer Driver - Canon S450 | User Manual - Page 178
rm the success of normal print head cleaning. Printing a Nozzle Check Pattern Note You can also start print head cleaning with the RESUME button on the printer. Press and hold down the RESUME button until the POWER light flashes once, and then release it. Using the Windows 98/95 Printer Driver 178 - Canon S450 | User Manual - Page 179
. Only when the normal print head cleaning does not correct the problem, perform deep print head cleaning. 1 Open the Printer Properties dialog box, then click the Maintenance tab. 2 Click the print head deep cleaning icon in the Print Head Cleaning box. Using the Windows 98/95 Printer Driver 179 - Canon S450 | User Manual - Page 180
print head cleaning and deep print head cleaning again. After cleaning the print heads several times, if the Nozzle Check Pattern is not satisfactory, a print head may be worn out and the corresponding BJ cartridge must be replaced. Replacing a BJ Cartridge Using the Windows 98/95 Printer Driver - Canon S450 | User Manual - Page 181
Pattern when your printouts are streaked or the color tones are not correct, or after performing print head cleaning. 1 Open the Printer Properties dialog box, then click the Maintenance tab. 2 Click the nozzle check pattern icon in the Test Prints box. Using the Windows 98/95 Printer Driver 181 - Canon S450 | User Manual - Page 182
in the printer and the printer is turned on. 4 Click the OK button. You can also start printing a Nozzle Check Pattern with the RESUME button on the printer. Press and hold down the RESUME button until the POWER light flashes twice, and then release it. Using the Windows 98/95 Printer Driver 182 - Canon S450 | User Manual - Page 183
head alignment check pattern for both BJ cartridges If patterns (1) or (2) are broken or missing, print head cleaning is required. Cleaning the Print Heads If patterns (3) are not overlapped perfectly, print head alignment is required. Aligning the Print Heads Using the Windows 98/95 Printer Driver - Canon S450 | User Manual - Page 184
head alignment check pattern for both BJ cartridges If patterns (1) or (2) are broken or missing, print head cleaning is required. Cleaning the Print Heads If patterns (3) are not overlapped perfectly, print head alignment is required. Aligning the Print Heads Using the Windows 98/95 Printer Driver - Canon S450 | User Manual - Page 185
cleaning and deep print head cleaning again. After cleaning the print heads several times, if the Nozzle Check Pattern is not satisfactory, one of the print heads may be worn out and the corresponding BJ cartridge must be replaced. Replacing a BJ Cartridge Using the Windows 98/95 Printer Driver 185 - Canon S450 | User Manual - Page 186
or switch BJ cartridges for a special print job, you must align the print heads to ensure optimum results in printing. There are two ways to align the print heads: automatically and manually. Normally you will execute the automatic print head alignment feature of the printer driver. If this does - Canon S450 | User Manual - Page 187
. Manual print head alignment • To turn off the printer after automatic head alignment, always press the POWER button to turn off the printer. If you do not turn off the printer correctly with the POWER button, the print head alignment settings are not saved. Using the Windows 98/95 Printer Driver - Canon S450 | User Manual - Page 188
Custom Setting on the bottom right of the screen. You see this screen: 3 Check "Align heads manually," then click the Send button. 4 When a confirmation message appears, click the OK button. 5 Now click the print head alignment icon on the Maintenance tab. Using the Windows 98/95 Printer Driver 188 - Canon S450 | User Manual - Page 189
plain paper are loaded; then click the OK button. The printer starts to print the standard head alignment pattern. During print head alignment, do not open the front cover. 7 When this pattern is printed, click the Yes button. Print head alignment pattern Using the Windows 98/95 Printer Driver 189 - Canon S450 | User Manual - Page 190
you see the lines perfectly aligned. (Y) Correct: Incorrect: (X1) (B1) 9 When you finish entering numbers, click the OK button to save the settings. Using the Windows 98/95 Printer Driver 190 - Canon S450 | User Manual - Page 191
to print the high-resolution head alignment pattern. 11 Check all the patterns in lines of (Y), from (X1) to (X6), and from (B1) to (B2). For each line enter the appropriate number where you see the lines perfectly aligned. (Y) Correct: Incorrect: (X6) (B1) Using the Windows 98/95 Printer Driver - Canon S450 | User Manual - Page 192
procedure. Note When you wish to turn off the printer after manual head alignment, always press the POWER button to turn off the printer. If you do not turn off the printer correctly with the POWER button, the print head alignment settings are not saved. Using the Windows 98/95 Printer Driver 192 - Canon S450 | User Manual - Page 193
OK button. The printer is turned off. Note The next time you turn on the printer, press the POWER button of the printer. Setting Auto Power on/off 1 Open the Printer Properties dialog box, then click the Maintenance tab. 2 Click the Power on/off icon. Using the Windows 98/95 Printer Driver 193 - Canon S450 | User Manual - Page 194
that the printer is turned on and click the Send button. 5 When a confirmation message appears, click the OK button. When you wish to disable the Auto Power On/Off setting, select Disable for Auto Power On and Auto Power Off in the Auto Power dialog box. Using the Windows 98/95 Printer Driver 194 - Canon S450 | User Manual - Page 195
parallel interface only) Click this checkbox when you wish to use the ECP mode setting to operate the printer. Using ECP Mode High-speed printing Click this checkbox when you wish to shorten the response speed of the printer to enable high-speed printing. Using the Windows 98/95 Printer Driver 195 - Canon S450 | User Manual - Page 196
this checkbox when you wish to perform manual print head alignment. 3 Make sure that the printer is turned on and click the Send button. 4 When a confirmation message appears, click the OK button to close the dialog box and send the setting to the printer. Using the Windows 98/95 Printer Driver 196 - Canon S450 | User Manual - Page 197
printing, depending on the computer system. Note Before changing the data transfer method to the ECP mode, consider the following points: • The computer system and printer cable you are using must support , or contact the computer manufacturer. Using the Windows 98/95 Printer Driver 197 - Canon S450 | User Manual - Page 198
in the Maintenance tab. (2) Uncheck the Set printer to ECP mode checkbox in the Custom Setting dialog box. (3) Click the Send button. (4) Shut down Windows, then turn the printer off. (5) Turn the printer back on again. The ECP mode setting is released. Using the Windows 98/95 Printer Driver 198 - Canon S450 | User Manual - Page 199
BJ Printer. 2 Click Uninstall. 3 When a confirmation message appears, click the Yes button. 4 Click the OK button. This completes the uninstallation procedure. Depending on the system you use, you may be prompted to restart the system. Click the OK button. Using the Windows 98/95 Printer Driver 199 - Canon S450 | User Manual - Page 200
the icon of the printer driver you wish to delete in the Printers window. (3) Select Delete from the File menu. (4) When a confirmation message appears, click the Yes button. • You cannot run the uninstaller while the BJ Printer Status Monitor is active. Using the Windows 98/95 Printer Driver 200 - Canon S450 | User Manual - Page 201
Using the Macintosh Printer Driver Printer Driver Basics Preparing and Executing a Print Job Print Mode Settings Executing Special Functions Printer Maintenance Using the Macintosh Printer Driver 201 - Canon S450 | User Manual - Page 202
Printer Driver Basics The printer driver controls communication between the printer and your computer. To use the printer with your computer, you must install the printer driver. For instructions on installing the printer driver, refer to the Quick Start Guide. Using the Macintosh Printer Driver 202 - Canon S450 | User Manual - Page 203
indicates the print mode in the Printer Properties dialog box. 4 Specify the BJ Cartridge setting according to the BJ cartridge you are using. 5 Specify the Media Type setting acording to the print media you are using. 6 Click the Print button. Printing begins. Using the Macintosh Printer Driver 203 - Canon S450 | User Manual - Page 204
Print Mode Settings Selecting a Printer Driver Changing the Page Setup Dialog Box Settings Changing the Print Dialog Box Settings How to Use Help Using the Macintosh Printer Driver 204 - Canon S450 | User Manual - Page 205
Before using the Page Setup dialog box and the Print dialog box, you must first go into Chooser in the Apple Menu and choose the correct printer driver for your type of connection. Once you have chosen the printer driver, it will remain selected. You will only need to choose it again if you change - Canon S450 | User Manual - Page 206
to On. Close box 4 Click in the Close box to close the Chooser. A dialog box may appear with this message: You have changed your current printer. Please choose "Page Setup..." in all the open applications. Simply click OK. You can now use the S450 for printing. Using the Macintosh Printer Driver 206 - Canon S450 | User Manual - Page 207
used for printing is usually set when a document is created with an application. In your application, open the Page Setup dialog box and select the paper size that you want to use with your printer. (The default the appropriate paper size from the pop-up menu. Using the Macintosh Printer Driver 207 - Canon S450 | User Manual - Page 208
3 Select Orientation. Print Mode Settings 4 Click the OK button. The Page Setup dialog box closes. Selecting the paper size (for custom paper sizes) program. Normally, click Page Setup from the File menu, and the Page Setup dialog box is displayed. Using the Macintosh Printer Driver 208 - Canon S450 | User Manual - Page 209
Print Mode Settings 2 In Paper Size, select Custom1, Custom 2, or Custom3 and then click the Custom button. The Custom dialog box is displayed. 3 Select inch or mm for the unit of measurement in Unit and enter the desired width and height. Using the Macintosh Printer Driver 209 - Canon S450 | User Manual - Page 210
set. • Any Custom can be specified as the user-defined paper size. • To make the setting made with the Page Setup dialog box the default, so that it is automatically selected whenever a new document is created, place a check mark in the Save Settings checkbox. Using the Macintosh Printer Driver 210 - Canon S450 | User Manual - Page 211
from the File menu, and the Print dialog box is displayed. 2 Type in the number of copies to be printed, and then set which pages are to be printed. Note When only certain pages of a document are to be printed, enter the first (From) and last (To) print pages. Using the Macintosh Printer Driver 211 - Canon S450 | User Manual - Page 212
drop-down box to display a pop-up menu. Select the BJ cartridge combination you have installed and the media type you have loaded. Note When a document created in color is to be printed out in monochrome, place a check mark in the Print Grayscale checkbox. Using the Macintosh Printer Driver 212 - Canon S450 | User Manual - Page 213
. Intended for printing photographs and other graphics that use gradations of color and tone. Allows you to customize the print mode settings. Setting for Manual Printing 5 Click the Print button to close the Print dialog box and start the print job. Using the Macintosh Printer Driver 213 - Canon S450 | User Manual - Page 214
button and change the output destination. 1 Open the Print dialog box, and click the Options... button. The Options dialog box is displayed. 2 Select Preview as the output destination, and click the OK button. 3 Click the Preview button in the Print dialog box. Using the Macintosh Printer Driver 214 - Canon S450 | User Manual - Page 215
The Preview dialog box is displayed. Print Mode Settings 4 When you are satisfied with the document and want to print it, click the Print button. To close the preview screen without printing, click the Cancel button. Using the Macintosh Printer Driver 215 - Canon S450 | User Manual - Page 216
button and change the output destination. 1 Open the Print dialog box, and click the Options... button. The Options dialog box is displayed. 2 Select PICT File as the output destination, and click the OK button. 3 Click the File button in the Print dialog box. Using the Macintosh Printer Driver 216 - Canon S450 | User Manual - Page 217
Print Mode Settings 4 Type in the Filename under "Save as:" and click the Save button. The document data is saved in PICT file format and displayed on your desktop. Using the Macintosh Printer Driver 217 - Canon S450 | User Manual - Page 218
of that item appears in a balloon. Displaying balloon help 1 Select Show Balloons from the Help menu. 2 Display the printer driver screens (the Page Setup dialog box, the Print dialog box, etc.). 3 Position the cursor over the item for which you want to display an explanation. An explanation of - Canon S450 | User Manual - Page 219
Pages on One Sheet Changing the Print Order Setting for Manual Printing Changing the Print Quality/Halftoning Optimizing Image Data Adjusting the Image Data Registering and Managing Print Settings Using Background Printing Using the Printer With a Network Using the Macintosh Printer Driver 219 - Canon S450 | User Manual - Page 220
Documents Enlarged/Reduced The scaled printing feature of the printer driver allows you to set a scaling value so you can print an enlarged or reduced page on a paper size that is larger or smaller than the ratio; or you can click the drop-down box in Scale. Using the Macintosh Printer Driver 220 - Canon S450 | User Manual - Page 221
to open the Print dialog box. • When you wish to revert Scaled Printing to the original value, set the original value (100%) in the Scale box. • You can type in a Scale value from 25 to 400%. When clicking the arrows, the Scale values run from 50 to 200%. Using the Macintosh Printer Driver 221 - Canon S450 | User Manual - Page 222
Setup dialog box. Normally, select Page Setup in the File menu. 2 Select Letter in Paper Size. 3 Click the Banner Printing checkbox to place a √ in the box. 4 Click OK. 5 When a confirmation message appears, click the OK button. The Page Setup dialog box closes. Using the Macintosh Printer Driver 222 - Canon S450 | User Manual - Page 223
book cover. Specifying the layout Open the Options dialog box from the Print dialog box and make the necessary settings. 1 Open the Print dialog box. Normally, select Print from the File menu. 2 Click the Options... button. The Options dialog box is displayed. Using the Macintosh Printer Driver 223 - Canon S450 | User Manual - Page 224
2 Up or 4 Up layout from the pop-up menu. The 2-Page Print setting prints two pages on one sheet of paper and the 4-Page Print setting prints four pages on one sheet of paper. Confirm the layout of the printout Vertically from top left Vertically from top right Using the Macintosh Printer Driver 224 - Canon S450 | User Manual - Page 225
job. Note When you wish to revert Page Layout printing to the original setting, select the 1 Up layout in Page Layout. I Changing the Print Order Based on the default settings of the printer driver, the printer starts printing one set of any document from the first page. When two or more copies - Canon S450 | User Manual - Page 226
from the first page through to the last page. When "Print collated pages" is disabled, the printer prints the document and collates copies of the same page. In this case, you will need to manually combine the pages to create each set of a multiple-page document. Using the Macintosh Printer Driver 226 - Canon S450 | User Manual - Page 227
set the items in the Quality panel and the Color panel. 1 Open the Print dialog box. Normally, select Print from the File menu. 2 Click the icon in Print Mode. 3 Click the Details... button. The Quality panel of the Detailed Setting dialog box is displayed. Using the Macintosh Printer Driver 227 - Canon S450 | User Manual - Page 228
4 Set Print Quality or Halftoning, as necessary. Executing Special Functions Changing the Print Quality/Halftoning Photo Optimizer Using the Macintosh Printer Driver 228 - Canon S450 | User Manual - Page 229
the OK button. Then return to the Print dialog box. 7 Click the Print button to close the Print dialog box and start the print job. When the same print mode setting is to be used the next time you print, select the icon from Print Mode in the Print dialog box. Using the Macintosh Printer Driver 229 - Canon S450 | User Manual - Page 230
/Halftoning When your printouts are not satisfactory, the printer driver allows you to make fine adjustments to the print quality and halftoning settings. If there is a problem in the image data you wish to print, changes to the print quality and halftoning settings may not be visible or effective - Canon S450 | User Manual - Page 231
the printing. The print mode display varies with the position of the slide bar. 5 Select the Halftoning icon, as necessary. The halftoning selection determines the way in which the ink dots are arranged on the page, and changes the appearance of halftones. Using the Macintosh Printer Driver 231 - Canon S450 | User Manual - Page 232
setting made for Halftoning. To obtain the best quality printing, select Scatter. • Some settings cannot be selected depending on the type of BJ cartridge and the selected paper type. In such cases, make the necessary adjustments within the supported range. Using the Macintosh Printer Driver 232 - Canon S450 | User Manual - Page 233
box. 1 Open the Print dialog box. Normally, select Print from the File menu. 2 Select the icon in Print Mode. 3 Click the Details... button. The Quality Panel of the Detailed Setting dialog box is displayed. 4 Place a check mark in the Photo Optimizer checkbox. Using the Macintosh Printer Driver 233 - Canon S450 | User Manual - Page 234
the icon in Print Mode and then click the Color icon in the Detailed Setting dialog box. 1 Open the Print dialog box. Normally, select Print from the File menu. 2 Select the icon in Print Mode. 3 Click the Details... button. The Quality panel is displayed. Using the Macintosh Printer Driver 234 - Canon S450 | User Manual - Page 235
is not to be applied. Matching Method This sets the color representation method. Photo: For printing overlapping intermediate color. Graphic: To print primary color more brightly. Spot Color: To print documents that use large amounts of a basic color. Using the Macintosh Printer Driver 235 - Canon S450 | User Manual - Page 236
Executing Special Functions Printer Profile This selects the profile to suit the type of document. Generally, you will use the Recommended by Canon setting. Recommended by Canon lists the color features that are suitable for the BJ cartridge, paper size, print quality, halftoning, etc. Gamma - Canon S450 | User Manual - Page 237
use names to register the contents of those settings that are performed with the Print dialog box. 1 Open the Print dialog box, and then select options as needed. 2 Click the Apply button. The Register Settings dialog box is displayed. 3 Click the Apply button. Using the Macintosh Printer Driver 237 - Canon S450 | User Manual - Page 238
the new settings. Importing registered print setting You can read in a previously registered print mode and set it as the Print dialog box for the icon. 1 Open the Print dialog box and click the Apply... button. The Register Settings dialog box is displayed. Using the Macintosh Printer Driver 238 - Canon S450 | User Manual - Page 239
When a registered print mode is no longer necessary or you want to register a different setting under the same name, delete it by following these steps: 1 Open the Print dialog box and click the Apply... button. The Register Settings dialog box is displayed. Using the Macintosh Printer Driver 239 - Canon S450 | User Manual - Page 240
from the list. Note 4 Click the Close button. You return to the Print dialog box. • Factory Defaults cannot be deleted. • Once you delete a print setting, you cannot restore it. If you need it, you will have to go through the entire setting process again. Using the Macintosh Printer Driver 240 - Canon S450 | User Manual - Page 241
Apple Menu, select a printer driver, and set Backgrounding to On. Selecting a Printer Driver While background printing is being performed, you can display the BJ PrintMonitor to confirm the progress of printing or to stop the printing. Displaying the BJ PrintMonitor window When Backgrounding is set - Canon S450 | User Manual - Page 242
a list of the documents queued for printing. Print queue document information includes the document name, number of pages, number of copies, and the time when the print job was accepted. The total number of print queue documents is displayed in the bottom row. Using the Macintosh Printer Driver 242 - Canon S450 | User Manual - Page 243
want to stop printing and then click the icon. The selected document is deleted from the list. • Printing can be suspended/restarted. Click the name of the document for which you want to suspend printing and then click the . To restart printing, click the icon. Using the Macintosh Printer Driver 243 - Canon S450 | User Manual - Page 244
environment and installation • The S450 can be connected to an Ethernet environment. • Install the printer driver on all the computers that will use this printer. See your Quick Start Guide. • The printer must be connected to the computer acting as the print server via a USB interface cable - Canon S450 | User Manual - Page 245
. Client machine Refers to a computer that is connected to the print server via an Ethernet network. From a client machine, select the printer driver called S450 (Server). When printing is executed, data is sent to the printer via the print server. Although the BJ PrintMonitor cannot be started from - Canon S450 | User Manual - Page 246
Executing Special Functions 2 Select the S450 icon and select the printer name from "Connected to:" 3 Click the Share button. 4 Confirm that S450 Server is selected for "Enter new print server name:", and then click the Send button. Using the Macintosh Printer Driver 246 - Canon S450 | User Manual - Page 247
then click the Close button. 6 Click the close box to close the Chooser. Setting up client machines 1 Select Chooser from the Apple Menu. 2 Select the S450 (Server) icon and select the print server in "Connected to:". 3 Click the close box to close the Chooser. Using the Macintosh Printer Driver 247 - Canon S450 | User Manual - Page 248
BJ PrintMonitor, start the BJ StatusMonitor. Starting the BJ StatusMonitor Double-click the BJ StatusMonitor icon in the BJ Extras folder. Closing the BJ StatusMonitor window Select Quit from the File menu to close the BJ StatusMonitor. Using the Macintosh Printer Driver 248 - Canon S450 | User Manual - Page 249
document. Displays information related to the document currently being printed. The icon on the left gradually fills with black as printing proceeds. Lists the names of the queued documents. The a document name, you can determine the owner of the print job. Using the Macintosh Printer Driver 249 - Canon S450 | User Manual - Page 250
from the Control Panel. • When you are using two or more print servers, you can switch the display of BJ StatusMonitor. Select the desired print server from Print Server and then click the OK button. You can then switch the display of the BJ StatusMonitor. Using the Macintosh Printer Driver 250 - Canon S450 | User Manual - Page 251
Printer Maintenance Cleaning the Print Heads Printing a Nozzle Check Pattern Aligning the Print Heads Turning the Printer On and Off Special Settings Uninstalling the Printer Driver Using the Macintosh Printer Driver 251 - Canon S450 | User Manual - Page 252
Printer Maintenance I Cleaning the Print Heads Cleaning the print heads clears the nozzles. There are two ways to clean the print heads: normal print head cleaning and deep print head cleaning. Always execute normal print head cleaning first. If this does not correct the problem, then execute deep - Canon S450 | User Manual - Page 253
execute normal print head cleaning first. Only when the normal print head cleaning does not correct the problem, perform deep print head cleaning. 1 Open the Page Setup dialog box. Normally, select Page Setup from the File menu. 2 Click the Utilities button. Using the Macintosh Printer Driver 253 - Canon S450 | User Manual - Page 254
click the OK button. Print head cleaning begins. (It takes about two minutes to complete print head cleaning and the POWER light stops flashing.) 5 Print a Nozzle Check Pattern to confirm the success of deep print head cleaning. Printing a Nozzle Check Pattern Using the Macintosh Printer Driver 254 - Canon S450 | User Manual - Page 255
confirms whether the inks are being correctly ejected from the print head nozzles and whether the print head on the BJ cartridge is correctly aligned. Print the Nozzle Check Pattern when your printouts are streaked or the color tones are not correct, or after print head cleaning has been executed - Canon S450 | User Manual - Page 256
head alignment check pattern for both BJ Cartridges If patterns (1) or (2) are broken or missing, print head cleaning is required. Cleaning the Print Heads If patterns (3) are not overlapped perfectly, print head alignment is required. Aligning the Print Heads Using the Macintosh Printer Driver - Canon S450 | User Manual - Page 257
head alignment check pattern for both BJ Cartridges If patterns (1) or (2) are broken or missing, print head cleaning is required. Cleaning the Print Heads If patterns (3) are not overlapped perfectly, print head alignment is required. Aligning the Print Heads Using the Macintosh Printer Driver - Canon S450 | User Manual - Page 258
you replace a BJ cartridge or switch BJ cartridges for a special print job, you must align the print heads to ensure optimum results in printing. There are two ways to align the print heads. Normally you will execute the automatic print head alignment feature of the printer driver. If this does not - Canon S450 | User Manual - Page 259
is loaded in the printer. 5 Click the OK button. The printer starts to print the head alignment pattern. During print head alignment, do not open the front cover. After the following pattern prints, the print heads of the two BJ cartridges are aligned properly. Using the Macintosh Printer Driver 259 - Canon S450 | User Manual - Page 260
the print heads manually • To turn off the printer after automatic head alignment, always press the POWER button to turn off the printer. If you do not turn off the printer correctly with the POWER button, the print head alignment settings are not saved. Using the Macintosh Printer Driver 260 - Canon S450 | User Manual - Page 261
Printer Maintenance Aligning the print heads manually If the automatic print head alignment does not work effectively for some reason, align the print heads manually. 1 Select Page Setup from the File menu. 2 Click the Utilities button. 3 Select Special Settings by clicking the up- or down-arrow. 4 - Canon S450 | User Manual - Page 262
. Printer Maintenance Print head alignment pattern 9 Check all the patterns in lines of (Y), from (X1) to (X6), and from (B1) to (B2). For each line enter the appropriate number where you see the lines perfectly aligned. (Y) Correct: Incorrect: (X1) (B1) Using the Macintosh Printer Driver 262 - Canon S450 | User Manual - Page 263
settings. 11 Make sure that the printer is turned on and letter-size plain paper is loaded; then click the OK button. The printer starts to print the high-resolution head alignment pattern. 12 Check all the When you finish entering numbers, save the settings. Using the Macintosh Printer Driver 263 - Canon S450 | User Manual - Page 264
procedure. Note When you wish to turn off the printer after manual head alignment, always press the POWER button to turn off the printer. If you do not turn off the printer correctly with the POWER button, the print head alignment settings are not saved. Using the Macintosh Printer Driver 264 - Canon S450 | User Manual - Page 265
and Off The Auto Power On/Off capability of the printer driver allows you to turn the printer off when no data is sent to the printer for a certain period of time and turn the printer back on again when data is sent to the printer. 1 Open the Page Setup dialog box. Normally, select Page Setup - Canon S450 | User Manual - Page 266
printer for the set time, the printer is turned off automatically. The default setting is off. 4 When a confirmation message appears, click the OK button. When Auto Power On/Off is to be cancelled, remove the check mark from each checkbox using the same procedure. Using the Macintosh Printer Driver - Canon S450 | User Manual - Page 267
box, you can change the printer's mode settings and printer driver to change its operation. Use the Chooser to change the driver-supported resolution. Changing the printer's mode A pause can be specified to allow the most recent printout to dry, or to adjust the print head position. 1 Open the Page - Canon S450 | User Manual - Page 268
passes of the print head. Select this item, by setting it to On, if you find that the printed pages are not drying well. 4 When a confirmation message appears, click the OK button. This completes changing the printer's mode. Changing the driver-supported resolution The driver-supported resolution is - Canon S450 | User Manual - Page 269
3 Click the Setup button. Printer Maintenance 4 Click on Driver-Supported Resolution and select High from the pop-up menu. 5 Click the OK button. 6 Click the close box to close the Chooser. Using the Macintosh Printer Driver 269 - Canon S450 | User Manual - Page 270
unsaved documents in applications that are currently running, save your documents. 2 Double-click S450 folder and then double-click Printer Driver folder. 3 Double-click the BJ Installer icon. 4 When the Software License Agreement is displayed, click the Agree button. 5 Select Uninstall from the pop - Canon S450 | User Manual - Page 271
Printer Maintenance 6 Click the Uninstall button. 7 When a confirmation message appears, click the Continue button. 8 When a confirmation message appears, click the OK button to restart the computer. Using the Macintosh Printer Driver 271 - Canon S450 | User Manual - Page 272
the Service Life of the Printer BJ Cartridges You Can Use With the Printer Notes on Handling BJ Cartridges BJ Cartridge Maintenance When to Replace a BJ Cartridge Printing a Nozzle Check Pattern Cleaning the Print Heads Replacing the Ink Tanks Replacing a BJ Cartridge Aligning the Print Heads - Canon S450 | User Manual - Page 273
Prolonging the Service Life of the Printer To ensure a long service life for your printer, clean it frequently and replace consumable items such as the BJ cartridges when required. Before you move the printer to a new location, pack it in its original box and packing material to prevent damage - Canon S450 | User Manual - Page 274
Printer You can install two combinations of BJ cartridges for printing. • Standard color combination Use this standard color combination for business graphics or standard color printing of charts and text. Left: BC-30e Black BJ Cartridge Right: BC-31e Color BJ Cartridge • Photo color combination - Canon S450 | User Manual - Page 275
reports that contain text with color charts or graphs. The BC-30e Black BJ Cartridge is composed of two distinct parts, a replaceable print head and one replaceable ink tank, the BCI-3eBk Ink Tank. When this BJ cartridge runs out of black ink, only the ink tank needs to be replaced. Replacing - Canon S450 | User Manual - Page 276
the BC-30e Black BJ Cartridge installed on the left side of the cartridge holder, the combination is ideal and economical for printing text and color graphs and charts. The BC-31e Color BJ Cartridge is composed of four distinct parts, a replaceable print head and three replaceable ink tanks. When - Canon S450 | User Manual - Page 277
BJ Cartridge is composed of a replaceable print head and three replaceable ink tanks. When a color runs out, only that ink tank needs to be replaced. Photo Black: Photo Cyan: Photo Magenta: BCI-3ePBk Photo Ink Tank BCI-3ePC Photo Ink Tank BCI-3ePM Photo Ink Tank Replacing the Ink Tanks Routine - Canon S450 | User Manual - Page 278
head becomes very hot during printing and can cause a minor burn. Touching the print head could damage it and make further printing impossible. • To avoid ink spills and stains on your clothing or the surrounding area, do not drop or shake BJ cartridges or ink tanks. BCIICn-ka3TBannKok n Black - Canon S450 | User Manual - Page 279
in an Ink Cartridge Storage Box. If the BJ cartridge is not properly stored in the container, the ink will dry out and you can no longer use the BJ cartridge. Also, after removing the seal on an ink tank, always insert it into a BJ cartridge to prevent the ink tank from drying out. Black BCCIyI - Canon S450 | User Manual - Page 280
Tanks I When you replace an ink tank or BJ cartridge... The BC-30e Black, BC-31e Color, and BC-32e Photo BJ Cartridges contain replaceable ink tanks. Ink tanks and BJ cartridges are consumable items. When an ink tank runs out of ink, or after a print head wears out, replace the item. Replacing the - Canon S450 | User Manual - Page 281
topics regarding BJ cartridge maintenance describe how to check the status of the BJ cartridges and take the appropriate actions to correct problems. Printing a Nozzle Check Pattern Cleaning the Print Heads Replacing the Ink Tanks Replacing a BJ Cartridge Aligning the Print Heads Routine Maintenance - Canon S450 | User Manual - Page 282
the necessary ink tank(s). Replacing the Ink Tanks Note If an ink tank runs out of ink, the printer beeps four times and the BJ Status Monitor for Windows starts up to display a message to warn you that an ink tank has run out of ink. If, after you replace the ink tank(s), the print quality is - Canon S450 | User Manual - Page 283
normal print head cleaning Nozzle check pattern poor quality? Execute deep print head cleaning Nozzle check pattern poor quality? Replace the BJ cartridge Execute print head alignment Printing a Nozzle Check Pattern Cleaning the Print Heads Replacing a BJ Cartridge Aligning the Print Heads Routine - Canon S450 | User Manual - Page 284
when your printouts are streaked or the color tones are not correct, or after you perform print head cleaning. Windows Printing a Nozzle Check Pattern Macintosh Printing a Nozzle Check Pattern Note You can print a Nozzle Check Pattern with the printer driver or with the RESUME button on the - Canon S450 | User Manual - Page 285
the problem, then execute deep print head cleaning. Note Cleaning the print heads consumes ink, so clean the print heads only when necessary. Windows Cleaning the Print Heads Macintosh Cleaning the Print Heads Note You can also start print head cleaning with the RESUME button on the printer - Canon S450 | User Manual - Page 286
Cartridge: BCI-3eC Cyan Ink Tank BCI-3eM Magenta Ink Tank BCI-3eY Yellow Ink Tank BC-31e Color BJ Cartridge • For BC-32e Photo BJ Cartridge: BCI-3ePBk Photo Black Ink Tank BCI-3ePC Photo Cyan Ink Tank BCI-3ePM Photo Magenta Ink Tank BC-32e Photo BJ Cartridge (optional) 1 Make sure that the printer - Canon S450 | User Manual - Page 287
the wrong slot, colors will not print correctly. • To avoid interfering with the ink supply from a tank, never touch the opening on an ink tank. 2 To remove the empty ink tank, press in on the tab on the ink tank to release it; then lift it out of the slot. Do not remove the BJ cartridge! Leave the - Canon S450 | User Manual - Page 288
film. Note • Remove the film carefully so you do not remove the label from the ink tank. The label is needed to match the ink tank with the correct slot of the BJ cartridge. • Remove the film by pulling on the orange tape. Do not attempt to remove the film before you remove the - Canon S450 | User Manual - Page 289
4 Grip the bottom of the ink tank and twist off the orange protective cap in the direction of the arrow. Protective cap Note To prevent ink spills, do not press this side of the ink tank. Do not attempt to reattach a protective cap to an ink tank. Discard the protective cap immediately. Routine - Canon S450 | User Manual - Page 290
it with the correct slot. Then insert the ink tank in its place. Make sure you insert the ink tank into the correct slot of the cartridge holder. 6 To lock the ink tank in place, press down on top of the ink tank. Press down until the ink tank locks in place with a click. Routine Maintenance - Canon S450 | User Manual - Page 291
Replacing the Ink Tanks 7 Close the front cover. The cartridge holder returns to the home position, and print head cleaning begins automatically. The POWER light flashes during print head cleaning. When print head cleaning is complete and the POWER light stops flashing, you can resume normal operation - Canon S450 | User Manual - Page 292
remains poor even after replacing the ink tanks and cleaning the print heads, the print head is worn out and you must replace the corresponding BJ cartridge. Note Use only the following BJ cartridges with the S450 printer: • BC-30e Black BJ Cartridge • BC-31e Color BJ Cartridge • BC-32e Photo BJ - Canon S450 | User Manual - Page 293
Replacing a BJ Cartridge 2 Raise the cartridge lock lever to unlock the BJ cartridge. • If you are replacing a BC-30e Black BJ Cartridge or a BC-32e Photo BJ Cartridge, raise the left cartridge lock lever. • If you are replacing the BC-31e Color BJ Cartridge, raise the right cartridge lock lever. - Canon S450 | User Manual - Page 294
partially used BJ cartridge, store it in the Ink Cartridge Storage Box. • Always hold the BJ cartridge by the handles embossed on the left and right sides of the BJ cartridge. Do not touch the metal contacts or the print head on the BJ cartridge. Notes on Handling BJ Cartridges Routine Maintenance - Canon S450 | User Manual - Page 295
Remove the orange protective cap then slowly remove the orange protective tape. Protective cap Protective tape Note • Do not attempt to reattach the tape or cap to the BJ cartridge. Discard the protective cap and tape immediately. • To avoid poor print quality, do not touch the print head area of - Canon S450 | User Manual - Page 296
it locks in place. Note When you install either a BC-30e Black BJ Cartridge or an optional BC-32e Photo BJ Cartridge, insert it into the left side of the cartridge holder. You insert the BC-31e Color BJ Cartridge into the right side of the cartridge holder. 6 Press in on the tab of the protective - Canon S450 | User Manual - Page 297
ink quickly after it is installed. 8 Close the front cover. The cartridge holder returns to the home position and print head cleaning begins automatically. Do not open the front cover during print head cleaning. After you replace a BJ cartridge, always align the print heads. Aligning the Print Heads - Canon S450 | User Manual - Page 298
the print heads: automatically or manually. Normally you will execute the automatic print head alignment feature of the printer driver. If this does not work for some reason, then you can execute manual print head alignment. Windows Aligning the Print Heads Macintosh Aligning the Print Heads Routine - Canon S450 | User Manual - Page 299
dust and room dust may accumulate around the paper output tray and other parts of the printer. Clean the printer periodically. Caution • To avoid personal injury from burns or electrical shock or damage to the printer during cleaning, do not use a flammable solvent such as thinner, benzene, or - Canon S450 | User Manual - Page 300
Cleaning the Printer 3 Remove the paper output tray and wipe the paper output area with a soft cloth. Routine Maintenance 300 - Canon S450 | User Manual - Page 301
to unlock the BJ cartridge. 3 Remove the entire BJ cartridge with the ink tanks in place. Note • Always hold the BJ cartridge by the handles embossed on the left and right sides of the BJ cartridge. Do not touch the metal contacts or the print head area on the BJ cartridge. • To avoid staining - Canon S450 | User Manual - Page 302
Transporting the Printer 5 Press the POWER button ( ) while leaving the front cover open. The POWER light turns off and the cartridge holder remains in the same position. Now unplug the power cord from the power outlet. 6 Fix the cartridge holder with tape and the cartridge lock lever with packing - Canon S450 | User Manual - Page 303
Transporting the Printer 10 Disconnect the printer cable from your computer and printer, and disconnect the power cord from the printer. (Illustration shows use of a parallel printer cable.) 11 Reattach the tape and packing material to the printer and insert the printer into its plastic bag. Packing - Canon S450 | User Manual - Page 304
Transporting the Printer 12 Fit the packing material on either end of the printer and pack the printer into the original box. Note If you are shipping the printer through a shipping agent, mark the box with FRAGILE or HANDLE WITH CARE. Routine Maintenance 304 - Canon S450 | User Manual - Page 305
Troubleshooting Printout Is Unsatisfactory Printer Does Not Start or Stops Mid-Job Paper Jams or Does Not Feed The POWER Light Flashes Orange An Error Message Appears Other Problems Before You Call for Help Getting Help From Canon Troubleshooting 305 - Canon S450 | User Manual - Page 306
streaked or wrong Straight lines are broken Printed pages curled Backs of pages stained with ink Ink blurred Printed surface scratched White streaks visible Colors streaked or uneven Last part of print job not printing Characters and figures notched/gradation streaked or unnatural Troubleshooting 306 - Canon S450 | User Manual - Page 307
dialog box and select the print mode best suited for the print job in the Choose Print Mode box under the Main tab. Also make sure that the BJ Cartridge and Media Type settings match the BJ cartridge and media currently set in the printer. Using the Windows 98/95 Printer Driver Troubleshooting 307 - Canon S450 | User Manual - Page 308
IN THE BJ CARTRIDGE? You may not be able to achieve satisfactory performance with an ink tank that does not contain genuine Canon ink. It is recommended that you use genuine Canon ink tanks especially designed for use with the Canon BJ cartridges. Replacing the Ink Tanks Troubleshooting 308 - Canon S450 | User Manual - Page 309
, check the following. Check 1 IS THE INK IN THE BJ CARTRIDGE IN GOOD CONDITION? If there are wide differences between the screen colors and printed colors, one of the ink tanks may have run out of ink or some of the print head nozzles may be clogged. Print a Nozzle Check Pattern and check the - Canon S450 | User Manual - Page 310
Media Type settings match the BJ cartridge and media currently set in the printer. Using the Windows 98/95 Printer Driver Note Windows If Monochrome Effects is selected for Special Effects, the colors displayed on the screen may differ from those that are printed. Make sure the correct settings - Canon S450 | User Manual - Page 311
1 ARE YOU USING THE CORRECT PRINTER DRIVER? Windows Meaningless characters and symbols may print if you have selected the wrong printer driver for the print job. Start the print procedure again and make sure that Canon S450 is displayed in the Name entry box of the Print dialog box. If another - Canon S450 | User Manual - Page 312
problem may be in the file or the application program you are using. Rebuild the file and print it again. If the rebuilt file prints correctly, the original file was probably faulty. If the rebuilt file does not print correctly, contact the applications company. Before You Call for Help Troubleshooting - Canon S450 | User Manual - Page 313
the Printer Properties dialog box, click the Page Layout tab, and click Normal-size Printing. Using the Windows 98/95 Printer Driver Macintosh To disable Scaled Printing, select Page Setup from the File menu and set 100% in the Scale box. Using the Macintosh Printer Driver Troubleshooting 313 - Canon S450 | User Manual - Page 314
AND PRINTER DRIVER MATCH? Windows Set the same Page Size setting for the application program and the printer driver. Open the Printer Properties dialog box, click the Page Layout tab, and select the Page Size that matches the Page Size setting in the application program. Troubleshooting 314 - Canon S450 | User Manual - Page 315
dirt or dust, and clog the ink nozzles. If the protective tape or cap has been re-attached, remove it. Install the BJ cartridge in the printer and clean the print heads immediately. Check 3 DID YOU PRINT ON THE CORRECT PRINT SIDE OF THE MEDIA? The correct print side is different for each type of - Canon S450 | User Manual - Page 316
you install a BJ cartridge, you must align the print heads. If you do not align the print heads, straight lines may appear broken or uneven. Aligning the Print Heads Check 2 IS PRINT QUALITY SET TO FAST IN THE PRINTER DRIVER? Changing Print Quality to Fine in the printer driver may improve the - Canon S450 | User Manual - Page 317
better ink absorption. IS THE PRINTER DRIVER SET FOR HIGH DENSITY PRINTING? Move the Intensity setting (print density) in the Color tab to a lower setting and execute the print job again. A lower Intensity setting uses less ink and thus causes less curling of the printed page. Troubleshooting 317 - Canon S450 | User Manual - Page 318
Is Unsatisfactory Windows 1 Open the Printer Properties dialog box and click the Advanced button in the Main tab. 2 Click the Color tab. 3 Use the Intensity slide bar to change the Intensity setting. Macintosh 1 When using Manual for printing, click the Details button in the Printer Properties - Canon S450 | User Manual - Page 319
with ink. You may be able to eliminate this problem by reducing the black density on the printer driver setting screen. Windows 1 Open the Printer Properties dialog box and click the Advanced button in the Main tab. 2 Click the Color tab. 3 Use the Black slide bar to change the print density - Canon S450 | User Manual - Page 320
DRIVER SET FOR HIGH-DENSITY PRINTING? The Intensity setting in the printer driver can be used to adjust print density (that is, the amount of ink used to print). Lowering the print density setting can reduce the tendency for ink to spread in color photographs or illustrations. Troubleshooting - Canon S450 | User Manual - Page 321
. 2 Click the Color tab. 3 Use the Intensity slide bar to change the intensity setting. Macintosh 1 When using Manual for printing, click the Details button in the Printer Properties dialog box. 2 In the color panel, use the Density slide bar to change the print density setting. Troubleshooting 321 - Canon S450 | User Manual - Page 322
Down position. Check 3 ARE YOU PRINTING ON CURLED PLAIN PAPER? If curled plain paper is loaded with the curl bowing up, the print heads may scratch the bottom edge of the paper. Try to uncurl the paper. If necessary, turn the paper over, and load it in the sheet feeder again. Troubleshooting 322 - Canon S450 | User Manual - Page 323
paper, the paper may absorb too much ink and curl, and the print heads may scratch the surface of the curled page. Lower the Intensity setting. Windows 1 Open the Printer Properties dialog box, and click the Advanced button in the Main tab. 2 Click the Color tab. 3 Use the Intensity slide bar to - Canon S450 | User Manual - Page 324
out. If the problem persists after cleaning the print heads and aligning the print heads, try replacing the BJ cartridge. Note If the Nozzle Check Pattern prints normally, there may be a problem in the application program. For details, refer to the Troubleshooting sections of the documentation - Canon S450 | User Manual - Page 325
on the printout. Check 1 IS PRINT QUALITY ON THE QUALITY TAB IN THE PRINTER DRIVER SET TO FAST? Set Print Quality to Fine and print again. This reduces uneven coloration you may see in a document where a large amount of ink is used. Windows 1 Open the Printer Properties dialog box. 2 Click the - Canon S450 | User Manual - Page 326
or streaked colors. Windows 1 Open the Printer Properties dialog box. 2 Click the Advanced button in the Main tab. 3 In the Halftoning box under the Quality tab, disable Auto if it is checked and enabled. 4 Click Diffusion and click the OK button. Macintosh 1 When using Manual for printing, click - Canon S450 | User Manual - Page 327
the printer driver. Set the Page Size that matches the Page Size setting in the application program. ARE THE COMPUTER AND PRINTER SECURELY CONNECTED? Check the connection of the printer cable at the computer and printer. A loose connection can cause losing part of a print job. Troubleshooting 327 - Canon S450 | User Manual - Page 328
Is Unsatisfactory Check 3 IS A WPS PRINTER DRIVER INSTALLED? Windows You may not be able to print correctly with a WPS (Windows Printing System) printer driver installed in your system. Confirm whether or not a WPS driver is installed in your system. Change the WPS driver port setting to FILE or - Canon S450 | User Manual - Page 329
notched/gradation streaked or unnatural Windows Characters and figures print with unnatural notches. Gradation appears streaked. Check ARE YOU USING AN APPLICATION PROGRAM THAT ONLY SUPPORTS POSTSCRIPT? The S450 is a QuickDraw printer and is not a PostScript printer. Therefore, if you use an - Canon S450 | User Manual - Page 330
Printer Does Not Start or Stops Mid-Job Printer does not turn on Print job does not start Printing halts Printing starts but nothing prints Cartridge holder does not move to the center Troubleshooting 330 - Canon S450 | User Manual - Page 331
the same power outlet. If the other device operates normally, the power outlet is functioning normally. If you perform all these checks and the problem is not solved, unplug the printer and contact the Canon Customer Care Center. Before You Call for Help Getting Help From Canon Troubleshooting 331 - Canon S450 | User Manual - Page 332
ashes green, the computer is sending print data to the printer and the job is executing normally. ARE THE PRINTER AND COMPUTER SECURELY CONNECTED? Check the printer cable connections at the printer and computer. A faulty or loose connection can prevent the printer from starting. Troubleshooting 332 - Canon S450 | User Manual - Page 333
if you have selected the wrong printer driver for the print job. Windows Check that Canon S450 is displayed in the Name entry box of the Print dialog box. If another driver is selected, click the down-arrow and select Canon S450 from the pull-down list. If Canon S450 does not appear in the list - Canon S450 | User Manual - Page 334
the Printer Properties dialog box: click Start, select Settings, and click Printers. Highlight the Canon S450 icon and right-click. Now select Properties. 2 Click the Details tab and select LPT1 or USBPRN in the Print to the following port box (LPT1: Canon BJ LPT Printer Port). Troubleshooting 334 - Canon S450 | User Manual - Page 335
normally. If the print job requires a large amount of black ink on plain paper, the print job may require more time. Check 2 HAS THE PRINTER BEEN OPERATING FOR A LONG TIME? The print heads may occasionally overheat during a long print job. If the print heads overheat, printing pauses at the end - Canon S450 | User Manual - Page 336
to check the status of the print heads and clean the print heads. Printing a Nozzle Check Pattern Cleaning the Print Heads If the problem is not solved, replace the BJ cartridge. Replacing a BJ Cartridge If you can print a Nozzle Check Pattern, check that the printer is connected to the computer - Canon S450 | User Manual - Page 337
Check 2 Printer Does Not Start or Stops Mid-Job DID YOU REMOVE THE ORANGE PROTECTIVE TAPE FROM THE PRINT HEAD? If the orange protective tape is not removed from the BJ cartridge, ink cannot be ejected from the BJ cartridge. Remove the BJ cartridge and check the print head. If the tape has not been - Canon S450 | User Manual - Page 338
OPEN LONGER THAN 10 MINUTES? If the front cover remains open longer than 10 minutes, the cartridge holder automatically returns to the home position to prevent the print heads from drying out. Close the front cover and open it again. The cartridge holder moves to the center. Troubleshooting 338 - Canon S450 | User Manual - Page 339
Paper Jams or Does Not Feed Paper does not feed from auto sheet feeder Paper skews during feeding Multiple sheets feed together Paper jams Troubleshooting 339 - Canon S450 | User Manual - Page 340
THE PAPER TOO THICK? Thick paper does not feed from the auto sheet feeder. Do not attempt to print on paper or other media thicker than .024" or 28 lb (0.6 mm or 105 g/m2). Check or wrinkled. Media Sizes You Can Use With the Printer Media Types You Cannot Use With the Printer Troubleshooting 340 - Canon S450 | User Manual - Page 341
You Cannot Use With the Printer Check 3 IS THE PAPER GUIDE SET CORRECTLY? If the paper guide on the auto sheet feeder is not set correctly, the paper does not feed straight or may jam in the printer. The paper guide must be snug against the side of the stack and not too tight. Troubleshooting 341 - Canon S450 | User Manual - Page 342
and paper jams, never load paper in the auto sheet feeder that is folded, curled, or wrinkled. Media Types You Cannot Use With the Printer Check 4 ARE YOU PRINTING ON TRANSPARENCIES? When more than one transparency feeds from a stack at the same time, lower the paper rest, set the stack, and try - Canon S450 | User Manual - Page 343
pull the paper out of the printer from the auto sheet feeder or the paper output slot, whichever is easier. (If the paper tears or shreds, open the front cover and remove all the fragments of paper.) 2 Close the front cover, load the paper, and then press the RESUME button. Troubleshooting 343 - Canon S450 | User Manual - Page 344
removed, press the POWER button twice to eject the paper automatically and start the print job again. • Paper within the range of 17 to 28 lb (64 to be loaded in the auto sheet feeder. Media Sizes You Can Use With the Printer • To avoid misfeeds and paper jams, do not load wrinkled, folded, or - Canon S450 | User Manual - Page 345
jam Four flashes: BJ cartridge out of ink Five flashes: BJ cartridge not installed correctly Six flashes: BJ cartridge not installed Seven flashes: BJ cartridge defective Eight flashes: Waste ink absorber almost full The POWER light flashes orange and green alternately: Service error Troubleshooting 345 - Canon S450 | User Manual - Page 346
The POWER Light Flashes Orange I Two flashes: Out of paper, paper jam, paper feed error If no paper is loaded in the auto sheet feeder, or if the paper is not loaded correctly, set the paper correctly and press the RESUME button. If paper has jammed in the printer, remove the jam and press the - Canon S450 | User Manual - Page 347
a problem with one of the BJ cartridges installed in the printer. Remove each BJ cartridge and check that the contacts on the BJ cartridge and cartridge holder are clean. Also check that the orange protective tape has been removed from the print head then install the BJ cartridge again. If the error - Canon S450 | User Manual - Page 348
The POWER Light Flashes Orange I Eight flashes: Waste ink absorber almost full The printer has a built-in waste ink absorber to hold the ink that is consumed during print head cleaning. Eight flashes indicate the waste ink absorber is nearly full. Press the RESUME button to skip the error so you can - Canon S450 | User Manual - Page 349
An Error Message Appears Error writing to LPT1 or USBPRN Windows Application error, general protection fault Windows Other error messages Troubleshooting 349 - Canon S450 | User Manual - Page 350
Printer Properties dialog box from the Start menu: click Start, select Settings, and click Printers. Highlight the Canon S450 icon and rightclick. Select Properties. 2 Click the Details tab and click the Spool Settings button. Click the button for "Print directly to the printer." Troubleshooting - Canon S450 | User Manual - Page 351
icon and then select Properties from the pop- up menu. 2 Click the Device Manager tab, select the Universal serial bus controller, and then double-click Canon S450. 3 In the General tab, note what is displayed. Resolve any problems. Troubleshooting 351 - Canon S450 | User Manual - Page 352
An Error Message Appears IS THE PRINTER DRIVER INSTALLED CORRECTLY? There may be a problem with the printer driver. Uninstall the printer driver and install it again. Uninstalling the BJ Printer Driver See the Quick Start Guide for details on installing the printer driver. Check 6 IS THE PRINTER - Canon S450 | User Manual - Page 353
An Error Message Appears Check 7 IS A WPS DRIVER INSTALLED? You may not be able to print correctly if a WPS (Windows Printing System) driver is installed on your computer. 1 Click Start, point to Settings, and click Printers. 2 If a WPS driver is installed, right-click the icon and then select - Canon S450 | User Manual - Page 354
APPLICATION PROGRAM? Attempting to print from a Windows 3.1 application program installed on a system with Windows 98 or Windows 95 may cause an error. Use a Windows 98 or Windows 95 compatible application program. Note You cannot use the Canon S450 with the Windows 3.1 operating system. Check - Canon S450 | User Manual - Page 355
the file and try printing it again. If there is no problem with the new file, the old file was probably faulty. If the same error occurs with the new file, call either the software company or the Canon Customer Care Center. Before You Call for Help IS THE PRINTER DRIVER INSTALLED CORRECTLY? There may - Canon S450 | User Manual - Page 356
BJ STATUS MONITOR? Windows When an error occurs, the BJ Status Monitor screen opens. The Print Status tab displays a short description of the error and other information about the print job. Click the Guide tab to display instructions on how to solve the problem. For problems that require more - Canon S450 | User Manual - Page 357
Error Message Appears Cannot read printer driver. ... Uninstall the printer driver and reinstall it. Uninstalling the BJ Printer Driver See the Quick Start Guide for details on installing the printer driver. Background printing failed. Restart Windows and try again. [Application name] cannot print - Canon S450 | User Manual - Page 358
the Quick Start Guide for details on installing the printer driver. Error number (*300) displayed Check the following. • Printer is turned on? • Printer cable is connected securely? Make sure that the printer cable is securely fastened to the computer and the printer. If the problem cannot be solved - Canon S450 | User Manual - Page 359
Other Problems Cannot install the printer driver BJ Status Monitor does not open Cannot execute background printing Troubleshooting 359 - Canon S450 | User Manual - Page 360
Other Problems I Cannot install the printer driver Check 1 DID YOU FOLLOW THE PRINTER DRIVER INSTALLATION INSTRUCTIONS IN THE QUICK START GUIDE? The Quick Start Guide provides step-by-step instructions for installing the printer driver. If you are reinstalling the printer driver, remove any - Canon S450 | User Manual - Page 361
Guide. • When you install the printer driver from Run in the Start menu, specify the CD-ROM drive and file name (Setup.exe) correctly. • The drive name (E:, for example) varies according to how your system is set up. Check 4 IS THERE A PROBLEM WITH THE S450 CANON CREATIVE CD-ROM? The S450 Canon - Canon S450 | User Manual - Page 362
THE PRINTER DRIVER? Check the bi-directional option. 1 Open the Printer Properties dialog box from the Start menu. 2 Click the Details tab and click the Spool Settings button. 3 In the Spool Settings dialog box, click the button for "Enable bi-directional support for this printer." Troubleshooting - Canon S450 | User Manual - Page 363
Check 2 IS BACKGROUND PRINTING ENABLED IN THE PRINTER DRIVER? Windows 1 Open the Printer Properties dialog box, then click the Page Layout tab. 2 Check Background Printing in the Background checkbox. Macintosh 1 Select Chooser from the Apple menu. 2 Set Backgrounding to On. Troubleshooting 363 - Canon S450 | User Manual - Page 364
Before You Call for Help Narrowing down the problem Checking the printing environment Troubleshooting 364 - Canon S450 | User Manual - Page 365
. Application program problem Problems that arise only when you use a particular application program are probably caused by the application program. For details, consult the software company. The problem may also be solved by installing the latest version of the printer driver. Troubleshooting 365 - Canon S450 | User Manual - Page 366
the printing environment Check the information on the operating environment such as the name and version number of your operating system, the amount of memory installed, hard disk capacity and amount of free space on hard disk, and the printer driver version number. Checking the Windows version - Canon S450 | User Manual - Page 367
Checking the amount of free space on hard disk Before You Call for Help Windows 1 On the Windows desktop, double-click the My Computer icon. 2 Right-click the icon of the hard disk the icon of the hard disk. 2 Select Get Info from the File menu. 3 Select General Information. Troubleshooting 367 - Canon S450 | User Manual - Page 368
. The version number of the printer driver is displayed. Macintosh 1 Double-click the Extensions Folder in the System Folder and then select the S450 icon. 2 Select Get Info from the File menu. 3 Select General Information. The version number of the printer driver is displayed. Troubleshooting 368 - Canon S450 | User Manual - Page 369
support* options including: • For e-mail technical support, the latest driver downloads and answers to frequently asked questions (www.ccsi.canon.com) • 24-hour, 7-day-a-week,automated support for troubleshooting about extending your Canon service and support up to an additional two years, call 1-800-385- - Canon S450 | User Manual - Page 370
Specifications General Specifications System Requirements Specifications 370 - Canon S450 | User Manual - Page 371
method Bubble Jet on-demand Printing resolution • Black and color: 1440 (horizontal) x 720 (vertical) dpi • Photo: 720 x 720 dpi Print speed (printing with Canon standard pattern) • Black: 10 ppm • Color: 7 ppm Print direction Bi-directional Print width 8 in. (203.2 mm) max. Receive buffer 128 - Canon S450 | User Manual - Page 372
Material AWG28 or larger • Type Twisted-pair shielded cable • Length Up to 6.5 ft (2.0 m) • Connectors Amphenol 30360 or equivalent Recommended USB printer cable • Material AWG28 (data wiring pair) or AWG20 to 28 (distribution pair) • Type Twisted-pair shielded cable • Length Up to 16 - Canon S450 | User Manual - Page 373
• Temperature • Humidity 32 to 95˚F (0 to 35˚C) 5 to 90% RH (no condensation) Power supply USA/Canada AC 120V, 60Hz Power consumption • Off • Standby • Printing Approx. 1W (AC 230±10%) Approx. 1W (AC 120V) Approx. 3W (AC 230±10%) Approx. 3W (AC 120V) Approx. 30W Dimensions (with paper rest and - Canon S450 | User Manual - Page 374
General Specifications Sheet feeder capacity • Plain paper (17 lb. or 64 g/m2) • Artist Canvas • Back Print Film • Banner Paper • Glossy Photo Cards • Glossy Photo Paper • Greeting Cards • High Gloss Photo Film • High Resolution Paper • Magnet Sheet • Transparencies • Envelopes 100 sheets max. 1 - Canon S450 | User Manual - Page 375
Ordinary print media Regular size Letter, Legal, A4, A5, B5, US Com.#10, European DL Custom size • Width • Height 3.94" to 9.50" (100.0 to 241.3 mm) 3.94" - Canon S450 | User Manual - Page 376
Canon Specialty Papers • Artist Canvas • Back Print Film • Banner Paper • Brilliant White Paper • Bubble Jet Paper (water-resistant) • Glossy Photo Cards • Glossy Photo Paper • Greeting Cards • High Gloss Photo Film • High Resolution - Canon S450 | User Manual - Page 377
Graphic image printing Data format Resolution General Specifications Canon extended mode-Raster image format Canon extended mode-180, 360, 720, 1440 dpi Specifications 377 - Canon S450 | User Manual - Page 378
System Requirements Printer driver software Windows® 98/95 486 processor; 16MB RAM; 38MB free hard-disk space Windows 2000 Pentium® processor, 133MHz or faster; 3.2MB RAM for Professional, 64MB RAM for Server; 25MB free hard-disk space Windows NT® 4.0 Pentium®; 16MB RAM; 25MB free hard-disk space - Canon S450 | User Manual - Page 379
printer and computer through a USB interface, use the system under the following operating environment. Computer with Microsoft Windows 98 or Windows under Mac OS 8.1, the system must be upgraded using iMac Firmware 1.0, which can be downloaded from the home page of Apple Computer, Inc.) • Specifi - Canon S450 | User Manual - Page 380
Using the Optional IS-32 Color Image Scanner Cartridge Using the Scanner Using the Scanner With Windows Using the Scanner With Macintosh Scanner Problems Using the Optional IS-32 Color Image Scanner Cartridge 380 - Canon S450 | User Manual - Page 381
Using the Scanner Scanner Driver Basics Unpacking the Scanner Cartridge Installing the IS Scan Software Installing the Scanner Cartridge Basic Scanning Procedure Using the White Calibration Sheet Scanning Area Guidelines Loading an Image Using the Scanner 381 - Canon S450 | User Manual - Page 382
Scanner Driver Basics Installing the optional IS-32 Color Image Scanner Cartridge in the printer makes it possible to scan and save images such as your favorite photographs and greeting cards. Photograph Wallpaper for your computer Home page Greeting card Using the Scanner 382 - Canon S450 | User Manual - Page 383
Scanner Driver Basics Windows To use the scanner cartridge, you must install the IS Scan software, which includes the IS Scan scanner driver and the IS Scan Plus utility program. These two programs provide many features that allow you to perform simple color adjustments to improve the quality of - Canon S450 | User Manual - Page 384
Make sure you have the following items. I IS-32 Color Image Scanner Cartridge Optical components Electrical contacts Caution The scanner cartridge is composed of precision components. To avoid poor scanning results, do not touch the optical components or electrical contacts. Using the Scanner - Canon S450 | User Manual - Page 385
I White Calibration Sheet You use this sheet to maintain the correct color balance of scanned images. The first time you install the scanner cartridge, you need to run the white level calibration. You will also run calibration when the white level calibration data needs to be updated. I Scanning - Canon S450 | User Manual - Page 386
Installing the IS Scan Software Make sure the S450 Printer Driver is installed on your computer before you proceed with the following instructions. 1 Insert the S450 Canon Creative CD-ROM in your CD-ROM drive. 2 Double-click the S450 icon on your desktop: You'll see this screen: Using the Scanner - Canon S450 | User Manual - Page 387
3 Click the Manuals, Supplies, and Help button. You'll see this screen: Installing the IS Scan Software Using the Scanner 387 - Canon S450 | User Manual - Page 388
4 Click Canon Accessories and Paper. You'll see this screen: Installing the IS Scan Software 5 Click the Install IS-32 Driver button. 6 Follow the instructions on the screen. Using the Scanner 388 - Canon S450 | User Manual - Page 389
. • To avoid damaging the scanning head of the scanner cartridge, do not store the scanner cartridge in an Ink Cartridge Storage Box. The pad for the BJ cartridge print head inside the container is covered with ink that could damage the scanning head of the scanner cartridge. Using the Scanner 389 - Canon S450 | User Manual - Page 390
, clothing, or work area, handle the BJ cartridge carefully. Avoid dropping or shaking the BJ cartridge. Store the BJ cartridge in the Ink Cartridge Storage Box. 4 Insert the scanner cartridge into the left slot of the cartridge holder, then lower the cartridge lock lever until it locks in place - Canon S450 | User Manual - Page 391
Scan scanner driver, you can use the S450 printer as a scanner. 1 Remove the BJ cartridge installed in the left slot of the cartridge holder and then install the IS-32 Color Image Scanner Cartridge in the left slot. 2 Start a graphics application program. Windows Macintosh For Windows Users • If - Canon S450 | User Manual - Page 392
scan into the scanning holder, then load the scanning holder into the auto sheet feeder. Loading an Image 5 Scan the image. Windows Scanning an Image Macintosh Scanning an Image 6 Save the scanned image. 7 Now you can install the BJ cartridge and print the scanned image. Using the Scanner 392 - Canon S450 | User Manual - Page 393
color balance of scanned images. White level calibration is required when the scanner cartridge is used for the first time and when the white level calibration data needs to be updated. When white level calibration is needed, you will see this screen when you click the Prescan or Scan button. Windows - Canon S450 | User Manual - Page 394
Using the White Calibration Sheet 1 Load the white calibration sheet with the cropped corner at upper left. Scanning holder White calibration sheet 2 Click the OK button on your screen. 3 When the white calibration sheet is ejected from the paper output tray, White Level Calibration processing is - Canon S450 | User Manual - Page 395
• The white level calibration data is stored into memory and used for maintaining the correct color balance of scanned images. When a message appears and prompts you to load the white from the IS Scan driver. Windows Other IS Scan Features Macintosh Other IS Scan Functions Using the Scanner 395 - Canon S450 | User Manual - Page 396
Color Image Scanner Cartridge, the SH-101 A4/LTR scanning holder is available for purchase. Visit the Canon Web site to find out about accessories and supplies (www.ccsi.canon possible damage to the printer or scanner cartridge, do not scan an image with paper clips or staples. Using the Scanner 396 - Canon S450 | User Manual - Page 397
Loading an Image 1 Slide the paper guide to the left edge of the auto sheet feeder. 2 Place the scanning holder on the printer, be sure to set the paper thickness lever to the down (or envelope) position. Scanning with the lever set incorrectly will adversely affect the print quality. 3 Load the - Canon S450 | User Manual - Page 398
Loading an Image 4 Adjust the paper guide to the left edge of the scanning holder. Caution To prevent possible damage to the scanning holder, always insert the seamed side into the auto sheet feeder first. Using the Scanner 398 - Canon S450 | User Manual - Page 399
Using the Scanner With Windows Using IS Scan Changing the Scanning Mode Using the Customized Scanning Mode Saving the Settings Using the Saved Settings Other IS Scan Features Using IS Scan Plus Using Copy Using Capture Image Using Capture Photo Editing a Scanned Image Printing a Scanned Image Saving - Canon S450 | User Manual - Page 400
Note These basic procedures may vary according to the application program you are using. 1 Install the IS-32 Color Image Scanner Cartridge in the printer. Installing the Scanner Cartridge 2 Make sure Canon IS Scan 2 is set as the Acquire Source and then select the command used for scanning (such as - Canon S450 | User Manual - Page 401
Load the image you wish to scan in the auto sheet feeder of the printer and click the Prescan button. It's a good idea to use prescanning to fied portion is called a Selection Box and only the area in the Selection Box will be scanned. To specify the Selection Box: • Point to a corner of the - Canon S450 | User Manual - Page 402
of the Selection Box in the Image Size box. • The minimum size of the Selection Box is 1" × 1" (25.4 mm × 25.4 mm). Using the Scanner With Windows 402 - Canon S450 | User Manual - Page 403
image data to the TWAIN-compatible graphics application program. Adjust, edit, or enhance the image in the application program as needed. Using the Scanner With Windows 403 - Canon S450 | User Manual - Page 404
application program, do not close the application program. If you do, the system may not be able to respond. • To quit IS Scan, select Exit Driver from the Settings menu. Using the Scanner With Windows 404 - Canon S450 | User Manual - Page 405
scanning a Color color image 180 dpi Standard setting for scanning a Grayscale monochrome image 180 dpi Suitable for scanning a photographic print such as a snapshot Color 360 dpi Off Grayscale Off On Off Grayscale Off Off Off Grayscale Off On Using the Scanner With Windows 405 - Canon S450 | User Manual - Page 406
the Scanning Mode Scanning Mode Purpose Image Type Resolution Edge Emphasis Character Emphasis Color Matching Prescan Mode Scans by converting a Monochrome Off Monochrome monochrome image into the document is scanned and processed as a monochrome image. Using the Scanner With Windows 406 - Canon S450 | User Manual - Page 407
the main IS Scan dialog box. 2 Click the Custom button in the Scanning Mode box. This displays the Custom dialog box: Using the Scanner With Windows 407 - Canon S450 | User Manual - Page 408
settings here. Image Type Select a type of image: Color (the default), Grayscale, or Monochrome. Resolution Determines the images on a screen. • The 180 dpi setting is sufficient for printing images. Threshold Determines the intensity of halftones for monochrome images. Drag the slide Windows 408 - Canon S450 | User Manual - Page 409
original with an OCR software application. This option is available only when the Image Type is set for Monochrome. Color Matching In some cases, the colors displayed on your monitor may not match the colors you see in your printout. Color Matching attempts to match the colors of the scanned image - Canon S450 | User Manual - Page 410
sure that the image you wish to scan is inserted into the scanning holder properly and is loaded in the auto sheet feeder of the printer, then click the Scan or Prescan button. Using the Scanner With - Canon S450 | User Manual - Page 411
the Settings menu. 3 Select the folder in which the file is to be saved. 4 Enter a File name. 5 Click the Save button. Using the Scanner With Windows 411 - Canon S450 | User Manual - Page 412
Settings menu when you have changed the settings and you wish to save all the current settings under a new file name. Using the Scanner With Windows 412 - Canon S450 | User Manual - Page 413
Other IS Scan Features I White Level Calibration Use this feature to maintain the correct color balance of scanned images. You need to perform White Level Calibration when you use the scanner cartridge for the first time and when the white level calibration data needs to be updated. 1 Select White - Canon S450 | User Manual - Page 414
Scan dialog box, you can verify the name of the printer that is currently connected to your system and information on the communication mode. • If the printer is connected using the parallel interface, Device Information displays you can learn more about IS Scan. Using the Scanner With Windows 414 - Canon S450 | User Manual - Page 415
Using IS Scan Plus IS Scan Plus is a utility program that allows you to edit, enhance, print, and save an image acquired by the IS Scan scanner driver. You can use IS Scan Plus if you do not have a graphics application program. I Launching IS Scan Plus 1 Select Programs from the Start menu, then - Canon S450 | User Manual - Page 416
Copy Capture Image Scan and edit an image other than a photographic print. Using Capture Image Capture Photo Scan and edit a photographic print such as a snapshot. Using Capture Photo Device Information Verify the name of the printer that is currently connected to your system and information on the - Canon S450 | User Manual - Page 417
instructions, click the Help button in the upper right of the main screen. You can access the online Help from all the screens that IS Scan Plus displays. I Verifying the Device Information Make sure that the printer the screens that IS Scan Plus displays. Using the Scanner With Windows 417 - Canon S450 | User Manual - Page 418
I IS Scan Buttons Returns to the main IS Scan Plus screen. Moves back to the previous screen. Displays the Edit screen. Editing a Scanned Image Prints a scanned image. Printing a Scanned Image Saves a scanned image. Saving a Scanned Image Using IS Scan Plus Using the Scanner With Windows 418 - Canon S450 | User Manual - Page 419
an image immediately after scanning. You cannot edit or enhance the scanned image before printing. 1 Click the Copy button in the main IS Scan Plus screen. The Copy screen displays: 2 Specify any required settings: • Select Color or Monochrome in the Document Type box. • Select Fine or Fast in the - Canon S450 | User Manual - Page 420
Setting button. This displays the Print Setup dialog box. Make sure Canon S450 is displayed as the default printer. Click the Properties button, if necessary, to display the Printer Properties dialog box and specify any printer settings. Using the Windows 98/95 Printer Driver 4 When you click the - Canon S450 | User Manual - Page 421
Note Using Copy 6 Click the OK button in the dialog box. Printing begins. • To print the image displayed in the Preview Area again, click the Reprint button. • To make a copy of another the copied image from the preview area. Repeat the procedure described above. Using the Scanner With Windows 421 - Canon S450 | User Manual - Page 422
Capture Image Use the Capture Image feature to scan an image other than a photographic print. You can also edit, enhance, save, and print the scanned image. 1 Click the Capture Image button in the main IS Scan Plus screen. This displays the Capture Image screen. Using the Scanner With Windows 422 - Canon S450 | User Manual - Page 423
setting for scanning a color image. Standard setting for scanning a monochrome image. Suitable for scanning a photographic print such as a scanning holder, and then load it in the auto sheet feeder of the printer. 5 Click the Prescan button. The remaining steps are similar to those described - Canon S450 | User Manual - Page 424
the Capture Photo feature to scan a photographic print such as a snapshot. You can also edit, enhance, save, and print the scanned image. 1 Click the Capture -click your mouse. 2 Specify these settings: • Select Color or Black & White in the Photo Type box. • Select Regular or Panorama in the - Canon S450 | User Manual - Page 425
Using Capture Photo 3 Insert the image you wish to scan into the scanning holder, and then load it in the auto sheet feeder of the printer. 4 Click the Prescan button. The remaining steps are similar to those described for Scanning an Image. Scanning an Image Using the Scanner With Windows 425 - Canon S450 | User Manual - Page 426
on each feature, use the online Help for IS Scan Plus. Contrast / Brightness Adjusts the brightness and contrast of an image. Using the Scanner With Windows 426 - Canon S450 | User Manual - Page 427
Edges Enhances the edges in an image by increasing the contrast of the pixels between areas of different colors. Lines Emphasizes selected edges and de-emphasizes all other edges of an image. Pixelize Squares off all you to add a frame border around the image. Using the Scanner With Windows 427 - Canon S450 | User Manual - Page 428
. Undo Previous Click once to undo the previous editing effect; click repeatedly to undo each previous editing effect one by one. Using the Scanner With Windows 428 - Canon S450 | User Manual - Page 429
image acquired using the Capture Image or Capture Photo feature. Remove the scanner cartridge, and install the BJ cartridge according to your print job. Click the Print button on the IS Scan Plus screen. If you are using Capture Image, the Print dialog box appears: Using the Scanner With Windows 429 - Canon S450 | User Manual - Page 430
Printing a Scanned Image If you are using Capture Photo, the Photo Print Options dialog box appears. Click Print Setting to change the printer settings or click Print to print the image. Opening the Printer Properties Dialog Box Using the Scanner With Windows 430 - Canon S450 | User Manual - Page 431
. This displays the Save As dialog box. 2 Select the folder in which you wish to save the image. 3 Enter a File name. Using the Scanner With Windows 431 - Canon S450 | User Manual - Page 432
Saving a Scanned Image 4 Click the down-arrow for "Save as type" and select a format for the file. You can select one of the following file formats. • Bitmap.BMP • JPEG.JPG • TIFF.TIF 5 Click the Save button. Using the Scanner With Windows 432 - Canon S450 | User Manual - Page 433
Using the Scanner With Macintosh Scanning Images With Application Software Using the Main IS Scan Dialog Box Scanning an Image Scanning Images With IS Scan Changing the Scanning Mode Customizing the Scanning Settings Copying a Scanned - Canon S450 | User Manual - Page 434
device using the S450 driver. The basic procedure is described below (steps may vary based on your application software). 1 Start the application software and then select New... from the File menu. Then, open the menu you use to scan images. Install the scanner cartridge in the printer. 2 To open - Canon S450 | User Manual - Page 435
Using the Main IS Scan Dialog Box Menu Button Scan Button Save Button Halt Button Information Box Help Button Image Control Panel Brightness and Contrast Preview Area Menu button Selects the IS Scan functions. Click this button to change the settings for a scanned image or to edit a scanned image. - Canon S450 | User Manual - Page 436
. Transfer or Save button Click this button to transfer a scanned image to an application. When using IS Scan only without an application software, this button says Save. Halt button Click this button to cancel scanning. Information box Displays the settings related to image scanning. To perform - Canon S450 | User Manual - Page 437
Scanning an Image 1 Click the Menu button and then select Settings. The Settings dialog box displays: 2 Make the necessary settings for the image to be scanned. • Click on Paper Size to select a size that approximates the image to be scanned. • Click on Scanning Mode to select the item that best - Canon S450 | User Manual - Page 438
scanned in the printer and then click the Prescan button. You see the image displayed in the Preview Area. 5 If you only want to scan part of the object, drag the mouse within the Preview Area to select the part to be scanned. The Selection Box indicates the area that will be scanned. Using - Canon S450 | User Manual - Page 439
.4 mm by 25.4 mm). • The size of the selected range is displayed in the Image Control Panel. 6 Place the image to be scanned in the printer and click the Scan button. Remember, only the range indicated by the Selection Box is scanned. Using the Scanner With Macintosh 439 - Canon S450 | User Manual - Page 440
and start over. If you like the image, click the Transfer button. The scanned image is transferred to the application software. Edit the image data as required prior to printing or saving it. • Some application programs do not display the main IS Scan dialog box, but display their own scanning - Canon S450 | User Manual - Page 441
Images With IS Scan You can use IS Scan as a stand-alone program to scan and edit images. I Starting IS Scan 1 Turn on the printer and install the scanner cartridge. 2 Double-click the IS Scan S450 folder. IS Scan S450 Folder 3 Double-click the IS Scan S450 icon. Using the Scanner With Macintosh 441 - Canon S450 | User Manual - Page 442
Scanning Images With IS Scan IS Scan starts and the main dialog box displays. The contents of the main dialog box and the method you use to scan images are basically the same as when using TWAIN application software. Using the Scanner With Macintosh 442 - Canon S450 | User Manual - Page 443
I Saving Scanned Images 1 Click the Save button. Scanning Images With IS Scan Using the Scanner With Macintosh 443 - Canon S450 | User Manual - Page 444
2 Make the necessary settings. Scanning Images With IS Scan • Select the location to which you want to save your image. • Enter a name for the image data in Name. • Click the drop-down box in Format to select PICT or TIFF. 3 Click the Save button. The image data is saved into a file. Using the - Canon S450 | User Manual - Page 445
& white draft is to be scanned Grayscale 180 dpi Edge Emphasis Prescan Color Matching Mode* Off Grayscale On (Execute) Off Color On (Execute) Off Grayscale Off * By default, Prescan is disabled. Once enabled, Black & White is the default Prescan Mode. You can select a Prescan Mode of - Canon S450 | User Manual - Page 446
Use Image Type Edge Emphasis Prescan Resolution Color Matching Mode* Recommended when scanning a document consisting entirely of text, such as a document created with a typewriter or word processor Black & White 180 dpi On (Execute) Black & Off White Scans by converting a monochrome image - Canon S450 | User Manual - Page 447
Note Changing the Scanning Mode • The Settings dialog box displays when you select Settings after you click the Menu button in the main dialog box. • When you select FAX or OCR, the document is scanned and processed as a grayscale image and converted to monochrome binary image data. This process - Canon S450 | User Manual - Page 448
Custom. 3 Make the appropriate settings for the image to be scanned. Image Type Select a mode according to the image to be scanned. You can select Color, Grayscale, Black & White, or Black & White (Text Enhanced). Using the Scanner With Macintosh 448 - Canon S450 | User Manual - Page 449
to a printer. Settings are 90, 180, 200, 300, 360. Threshold This function is valid only when Image Type is set to Black & White. will be darker. Prescan Place a check mark in the Prescan check box to perform the prescan. The scanning mode can be set to Black & White, Grayscale, or Color. Color - Canon S450 | User Manual - Page 450
you copy a scanned image to the clipboard, you can use the image easily with other application software. This is particularly useful when you want to paste an image into documents created with application software that is not TWAIN-compatible. I Copying an Image 1 Click the Menu button in the main - Canon S450 | User Manual - Page 451
Adjusting an Image If you are not satisfied with a scanned image, you can perform fine adjustment using a range of functions. Image data can be processed so that the brightness of the image changes or so that the image appears sharper or softer. I Adjusting the Brightness and Contrast 1 Click the - Canon S450 | User Manual - Page 452
Adjusting an Image 2 Move each slide bar to the right or left to adjust the image. Brightness Moving the Brightness slide bar to the left makes the entire image darker, while moving it to the right makes the image brighter. Contrast Moving the slide bar to the left reduces the contrast of the entire - Canon S450 | User Manual - Page 453
it clearer. Soften Softens the edges of an image. Despeckle Removes speckling from an image, making any such areas less noticeable. Invert Inverts the colors of an image to produce a negative of the original. You can check the effect of the adjustment in the Preview Area. Using the Scanner - Canon S450 | User Manual - Page 454
or line drawing. Lines... Emphasizes only lines in a specific direction. Pixelize... Applies a mosaic effect to an image. Posterize... Reduces the number of colors and simplifies the image. Low Relief... Creates a low relief version of the image. When you select one of these functions, the - Canon S450 | User Manual - Page 455
Applying Special Effects to an Image 2 Select a desired function from the list. The following is an example of the screen displayed when you select Edges. The operation is the same when any other function is selected. You can check the approximate result of the selection in the Preview Area. For - Canon S450 | User Manual - Page 456
Note Applying Special Effects to an Image 3 Once you are satisfied with the adjustment, click the OK button. To cancel an adjustment you have made, click the Menu button and then select Undo. Then, select either of the following: Last Only the function applied immediately before is cancelled. If you - Canon S450 | User Manual - Page 457
for the first time, or when the temperature of the scanner cartridge rises to a certain level, a message displays prompting you to place the white calibration sheet in the printer. Place the white calibration sheet in the printer and then click the OK button. The calibration sheet is scanned and - Canon S450 | User Manual - Page 458
Other IS Scan Functions I Using the Online Help Clicking the Help button on the main dialog box displays helpful explanations of the functions of IS Scan. You can also display the Help by clicking the Menu button, then Help, and Help again. Using the Scanner With Macintosh 458 - Canon S450 | User Manual - Page 459
, the process from scanning to printing is completed quickly and easily. I Installing the Copy Utility To use the Copy Utility, you must first copy the folder including the necessary files to any location. 1 Load the S450 Canon Creative CD-ROM into the CD-ROM driver on your Macintosh. 2 Double-click - Canon S450 | User Manual - Page 460
the Copy Utility at any time. Note To use the Copy Utility, the printer driver and IS Scan scanner driver must also be installed. I Starting the Copy Utility 1 Turn on the printer and install the scanner cartridge. 2 Click the Copy Utility for S450 folder. Using the Scanner With Macintosh 460 - Canon S450 | User Manual - Page 461
3 Click the Copy Utility icon. Using the Copy Utility The Copy Utility starts and the main dialog box displays: Using the Scanner With Macintosh 461 - Canon S450 | User Manual - Page 462
Copying the Image Using the Copy Utility 1 Click the Color or Black & White button according to the image to be the scanner cartridge and replace it with a BJ cartridge according to the printing settings. 8 Place a blank sheet of paper in the printer and click the OK button. Printing starts. - Canon S450 | User Manual - Page 463
Utility Note • To print the same image again, click the Reprint button. • To copy another document with the same settings, click the Copy button and follow the instructions on the screen. • To perform copying with different settings, click the Reset button and follow the instructions on the screen - Canon S450 | User Manual - Page 464
Scanner Problems Scanning Result Is Unsatisfactory Scanner Cannot Be Used With a TWAIN-Compatible Application Program Other Scanner Problems Scanner Problems 464 - Canon S450 | User Manual - Page 465
Scanning Result Is Unsatisfactory Quality of Scanned Image Is Uneven White Portion Becomes Grayish Parts of an Image Missing or Not Aligned Properly Image Contains Unexpected Colors, or Is Too Light or Too Dark Scanner Problems 465 - Canon S450 | User Manual - Page 466
is scratched or damaged, replace it. Note You can purchase a scanning holder for A4/LTR-size images. Visit the Canon Web site to find out about accessories and supplies (www.ccsi.canon.com). Check 3 ARE YOU SCANNING THICK PAPER? The image being scanned must be thinner than 0.01 inch (0.25 mm - Canon S450 | User Manual - Page 467
to draw an image, the higher the precision and the quality of the scanned image becomes. For a better quality image, select a greater number. Windows The scanning speed becomes slower and the file size of the scanned image becomes larger when you use a higher resolution. Changing the Scanning Mode - Canon S450 | User Manual - Page 468
LEVEL CALIBRATION? Use White Level Calibration to maintain the correct color balance of scanned images. Using the White Calibration Sheet Check and scans even the small differences of the density between white and other colors. Adjust the brightness and contrast. Note • When you are using IS - Canon S450 | User Manual - Page 469
, always set Black & White in the Scanning Mode so the scanner can scan using only two values between white and black. For details on how to set Black & White in the Scanning Mode, use the online Help. Windows Macintosh Changing the Scanning Mode Changing the Scanning Mode Scanner Problems 469 - Canon S450 | User Manual - Page 470
Scanning Result Is Unsatisfactory I Parts of an Image Missing or Not Aligned Properly Check 1 DID is smaller than the size of the image you scan, parts of the image will be missing. If you place the image outside the scanning area, parts of the image may not be aligned properly. Always check - Canon S450 | User Manual - Page 471
is not what you expected, or the image is too light or too dark. Check 1 IS THE NUMBER OF DISPLAY COLORS SET TO HIGH COLOR OR TRUE COLOR? Windows Check the number of display colors as follows. 1 From the Start menu, select Settings, and then select Control Panel. 2 Double-click the Display icon - Canon S450 | User Manual - Page 472
Mode is set for Color. Windows Check that Color Matching is enabled. 1 Click the Custom Setting button. 2 Make sure that Color Matching is enabled in the Custom Setting dialog box. Macintosh 1 Select Settings from the Menu screen. 2 Make sure that Color Matching is enabled. Scanner Problems 472 - Canon S450 | User Manual - Page 473
Scanner Cannot Be Used With a TWAIN-Compatible Application Program Cannot Launch IS Scan From Within the TWAIN-Compatible Graphics Application Program Cannot Transfer to TWAIN-Compatible Graphics Application Program Scanner Problems 473 - Canon S450 | User Manual - Page 474
PROGRAM YOU ARE USING SUPPORT THE LATEST 32-BIT TWAIN SPECIFICATIONS OR TWAIN SOURCE MANAGER (VERSION 1.5 OR LATER)? Windows When IS Scan is used as a TWAIN interface, you must use the latest 32-bit TWAIN-compatible graphics application program. See the User's Manual for your application program - Canon S450 | User Manual - Page 475
Graphics Application Program Check DOES THE TWAIN-COMPATIBLE GRAPHICS APPLICATION PROGRAM YOU ARE USING SUPPORT THE FILE FORMAT TYPE AND RESOLUTION OF THE IMAGE DATA? Some TWAIN-compatible graphics application program first, and then scan and transfer the image again. Scanner Problems 475 - Canon S450 | User Manual - Page 476
Other Scanner Problems Cannot Install Scanner Driver Does Not Launch With Default Settings Windows Improper Colors Displayed in the Dialog Box Scanning Too Slow Communication Error Occurs Error Message Appears Scanner Problems 476 - Canon S450 | User Manual - Page 477
Problems I Cannot Install Scanner Driver Check 1 DID YOU FOLLOW THE SCANNER DRIVER INSTALLATION Windows INSTRUCTIONS? Installing the IS Scan Software If an error occurred during installation and you had to shut down the installation procedure, you may not be able to install the scanner driver - Canon S450 | User Manual - Page 478
Check 4 Other Scanner Problems IS THERE A PROBLEM WITH THE CD-ROM? Windows The Canon Creative CD-ROM may be damaged. On the Windows desktop, double-click the My Computer icon then double-click the CD-ROM icon. If Windows cannot read the CD-ROM, call the Canon Customer Care Center for help. Getting - Canon S450 | User Manual - Page 479
Dialog Box Check IS THE NUMBER OF DISPLAY COLORS SET TO HIGH COLOR OR TRUE COLOR? Windows This problem occurs when IS Scan is launched from a TWAIN-compatible application program. If the problem is not solved, change the number of display colors of your computer. 1 From the Start menu, select - Canon S450 | User Manual - Page 480
Other Scanner Problems I Scanning Too Slow Scanning is requiring an unusually long time. Check ARE YOU USING A HIGHER RESOLUTION THAN REQUIRED? In resolution setting. Make sure that the resolution is not set higher than you require. • Use the prescanning capability. Scanner Problems 480 - Canon S450 | User Manual - Page 481
Check that the printer is plugged in and ready. Check 3 ARE YOU USING THE USB INTERFACE RUNNING UNDER WINDOWS 98? Windows When using the USB interface running under Windows 98, a communication error may occur if the Hardware acceleration setting is Full. To solve the problem, follow these steps - Canon S450 | User Manual - Page 482
I Error Message Appears Check REFER TO THE ONLINE HELP. Other Scanner Problems Windows From the main IS Scan screen, select Contents from the Help menu, or press F1. Macintosh Open the online Help. Scanner Problems 482
-
 1
1 -
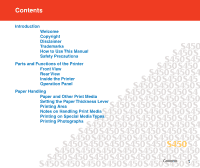 2
2 -
 3
3 -
 4
4 -
 5
5 -
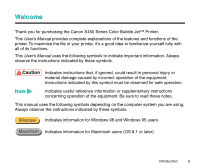 6
6 -
 7
7 -
8
-
9
-
10
-
11
-
12
-
13
-
14
-
15
-
16
-
17
-
18
-
19
-
20
-
21
-
22
-
23
-
24
-
25
-
26
-
27
-
28
-
29
-
30
-
31
-
32
-
33
-
34
-
35
-
36
-
37
-
38
-
39
-
40
-
41
-
42
-
43
-
44
-
45
-
46
-
47
-
48
-
49
-
50
-
51
-
52
-
53
-
54
-
55
-
56
-
57
-
58
-
59
-
60
-
61
-
62
-
63
-
64
-
65
-
66
-
67
-
68
-
69
-
70
-
71
-
72
-
73
-
74
-
75
-
76
-
77
-
78
-
79
-
80
-
81
-
82
-
83
-
84
-
85
-
86
-
87
-
88
-
89
-
90
-
91
-
92
-
93
-
94
-
95
-
96
-
97
-
98
-
99
-
100
-
101
-
102
-
103
-
104
-
105
-
106
-
107
-
108
-
109
-
110
-
111
-
112
-
113
-
114
-
115
-
116
-
117
-
118
-
119
-
120
-
121
-
122
-
123
-
124
-
125
-
126
-
127
-
128
-
129
-
130
-
131
-
132
-
133
-
134
-
135
-
136
-
137
-
138
-
139
-
140
-
141
-
142
-
143
-
144
-
145
-
146
-
147
-
148
-
149
-
150
-
151
-
152
-
153
-
154
-
155
-
156
-
157
-
158
-
159
-
160
-
161
-
162
-
163
-
164
-
165
-
166
-
167
-
168
-
169
-
170
-
171
-
172
-
173
-
174
-
175
-
176
-
177
-
178
-
179
-
180
-
181
-
182
-
183
-
184
-
185
-
186
-
187
-
188
-
189
-
190
-
191
-
192
-
193
-
194
-
195
-
196
-
197
-
198
-
199
-
200
-
201
-
202
-
203
-
204
-
205
-
206
-
207
-
208
-
209
-
210
-
211
-
212
-
213
-
214
-
215
-
216
-
217
-
218
-
219
-
220
-
221
-
222
-
223
-
224
-
225
-
226
-
227
-
228
-
229
-
230
-
231
-
232
-
233
-
234
-
235
-
236
-
237
-
238
-
239
-
240
-
241
-
242
-
243
-
244
-
245
-
246
-
247
-
248
-
249
-
250
-
251
-
252
-
253
-
254
-
255
-
256
-
257
-
258
-
259
-
260
-
261
-
262
-
263
-
264
-
265
-
266
-
267
-
268
-
269
-
270
-
271
-
272
-
273
-
274
-
275
-
276
-
277
-
278
-
279
-
280
-
281
-
282
-
283
-
284
-
285
-
286
-
287
-
288
-
289
-
290
-
291
-
292
-
293
-
294
-
295
-
296
-
297
-
298
-
299
-
300
-
301
-
302
-
303
-
304
-
305
-
306
-
307
-
308
-
309
-
310
-
311
-
312
-
313
-
314
-
315
-
316
-
317
-
318
-
319
-
320
-
321
-
322
-
323
-
324
-
325
-
326
-
327
-
328
-
329
-
330
-
331
-
332
-
333
-
334
-
335
-
336
-
337
-
338
-
339
-
340
-
341
-
342
-
343
-
344
-
345
-
346
-
347
-
348
-
349
-
350
-
351
-
352
-
353
-
354
-
355
-
356
-
357
-
358
-
359
-
360
-
361
-
362
-
363
-
364
-
365
-
366
-
367
-
368
-
369
-
370
-
371
-
372
-
373
-
374
-
375
-
376
-
377
-
378
-
379
-
380
-
381
-
382
-
383
-
384
-
385
-
386
-
387
-
388
-
389
-
390
-
391
-
392
-
393
-
394
-
395
-
396
-
397
-
398
-
399
-
400
-
401
-
402
-
403
-
404
-
405
-
406
-
407
-
408
-
409
-
410
-
411
-
412
-
413
-
414
-
415
-
416
-
417
-
418
-
419
-
420
-
421
-
422
-
423
-
424
-
425
-
426
-
427
-
428
-
429
-
430
-
431
-
432
-
433
-
434
-
435
-
436
-
437
-
438
-
439
-
440
-
441
-
442
-
443
-
444
-
445
-
446
-
447
-
448
-
449
-
450
-
451
-
452
-
453
-
454
-
455
-
456
-
457
-
458
-
459
-
460
-
461
-
462
-
463
-
464
-
465
-
466
-
467
-
468
-
469
-
470
-
471
-
472
-
473
-
474
-
475
-
476
-
477
-
478
-
479
-
480
-
481
-
482
 |
 |