Canon SELPHY CP400 Compact Photo Printer SELPHY CP400 User Guide - Page 11
Printing, p. 31 - windows 10
 |
View all Canon SELPHY CP400 manuals
Add to My Manuals
Save this manual to your list of manuals |
Page 11 highlights
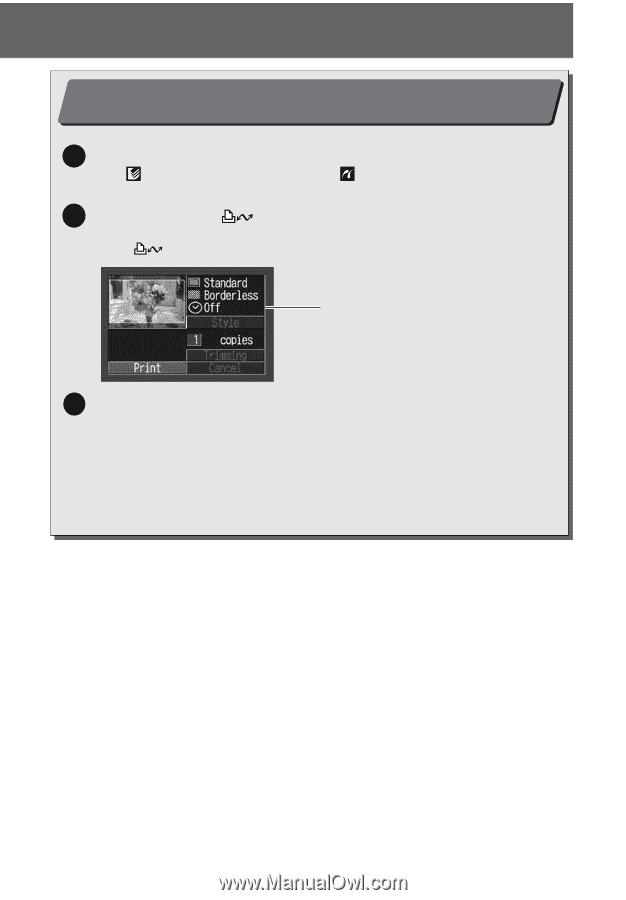
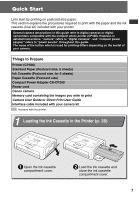
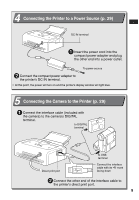
Quick Start (Continued) 6 Printing (p. 31) 1 Turn the camera's power on and display the images. • The (Canon Direct Print) mark or the (PictBridge) mark appears on the upper left corner of the LCD monitor. 2 Press the camera's , SET or SELECT button. • The button to be pressed differs depending on the camera. • If the button is pressed, printing starts immediately. Screen shot of the camera's LCD monitor The screen shot differs depending on the model of your camera. 3 Select [Print] and press the SET or SELECT button. • Printing starts. • The printer's display window blinks blue. With certain camera models, the camera will power up and display its images when it is connected to the printer with the interface cable. For detailed instructions, please refer to the Camera User Guide or Direct Print User Guide that came with your camera. 10
-
 1
1 -
2
-
3
-
4
-
5
-
 6
6 -
 7
7 -
 8
8 -
 9
9 -
 10
10 -
 11
11 -
 12
12 -
 13
13 -
 14
14 -
 15
15 -
 16
16 -
17
-
18
-
19
-
20
-
21
-
22
-
23
-
24
-
25
-
26
-
27
-
28
-
29
-
30
-
31
-
32
-
33
-
34
-
35
-
36
-
37
-
38
-
39
-
40
-
41
-
42
-
43
-
44
-
45
-
46
-
47
-
48
-
49
-
50
-
51
-
52
-
53
-
54
-
55
-
56
-
57
-
58
-
59
-
60
-
61
 |
 |