Canon imageFORMULA ScanFront 300 ScanFront 300/300P Setup Guide - Page 24
Scanning Procedure, Operation Guide, ScanFront 300/300P INSTRUCTIONS
 |
View all Canon imageFORMULA ScanFront 300 manuals
Add to My Manuals
Save this manual to your list of manuals |
Page 24 highlights
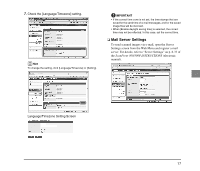
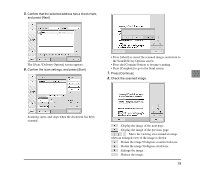
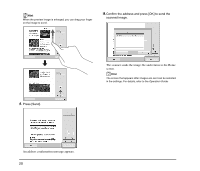
6. Scanning Procedure This section gives an overview of the procedure for sending scanned images from the Home screen. For more details, refer to the Operation Guide or the ScanFront 300/300P INSTRUCTIONS (electronic manual). 1. Place a document in the scanner. 2. Select a transfer destination by pressing a destination button. The [Address selection] screen appears. Hint You can change the transfer destination from the [Address selection] screen. 3. Press one of the displayed addresses to select it. Hint • You can change the transfer destination by changing the [Address type]. • The following icons are used to indicate the types of address. :E-mail :Shared folder :Fax :FTP :Group • Pressing an address adds a checkmark ( ) to the icon and selects the address. Pressing a selected address again clears the selection. • Each time you press an e-mail or group icon, the send condition changes (To, Cc, Bcc). :To :Cc :Bcc :Selection cleared IMPORTANT If an address has a shaded background but no check mark, it is not selected. 4. If there are no addresses registered in the address book, press [Edit] to register addresses. Hint If the address you want to register is for your private use, register it in My Address Book. For details, refer to "Registering and Editing Addresses" on p. 3-22 of the Operation Guide. 18
-
 1
1 -
2
-
3
-
4
-
5
-
6
-
7
-
8
-
9
-
10
-
11
-
12
-
13
-
14
-
15
-
16
-
17
-
18
-
 19
19 -
 20
20 -
 21
21 -
 22
22 -
 23
23 -
 24
24 -
 25
25 -
 26
26 -
 27
27 -
 28
28
 |
 |
