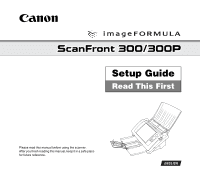
Canon imageFORMULA ScanFront 300 ScanFront 300/300P Setup Guide - Page 6

Table of Contents, Turning the Power ON and OFF

Page 6 highlights

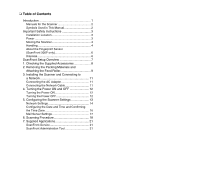
❏ Table of Contents Introduction 1 Manuals for the Scanner 2 Symbols Used in This Manual 2 Important Safety Instructions 3 Installation Location 3 Power 3 Moving the Scanner 4 Handling 4 About the Fingerprint Sensor (ScanFront 300P only 6 Disposal 6 ScanFront Setup Overview 7 1. Checking the Supplied Accessories 8 2. Removing the Packing Materials and Attaching the Feed Roller 9 3. Installing the Scanner and Connecting to a Network 11 Connecting the AC Adapter 11 Connecting the Network Cable 11 4. Turning the Power ON and OFF 12 Turning the Power ON 12 Turning the Power OFF 12 5. Configuring the Scanner Settings 13 Network Settings 14 Configuring the Date and Time and Confirming the Time Zone 16 Mail Server Settings 17 6. Scanning Procedure 18 7. Supplied Applications 21 ScanFront Service 21 ScanFront Administration Tool 21

  • 1
  • 2
  • 3
  • 4
  • 5
  • 6
  • 7
  • 8
  • 9
  • 10
  • 11
  • 12
  • 13
  • 14
  • 15
  • 16
  • 17
  • 18
  • 19
  • 20
  • 21
  • 22
  • 23
  • 24
  • 25
  • 26
  • 27
  • 28

Table of Contents
Introduction
.............................................................
1
Manuals for the Scanner
.........................................
2
Symbols Used in This Manual
.................................
2
Important Safety Instructions
..................................
3
Installation Location
.................................................
3
Power
......................................................................
3
Moving the Scanner
.................................................
4
Handling
..................................................................
4
About the Fingerprint Sensor
(ScanFront 300P only)
.............................................
6
Disposal
...................................................................
6
ScanFront Setup Overview
.....................................
7
1. Checking the Supplied Accessories
....................
8
2. Removing the Packing Materials and
Attaching the Feed Roller
....................................
9
3. Installing the Scanner and Connecting to
a Network
..........................................................
11
Connecting the AC Adapter
...................................
11
Connecting the Network Cable
..............................
11
4. Turning the Power ON and OFF
.......................
12
Turning the Power ON
...........................................
12
Turning the Power OFF
.........................................
12
5. Configuring the Scanner Settings
.....................
13
Network Settings
...................................................
14
Configuring the Date and Time and Confirming
the Time Zone
.......................................................
16
Mail Server Settings
..............................................
17
6. Scanning Procedure
..........................................
18
7. Supplied Applications
........................................
21
ScanFront Service
.................................................
21
ScanFront Administration Tool
..............................
21