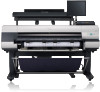
Canon imagePROGRAF iPF815 MFP M40 iPF815/iPF825 Setup Guide - Page 5
Install the Printhead
 |
View all Canon imagePROGRAF iPF815 MFP M40 manuals
Add to My Manuals
Save this manual to your list of manuals |
Page 5 highlights
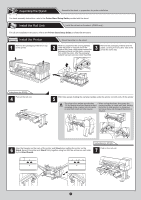
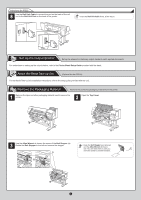
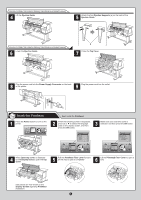
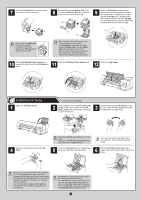
Instructions for Models That Include the Stationary Output Stacker as a Standard Accessory 4 Lift the Ejection Guide. 5 Attach the four Ejection Supports (a) on the back of the Ejection Guide. Instructions for Models That Include the Stationary Output Stacker as a Standard Accessory 6 Lower the Ejection Guide. a 7 Close the Top Cover. 8 Plug the power cord into the Power Supply Connector on the back of the printer. 9 Plug the power cord into the outlet. Install the Printhead 1 Press the Power button to turn on the printer. OK Next, install the Printhead. 2 When the following screen is displayed, press ▲ or ▼ to select the language used on the display screen, and then press the OK button. Language English ᣣᧄ⺆ Français Italiano Deutsch Español 3 Make sure your local time zone is selected, and then press the OK button. Time Zone 0:London (GMT) +1:Paris,Rome +2:Athens,Cairo +3:Moscow +4:Eerevan,Baku +5:Islamabad Language English ᣣᧄ⺆ Français Italiano Deutsch Español OK Time Zone 0:London (GMT) +1:Paris,Rome +2:Athens,Cairo +3:Moscow +4:Eerevan,Baku +5:Islamabad OK 4 When Open top cover. is displayed on the Display Screen, open the Top Cover. 5 Pull the Printhead Fixer Lever forward all the way to open it completely. 6 Lift the Printhead Fixer Cover to open it fully. Instructions are now shown on the Display Screen regarding Printhead installation. 5
-
 1
1 -
 2
2 -
 3
3 -
 4
4 -
 5
5 -
 6
6 -
 7
7 -
 8
8 -
 9
9 -
 10
10 -
 11
11 -
12
-
13
-
14
-
15
-
16
 |
 |
