Casio PX-320CS User Guide - Page 14
Layering Two Tones, Splitting the Keyboard, between Two Tones
 |
UPC - 079767343255
View all Casio PX-320CS manuals
Add to My Manuals
Save this manual to your list of manuals |
Page 14 highlights
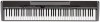
Selecting and Playing a Tone Layering Two Tones Use the following procedure to layer two tones, so they sound at the same time. The tone you specify first is called the "main tone", while the tone you specify second is called the "layered tone". 1. While holding down the TONE button of the tone that corresponds to the main tone, press the button that corresponds to the layered tone. Example: While holding down the GRAND PIANO (CLASSIC) button, press the SYNTH-VOICE button. GRAND PIANO (CLASSIC) SYNTH-VOICE NOTE • If you use the VARIOUS/GM TONES button to assign either of the above tones, the tone currently assigned to the VARIOUS/GM TONES button will appear on the display while the button is depressed. Note that a different tone number appears depending on whether you press the VARIOUS/GM TONES button first (to assign it as the main tone) or second (to assign it as the layered tone). • While you are holding down the VARIOUS/GM TONES button and its tone number is displayed, you can change the currently assigned tone using the T/NO and S/YES buttons. 2. To unlayer the keyboard, press any one of the TONE buttons. NOTE • You can adjust the balance between the main tone and layered tone. See "Other Settings" on page E-32 for more information. • You cannot layer the keyboard while in the Duet Mode or when recording to Track 2 on the digital piano. Splitting the Keyboard between Two Tones You can assign different tones to keys on the left side (low range) and the right side (high range) of the keyboard. Split point Low range High range STRINGS GRAND PIANO (CLASSIC) 1. Press the TONE button of the tone you want to select for the high range. Example: GRAND PIANO (CLASSIC) 2. Press the SPLIT button. • This will cause the SPLIT lamp to light. 3. Press the TONE button of the tone you want to select for the low range. Example: STRINGS 4. After you are finished using the split keyboard, press the SPLIT button again to unsplit it. • This will cause the SPLIT lamp to go out. NOTE • You can configure the keyboard so it is layered with two tones in the high range. To do this, first perform the layer operation in the left side of this page. After that, split the keyboard as described above. • You cannot split the keyboard while in the Duet Mode or when recording to Track 2 on the digital piano. E-12
-
 1
1 -
2
-
3
-
4
-
5
-
6
-
7
-
8
-
 9
9 -
 10
10 -
 11
11 -
 12
12 -
 13
13 -
 14
14 -
 15
15 -
 16
16 -
 17
17 -
 18
18 -
 19
19 -
20
-
21
-
22
-
23
-
24
-
25
-
26
-
27
-
28
-
29
-
30
-
31
-
32
-
33
-
34
-
35
-
36
-
37
-
38
-
39
-
40
-
41
-
42
-
43
-
44
-
45
-
46
-
47
-
48
-
49
-
50
-
51
-
52
-
53
-
54
-
55
-
56
-
57
-
58
-
59
-
60
-
61
-
62
 |
 |
