Cisco C3230-1W-49-K9 Hardware Guide - Page 26
Protective End Cap Cover Installation, Step 1
 |
View all Cisco C3230-1W-49-K9 manuals
Add to My Manuals
Save this manual to your list of manuals |
Page 26 highlights
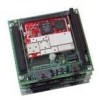
Chapter 1 Cisco 3200 Rugged Enclosures To attach the protective end cap cover to the enclosure, follow these steps (see Figure 1-10). Figure 1-10 Protective End Cap Cover Installation 1 2 6 4 5 3 170106 1 Hinge bracket 3 Cable/service loop cavity 5 Gasket 2 Hinge point 4 NEC pass-through 6 Cap mounting Step 1 Step 2 Step 3 Step 4 Step 5 Step 6 Step 7 Loosen the end cap mounting hardware (four 1/4-20 bolts), but do not remove the bolts. Slide the hinge brackets onto the right side and the left side of the end cap cover. The mounting tabs should slide under the loosened bolts. Re-torque the two loosened bolts on the right side of the end cap cover to between 58 and 68 in-lb. Ensure that the gasket is fully seated in the protective end cap cover. Close the cover on the protective end cap cover and ensure that it is fully seated. Re-torque the end cap cover bolts on left side of the end cap cover to between 58 and 68 in-lb. Tighten the 8-32 protective cover screws (18 in-lb) until they are seated. For sealing, we recommend Liquid Tight Connector, which is described at the following URL: http://www.newark.com/NewarkWebCommerce/newark/en_US/mfr/brands.jsp?mfg=HUBB 1-14 Cisco 3200 Series Router Hardware Reference OL-5816-10
-
 1
1 -
2
-
3
-
4
-
5
-
6
-
7
-
8
-
9
-
10
-
11
-
12
-
13
-
14
-
15
-
16
-
17
-
18
-
19
-
20
-
 21
21 -
 22
22 -
 23
23 -
 24
24 -
 25
25 -
 26
26 -
 27
27 -
 28
28 -
 29
29 -
 30
30 -
 31
31 -
32
-
33
-
34
-
35
-
36
-
37
-
38
-
39
-
40
-
41
-
42
-
43
-
44
-
45
-
46
-
47
-
48
-
49
-
50
-
51
-
52
-
53
-
54
-
55
-
56
-
57
-
58
-
59
-
60
-
61
-
62
-
63
-
64
-
65
-
66
-
67
-
68
-
69
-
70
-
71
-
72
-
73
-
74
-
75
-
76
-
77
-
78
-
79
-
80
-
81
-
82
-
83
-
84
-
85
-
86
-
87
-
88
-
89
-
90
-
91
-
92
-
93
-
94
 |
 |
