Compaq 301042-003 Compaq TFT1501 15-Inch LCD Monitor User Guide - Page 18
Selecting Items in the OSD Menu, Making Adjustments in the OSD Menu
 |
UPC - 613326544143
View all Compaq 301042-003 manuals
Add to My Manuals
Save this manual to your list of manuals |
Page 18 highlights
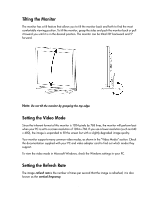
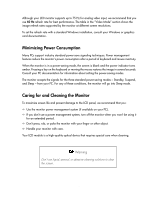
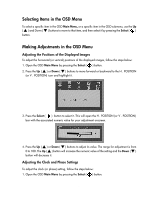
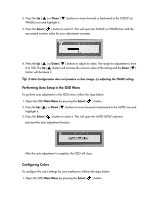
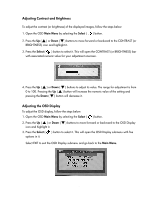
Selecting Items in the OSD Menu To select a specific item in the OSD Main Menu, or a specific item in the OSD submenu, use the Up ( ▲ ) and Down ( ▼ ) buttons to move to that item, and then select it by pressing the Select ( ) button. Making Adjustments in the OSD Menu Adjusting the Positions of the Displayed Images To adjust the horizontal (or vertical) positions of the displayed images, follow the steps below: 1. Open the OSD Main Menu by pressing the Select ( ) button. 2. Press the Up ( ▲ ) or Down ( ▼ ) buttons to move forward or backward to the H . POSITION (or V . POSITION) icon and highlight it. 3. Press the Select ( ) button to select it. This will open the H . POSITION (or V . POSITION) bar with the associated numeric value for your adjustment onscreen. 4. Press the Up ( ▲ ) or Down ( ▼ ) buttons to adjust its value. The range for adjustment is from 0 to 100. The Up ( ▲ ) button will increase the numeric value of the setting and the Down ( ▼ ) button will decrease it. Adjusting the Clock and Phase Settings To adjust the clock (or phase) setting, follow the steps below: 1. Open the OSD Main Menu by pressing the Select ( ) button. 14
-
 1
1 -
2
-
3
-
4
-
5
-
6
-
7
-
8
-
9
-
10
-
11
-
12
-
 13
13 -
 14
14 -
 15
15 -
 16
16 -
 17
17 -
 18
18 -
 19
19 -
 20
20 -
 21
21 -
 22
22 -
 23
23 -
24
-
25
-
26
-
27
-
28
-
29
-
30
-
31
-
32
-
33
-
34
-
35
-
36
-
37
-
38
 |
 |