Cuisinart CBT-1000 CBT-1000 Manual - Page 6
Operation - poweredge parts
 |
UPC - 086279024626
View all Cuisinart CBT-1000 manuals
Add to My Manuals
Save this manual to your list of manuals |
Page 6 highlights
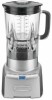
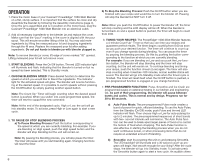
OPERATION 1. Place the motor base of your Cuisinart® PowerEdge® 1000-Watt Blender on a flat, sturdy surface. It is important that the surface be clean and dry. Assemble the blender by following the Assembly instructions (page 4). Once the jar is assembled and is in position on the motor base, plug the Cuisinart® PowerEdge® 1000-Watt Blender into an electrical outlet. 2. Add all necessary ingredients to the blender jar and replace the cover. Make sure that the "pour" marking in the cover is aligned with the pour spout. This will ensure smoother lifting of the lid. You may add more ingredients by lifting the measured pour lid and dropping ingredients through the fill area. Replace the measured pour lid after adding ingredients. Do not put hands in blender jar with blender plugged in. Note: To remove blender jar cover, lift edge of cover marked "lift" upward. Lifting measured pour lid will not remove cover. 3. START BLENDING: Press the On/Off button. The red LED indicator light will illuminate and flash, indicating that the blender is turned on but no speed has been selected. This is Standby mode. 4. CHOOSE BLENDING SPEED: Press desired function to determine the speed at which you would like to blend the ingredients. The indicator light for the activated speed will glow. The blender will now be functioning at the desired speed. It is possible to switch speeds without pressing the On/Off button by simply pushing another speed button. Note: The Count Up™ Timer will begin counting when the desired speed button is pushed. When you switch into a pre-programmed speed, the timer will reset to support the new command. Note: At the end of the designated cycle, High or Low, the unit will go into standby mode. To activate, press High or Low again to start a new cycle. 5. TO PAUSE OR STOP BLENDING PROCESS a) To Pause Blending Process: Push the button corresponding to the speed at which you are currently blending. For example: If you are blending on High speed, push the High speed button and the blender will stop blending but the unit will remain on. Note: By pausing the blending process, you will also pause the timer. The timer will pause until you start blending again. Changing functions will reset the timer. b) To Stop the Blending Process: Push the On/Off button when you are finished with your recipe and would like to turn the blender off. Pausing will stop the blender but NOT turn it off. Note: When you push the On/Off button to power the blender off, the timer will stop counting and the LCD display will be off. When the blender is turned back on and a speed button is pushed, the timer will begin to count from 0:00. 6. TIMING YOUR RECIPES: The PowerEdge® 1000-Watt Blender features a 4-minute Count-Up™ Timer so that you can time your recipes and guarantee perfect results. The timer begins counting from 0:00 as soon as you push your desired function. The timer will continue to count up even if you change speeds during blending. You can pause the timer by pausing the blending process. Do this by pushing the button corresponding to the function at which you are currently blending. For example: If you are blending on Low and you push the Low function button, the blender will stop blending and the timer will stop counting, but the unit will remain on. To continue blending and timing your recipe, push the function chosen (Low) again. The timer will also stop counting when it reaches 4:00 minutes, and an audible chime will sound. The blender will go into Standby mode when the timed cycle is finished. The timer will reset itself when the On/Off button is pushed, a pre-programmed function is engaged or you change functions. 7. PRE-PROGRAMMED FUNCTIONS: Pulse, Smoothie and Ice Crush are programmed based on extensive testing in our kitchen and engineering lab. As part of their programming, the blender will pause between bursts and cycles. This is normal and by design. Programs run for 20 to 60 seconds. a) Auto Pulse Mode: The pre-programmed Pulse mode creates a burst of power for quick, efficient blending. To use the Auto Pulse, from the Standby (On/Off) mode, push Pulse and the red LED indicator will flash. Then choose High or Low for auto-pulsing for up to 2 minutes. The pre-programmed sequences of short bursts with two- second intervals will commence. The Auto Pulse function can be used to break apart larger pieces of food or to control the texture of food when chopping. The Auto Pulse function is also effective in starting the blending process when you do not want continuous power, or when processing items that do not require an extended amount of blending. b) Smoothie: start by powering the unit on and pressing Smoothie. The LED backlight will illuminate and a 30-second count-up program will begin. Not smooth enough for your liking? After the cycle stops, the blender will go into Standby mode. To activate press the Smoothie button again to start a new cycle. An audible chime 6
-
 1
1 -
 2
2 -
 3
3 -
 4
4 -
 5
5 -
 6
6 -
 7
7 -
 8
8 -
 9
9 -
 10
10 -
 11
11 -
 12
12 -
13
-
14
-
15
-
16
-
17
-
18
-
19
-
20
-
21
-
22
-
23
-
24
-
25
-
26
-
27
-
28
-
29
 |
 |