Dacor EO230 Installation Instructions - Page 15
Install the Oven in the Cabinet
 |
View all Dacor EO230 manuals
Add to My Manuals
Save this manual to your list of manuals |
Page 15 highlights
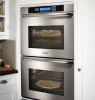
Installation Instructions 3. Raise the door so that it is at a 15° angle from the front of the oven. Hold the door with one hand on each side. Lift the door up and out. Door Gripping Points Install the Oven in the Cabinet warning • Use an appliance dolly to move the appliance when installing it or removing it from the wall for service. Use of an appliance dolly will minimize the risk of personal injury as a result of the oven tipping. • Failure to install the mounting screws may result in movement or tipping of the oven during use, or personal injury. • Do not block the oven air exhaust and intake located at the bottom of the oven door(s). Blocking the airflow may cause cabinet damage and poor baking performance. 2. Support the oven at all times until it is secured into the cabinet. Be certain to take all necessary safety precautions. 3. Resting the oven on the cabinet support platform, slide the oven into the recessed area until the rear edge of the oven trim post is flush with the cabinet face and the oven is centered within the cutout. Ensure that the electrical conduit slides through the opening in the cabinet platform or coils above the oven chassis as the oven is slid into place. Do not trap the appliance cable between the oven case back and the rear wall. 4. Make sure the oven is resting level. Shim it if necessary. warning When installing the mounting screws into composite cabinets, install them into the sides of the cabinet only. Mounting screws installed into the front of composite cabinets will have a tendency to pull loose. 5. Find the mounting hole locations in the front and side of the oven trim posts. Drill 1/16" pilot holes in the cabinet through the front or side of the trim posts. Single oven models require four (4) holes, while double oven models require six (6). 6. Install the #6 x 3/4" screws provided in the instructions envelope. Do not over-tighten. IMPORTANT An oven that is not level may provide poor or inconsistent baking results. 1. Lift the oven up to the cabinet cutout using the handles and gripping points shown. Use extreme caution when lifting the appliance, because it is heavy. Trim post Handle Gripping points Trim post Gripping point 13
-
 1
1 -
2
-
3
-
4
-
5
-
6
-
7
-
8
-
9
-
 10
10 -
 11
11 -
 12
12 -
 13
13 -
 14
14 -
 15
15 -
 16
16 -
 17
17 -
 18
18 -
 19
19 -
 20
20
 |
 |
