Dacor EO230 Installation Instructions - Page 17
Installation Checklist
 |
View all Dacor EO230 manuals
Add to My Manuals
Save this manual to your list of manuals |
Page 17 highlights
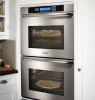
Installation Instructions Lower lip of hinge receptacle Notch on bottom of hinge Door Installation Installation Checklist warning • To ensure a safe and proper installation, the following checklist should be completed by the installer to ensure that no part of the installation has been overlooked. • Proper installation is the responsibility of the homeowner. The importance of proper installation of your Dacor oven cannot be overemphasized. □□ Oven is wired to all applicable codes and Dacor specifications. See pages 9 and 10. □□ Oven is level. See page 13. □□ Oven is secured into cabinet with included screws. See page 13. □□ Exhaust deflector has been installed. See page 14. □□ Oven door(s) have been properly re-installed. See page 14. □□ Plastic coating, if applicable, has been removed from outside of oven. □□ All packaging materials have been removed from inside the oven. □□ Power is turned on at circuit breaker or fuse box. □□ Proper oven operation has been verified. See page 14. □□ Problems have been noted on the warranty card or during the on-line activation. Warranty has been activated on-line or the warranty card has been filled out completely and mailed. 15
-
 1
1 -
2
-
3
-
4
-
5
-
6
-
7
-
8
-
9
-
10
-
11
-
 12
12 -
 13
13 -
 14
14 -
 15
15 -
 16
16 -
 17
17 -
 18
18 -
 19
19 -
 20
20
 |
 |
