Dell Force10 E600i E600 TeraScale Installation Guide - Page 17
Installing the Chassis into an Equipment Cabinet
 |
View all Dell Force10 E600i manuals
Add to My Manuals
Save this manual to your list of manuals |
Page 17 highlights
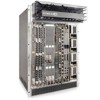
To install the chassis into a prepared rack: Step Task 1 If you are center or rear mounting the chassis in a 19-inch rack, make sure that the mounting brackets are properly positioned. NOTE: If your are mounting the chassis in a 23-inch rack, install the 23-inch adapters. 2 Using a hand cart, pallet jack, or forklift, align the rack-mount holes with the equipment rack holes, situating the chassis on top of the equipment rack shelf bar. 3 Insert rack mounting screws in the holes that are not obscured by the front shipping cover. Tighten the screws. See Figure 4-2. 4 Loosen and remove the screws attaching the front shipping cover. Remove the cover. 5 Insert the remaining rack mounting screws and tighten to secure the chassis in the rack. Installing the Chassis into an Equipment Cabinet Install the E600i system after you secure the rack shelf bar. Load the chassis into the lower half of an empty rack to avoid a top-heavy rack. (Figure 4-2). Make sure the cabinet is positioned with adequate space in the front, rear, and sides of the unit for proper ventilation, access to cables, and access for maintenance. See Rack Mounting the Chassis on page 16 for details. To install the chassis into an equipment cabinet: Step Task 1 Install the equipment rack shelf bar. 2 Using a hand cart, pallet jack, or forklift, align the rack-mount holes with the cabinet holes. 3 Insert rack mounting screws in the holes that are not obscured by the front shipping cover. Tighten the screws. 4 Loosen and remove the screws attaching the front shipping cover. Remove the cover. 5 Insert the remaining mounting screws and tighten to secure the chassis in the cabinet. Installing the Chassis | 17
-
 1
1 -
2
-
3
-
4
-
5
-
6
-
7
-
8
-
9
-
10
-
11
-
 12
12 -
 13
13 -
 14
14 -
 15
15 -
 16
16 -
 17
17 -
 18
18 -
 19
19 -
 20
20 -
 21
21 -
 22
22 -
23
-
24
-
25
-
26
-
27
-
28
-
29
-
30
-
31
-
32
-
33
-
34
-
35
-
36
-
37
-
38
-
39
-
40
-
41
-
42
-
43
-
44
-
45
-
46
-
47
-
48
-
49
-
50
-
51
-
52
-
53
-
54
-
55
-
56
-
57
-
58
-
59
-
60
-
61
-
62
-
63
-
64
-
65
-
66
-
67
-
68
-
69
-
70
-
71
-
72
-
73
-
74
-
75
-
76
 |
 |
