Dell Force10 S60-44T Installing the S60 System - Page 13
Install the S60 System, Install the S60 System in a Rack or Cabinet, Attach the Mounting Brackets
 |
View all Dell Force10 S60-44T manuals
Add to My Manuals
Save this manual to your list of manuals |
Page 13 highlights
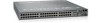
3 Install the S60 System To install the S60 system, Dell Force10 recommends completing the installation procedures in the order presented in this chapter. Always handle the S60 system and its components with care. Avoid dropping the system or its Field Replaceable Units (FRUs). This chapter describes the installation procedures as follows: 1 Install the S60 System in a Rack or Cabinet a Attach the Mounting Brackets b Install the Chassis into the Rack or Cabinet 2 Attach the Ground Cable 3 Insert Optional Modules 4 Connect Stacking Ports (Optional) 5 Supply Power and Power Up the System WARNING: Electrostatic discharge (ESD) damage can occur if the components are mishandled. Always wear an ESD-preventive wrist or heel ground strap when handling the S60 system and its components. As with all electrical devices, take all the necessary safety precautions to prevent injury when installing this system. Install the S60 System in a Rack or Cabinet Attach the Mounting Brackets The S60 system is shipped with mounting brackets (rack ears) and the required screws for rack or cabinet installation. The brackets are enclosed in a package with the chassis. NOTE: Dell Force10 recommends attaching the brackets to the front of the chassis on the Power Supply Unit (PSU) side. This provides the greatest weight support for the chassis in the rack or cabinet and is in compliance with Bellcore Zone 4 earthquake requirements. Install the S60 System | 13
-
 1
1 -
2
-
3
-
4
-
5
-
6
-
7
-
 8
8 -
 9
9 -
 10
10 -
 11
11 -
 12
12 -
 13
13 -
 14
14 -
 15
15 -
 16
16 -
 17
17 -
 18
18 -
19
-
20
-
21
-
22
-
23
-
24
-
25
-
26
-
27
-
28
-
29
-
30
-
31
-
32
-
33
-
34
-
35
-
36
-
37
-
38
-
39
-
40
-
41
-
42
-
43
-
44
-
45
-
46
-
47
-
48
-
49
-
50
-
51
-
52
-
53
-
54
 |
 |
