Dell Inspiron 9100 Service Manual - Page 42
the four tabs along the front edge of the keyboard into the palm rest, and then
 |
View all Dell Inspiron 9100 manuals
Add to My Manuals
Save this manual to your list of manuals |
Page 42 highlights
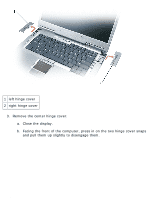
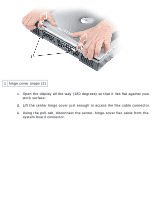
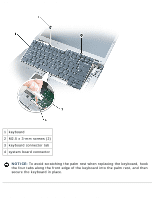
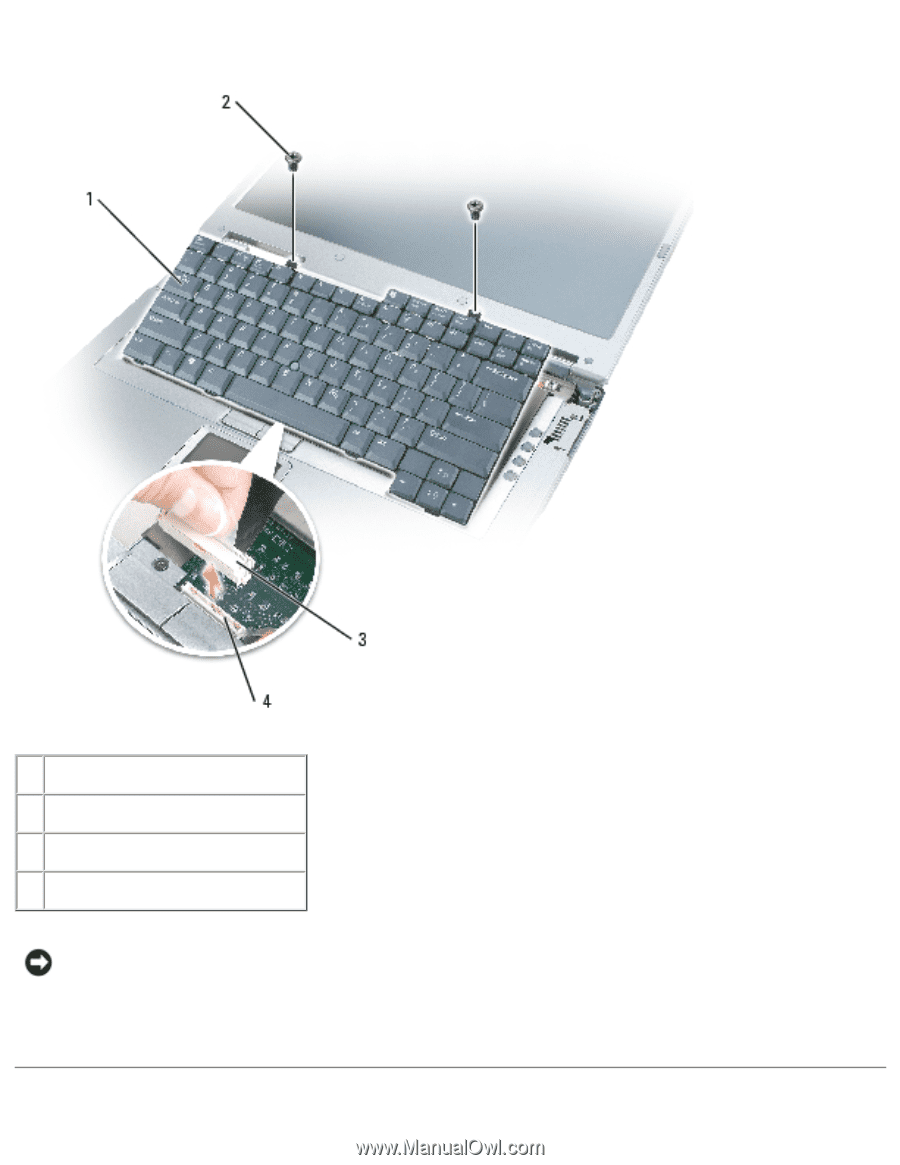
Keyboard: Dell Inspiron XPS and Inspiron 9100 Service Manual 1 keyboard 2 M2.5 x 3-mm screws (2) 3 keyboard connector tab 4 system board connector NOTICE: To avoid scratching the palm rest when replacing the keyboard, hook the four tabs along the front edge of the keyboard into the palm rest, and then secure the keyboard in place. file:///F|/Service%20Manuals/Dell/Inspiron/9100/keyboard.htm (2 of 3) [2/28/2004 7:45:52 AM]
-
 1
1 -
2
-
3
-
4
-
5
-
6
-
7
-
8
-
9
-
10
-
11
-
12
-
13
-
14
-
15
-
16
-
17
-
18
-
19
-
20
-
21
-
22
-
23
-
24
-
25
-
26
-
27
-
28
-
29
-
30
-
31
-
32
-
33
-
34
-
35
-
36
-
 37
37 -
 38
38 -
 39
39 -
 40
40 -
 41
41 -
 42
42 -
 43
43 -
 44
44 -
 45
45 -
 46
46 -
 47
47 -
48
-
49
-
50
-
51
-
52
-
53
-
54
-
55
-
56
-
57
-
58
-
59
-
60
-
61
-
62
-
63
-
64
-
65
-
66
-
67
-
68
-
69
-
70
-
71
-
72
-
73
-
74
-
75
-
76
-
77
-
78
-
79
-
80
-
81
-
82
-
83
-
84
-
85
-
86
-
87
 |
 |
Keyboard: Dell Inspiron XPS and Inspiron 9100 Service Manual
1 keyboard
2
M2.5 x 3-mm screws (2)
3
keyboard connector tab
4
system board connector
NOTICE:
To avoid scratching the palm rest when replacing the keyboard, hook
the four tabs along the front edge of the keyboard into the palm rest, and then
secure the keyboard in place.
file:///F|/Service%20Manuals/Dell/Inspiron/9100/keyboard.htm (2 of 3) [2/28/2004 7:45:52 AM]