Dell Inspiron 9100 Service Manual - Page 79
the right side, swinging it up, then lift the left side and draw the system board
 |
View all Dell Inspiron 9100 manuals
Add to My Manuals
Save this manual to your list of manuals |
Page 79 highlights
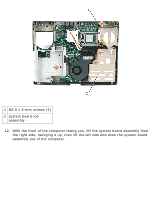
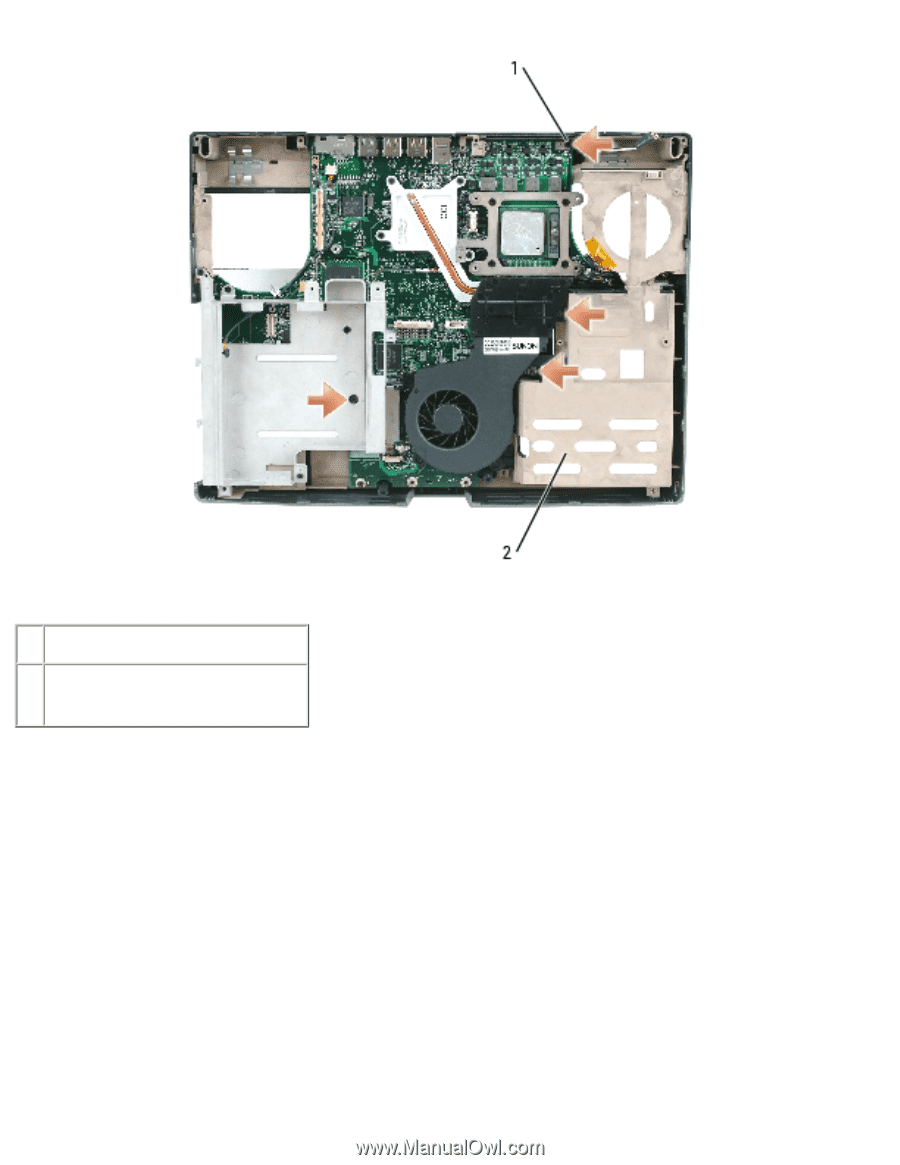
System Board: Dell Inspiron XPS and Inspiron 9100 Service Manual 1 M2.5 x 6-mm screws (4) 2 system board top assembly 12. With the front of the computer facing you, lift the system board assembly from the right side, swinging it up, then lift the left side and draw the system board assembly out of the computer. file:///F|/Service%20Manuals/Dell/Inspiron/9100/sysboard.htm (3 of 5) [2/28/2004 7:46:01 AM]
-
 1
1 -
2
-
3
-
4
-
5
-
6
-
7
-
8
-
9
-
10
-
11
-
12
-
13
-
14
-
15
-
16
-
17
-
18
-
19
-
20
-
21
-
22
-
23
-
24
-
25
-
26
-
27
-
28
-
29
-
30
-
31
-
32
-
33
-
34
-
35
-
36
-
37
-
38
-
39
-
40
-
41
-
42
-
43
-
44
-
45
-
46
-
47
-
48
-
49
-
50
-
51
-
52
-
53
-
54
-
55
-
56
-
57
-
58
-
59
-
60
-
61
-
62
-
63
-
64
-
65
-
66
-
67
-
68
-
69
-
70
-
71
-
72
-
73
-
 74
74 -
 75
75 -
 76
76 -
 77
77 -
 78
78 -
 79
79 -
 80
80 -
 81
81 -
 82
82 -
 83
83 -
 84
84 -
85
-
86
-
87
 |
 |
System Board: Dell Inspiron XPS and Inspiron 9100 Service Manual
1
M2.5 x 6-mm screws (4)
2
system board top
assembly
12.
With the front of the computer facing you, lift the system board assembly from
the right side, swinging it up, then lift the left side and draw the system board
assembly out of the computer.
file:///F|/Service%20Manuals/Dell/Inspiron/9100/sysboard.htm (3 of 5) [2/28/2004 7:46:01 AM]