Dell Inspiron One19 Dell™ Technology Guide - Page 118
Windows XP, Running Backup When the Settings Have Been Precon d, Start, Wizard, Backup or
 |
View all Dell Inspiron One19 manuals
Add to My Manuals
Save this manual to your list of manuals |
Page 118 highlights
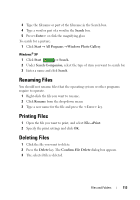
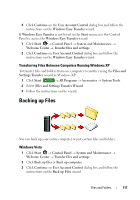
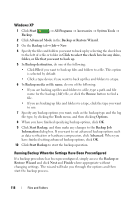
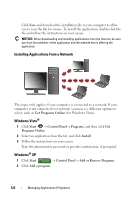
Windows XP 1 Click Start Backup. → All Programs → Accessories → System Tools → 2 Click Advanced Mode in the Backup or Restore Wizard. 3 On the Backup tab→ Job→ New. 4 Specify the files and folders you want to back up by selecting the check box to the left of a file or folder in Click to select the check box for any drive, folder, or file that you want to back up. 5 In Backup destination, do one of the following: • Click File if you want to back up files and folders to a file. This option is selected by default. • Click a tape device if you want to back up files and folders to a tape. 6 In Backup media or file name, do one of the following: • If you are backing up files and folders to a file, type a path and file name for the backup (.bkf) file, or click the Browse button to find a file. • If you are backing up files and folders to a tape, click the tape you want to use. 7 Specify any backup options you want, such as the backup type and the log file type, by clicking the Tools menu, and then clicking Options. 8 When you have finished specifying backup options, click OK. 9 Click Start Backup, and then make any changes to the Backup Job Information dialog box. If you want to set advanced backup options such as data verification or hardware compression, click Advanced. When you have finished setting advanced backup options, click OK. 10 Click Start Backup to start the backup operation. Running Backup When the Settings Have Been Preconfigured If a backup procedure has been preconfigured, simply access the Backup or Restore Wizard and click Next and Finish where appropriate without changing settings. The wizard will take you through the options and then start the backup process. 118 Files and Folders
-
 1
1 -
2
-
3
-
4
-
5
-
6
-
7
-
8
-
9
-
10
-
11
-
12
-
13
-
14
-
15
-
16
-
17
-
18
-
19
-
20
-
21
-
22
-
23
-
24
-
25
-
26
-
27
-
28
-
29
-
30
-
31
-
32
-
33
-
34
-
35
-
36
-
37
-
38
-
39
-
40
-
41
-
42
-
43
-
44
-
45
-
46
-
47
-
48
-
49
-
50
-
51
-
52
-
53
-
54
-
55
-
56
-
57
-
58
-
59
-
60
-
61
-
62
-
63
-
64
-
65
-
66
-
67
-
68
-
69
-
70
-
71
-
72
-
73
-
74
-
75
-
76
-
77
-
78
-
79
-
80
-
81
-
82
-
83
-
84
-
85
-
86
-
87
-
88
-
89
-
90
-
91
-
92
-
93
-
94
-
95
-
96
-
97
-
98
-
99
-
100
-
101
-
102
-
103
-
104
-
105
-
106
-
107
-
108
-
109
-
110
-
111
-
112
-
 113
113 -
 114
114 -
 115
115 -
 116
116 -
 117
117 -
 118
118 -
 119
119 -
 120
120 -
 121
121 -
 122
122 -
 123
123 -
124
-
125
-
126
-
127
-
128
-
129
-
130
-
131
-
132
-
133
-
134
-
135
-
136
-
137
-
138
-
139
-
140
-
141
-
142
-
143
-
144
-
145
-
146
-
147
-
148
-
149
-
150
-
151
-
152
-
153
-
154
-
155
-
156
-
157
-
158
-
159
-
160
-
161
-
162
-
163
-
164
-
165
-
166
-
167
-
168
-
169
-
170
-
171
-
172
-
173
-
174
-
175
-
176
-
177
-
178
-
179
-
180
-
181
-
182
-
183
-
184
-
185
-
186
-
187
-
188
-
189
-
190
-
191
-
192
-
193
-
194
-
195
-
196
-
197
-
198
-
199
-
200
-
201
-
202
-
203
-
204
-
205
-
206
-
207
-
208
-
209
-
210
-
211
-
212
-
213
-
214
-
215
-
216
-
217
-
218
-
219
-
220
-
221
-
222
-
223
-
224
-
225
-
226
-
227
-
228
-
229
-
230
-
231
-
232
-
233
-
234
-
235
-
236
-
237
-
238
-
239
-
240
-
241
-
242
-
243
-
244
-
245
-
246
-
247
-
248
-
249
-
250
-
251
-
252
-
253
-
254
-
255
-
256
-
257
-
258
-
259
-
260
-
261
-
262
-
263
-
264
-
265
-
266
-
267
-
268
-
269
-
270
-
271
-
272
-
273
-
274
-
275
-
276
-
277
-
278
-
279
-
280
-
281
-
282
-
283
-
284
-
285
-
286
-
287
-
288
-
289
-
290
-
291
-
292
-
293
-
294
-
295
-
296
-
297
-
298
-
299
-
300
-
301
-
302
-
303
-
304
-
305
-
306
-
307
-
308
-
309
-
310
-
311
-
312
-
313
-
314
-
315
-
316
-
317
-
318
-
319
-
320
-
321
-
322
-
323
-
324
-
325
-
326
-
327
-
328
-
329
-
330
-
331
-
332
-
333
-
334
-
335
-
336
-
337
-
338
-
339
-
340
-
341
-
342
-
343
-
344
-
345
-
346
-
347
-
348
-
349
-
350
-
351
-
352
-
353
-
354
 |
 |