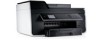
Dell V725w All In One Wireless Inkjet Printer User's Guide
Dell V725w All In One Wireless Inkjet Printer Manual
 |
View all Dell V725w All In One Wireless Inkjet Printer manuals
Add to My Manuals
Save this manual to your list of manuals |
Dell V725w All In One Wireless Inkjet Printer manual content summary:
- Dell V725w All In One Wireless Inkjet Printer | User's Guide - Page 1
Dell V725w User's Guide January 2012 Machine type(s): 4449 Model(s): 7d1, 7dE www.dell.com | support.dell.com - Dell V725w All In One Wireless Inkjet Printer | User's Guide - Page 2
supplies 12 Ordering ink cartridges...12 Replacing ink cartridges...13 Recycling Dell products...14 Using the printer control panel buttons and menus 16 Replacing the language sheet...16 Using the printer control panel...17 Changing the Sleep timeout...19 Saving paper and energy...19 Restoring - Dell V725w All In One Wireless Inkjet Printer | User's Guide - Page 3
...43 Working with photos...46 Printing on both sides of the paper (duplexing 48 Managing print jobs...51 Copying...55 Tips for copying ...57 Collating copies using the printer control panel 57 Placing separator sheets between copies 58 Copying multiple pages on one sheet...58 Placing an overlay - Dell V725w All In One Wireless Inkjet Printer | User's Guide - Page 4
the printer 124 Maintaining ink cartridges...124 Cleaning the exterior of the printer...125 Cleaning the scanner glass...126 Moving the printer to another location 126 Troubleshooting 128 Before you troubleshoot...128 If Troubleshooting does not solve your problem 128 Setup troubleshooting...128 - Dell V725w All In One Wireless Inkjet Printer | User's Guide - Page 5
Contents 5 Network troubleshooting...157 Notices...168 Product information...168 Edition notice...168 Power consumption...171 Index...179 - Dell V725w All In One Wireless Inkjet Printer | User's Guide - Page 6
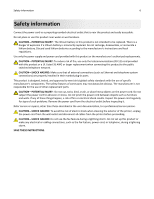
results. Inspect the power cord regularly for signs of such problems. Remove the power cord from the electrical outlet before inspecting it. Refer service or repairs, other than those described in the user documentation, to a professional service person. CAUTION-SHOCK HAZARD: To avoid the risk of - Dell V725w All In One Wireless Inkjet Printer | User's Guide - Page 7
printer, read the User's Guide carefully, and make sure you check the latest updates on our Web site. We're committed to delivering performance and value with our printers, and we want to make sure you're satisfied. If you do encounter any problems along the way, one of our knowledgeable support - Dell V725w All In One Wireless Inkjet Printer | User's Guide - Page 8
up and configuring the printer on a network, depending on your printer model • Caring for and maintaining the printer • Troubleshooting and solving problems User's Guide The User's Guide is available on the installation software CD. For updates, check our Web site at http://support.dell.com. - Dell V725w All In One Wireless Inkjet Printer | User's Guide - Page 9
supplemental information, updates, and online technical support: • Troubleshooting hints and tips • Frequently asked questions • Documentation • Driver downloads • Live chat support • E‑mail support • Telephone support Dell Support Web site-http://support.dell.com Note: Select your region, and - Dell V725w All In One Wireless Inkjet Printer | User's Guide - Page 10
the parts of the printer Use the To 1 Scanner cover Access the scanner glass. 2 Scanner glass Scan, copy or fax photos and documents. 3 Automatic Document Feeder Scan, copy, or fax multiple‑page letter‑, legal‑, and A4‑size documents. (ADF) 4 ADF paper guide Keep paper straight when feeding - Dell V725w All In One Wireless Inkjet Printer | User's Guide - Page 11
To 12 Scanner unit Access the ink cartridges. 13 Ink cartridge access area Install, replace, or remove the ink cartridges. 14 Ethernet port Connect your printer to a computer, a local network, an external DSL, or a cable modem. 15 USB port Connect the printer to a computer using a USB cable - Dell V725w All In One Wireless Inkjet Printer | User's Guide - Page 12
and replacing supplies Ordering ink cartridges Page yields are available at www.dell.com/supplies. For best results, use only Dell ink cartridges. Item Licensed cartridge1 Regular cartridge Black cartridge Series 31 Not available Yellow color cartridge Series 31 Not available Cyan - Dell V725w All In One Wireless Inkjet Printer | User's Guide - Page 13
Make sure you have a new ink cartridge or cartridges before you begin. You must install new cartridges immediately after removing the old ones, or the ink remaining in the printhead nozzles may dry out. Removing ink cartridges 1 Turn on your printer. 2 Open the printer. Note: The printhead moves to - Dell V725w All In One Wireless Inkjet Printer | User's Guide - Page 14
along the ink cartridge until the cartridge clicks into place. Notes: • Insert the color cartridges first, and then the black cartridge. • Insert the new ink cartridges immediately after removing the protective cap to avoid exposing the ink to air. 3 Close the printer. Recycling Dell products To - Dell V725w All In One Wireless Inkjet Printer | User's Guide - Page 15
Ordering and replacing supplies 15 6 Click . 7 Follow the instructions on the computer screen. - Dell V725w All In One Wireless Inkjet Printer | User's Guide - Page 16
be replaced anytime depending on which language you want to use. Some languages may not be available depending on your printer model. Note: Your printer comes with a preinstalled English language sheet. 1 Open the printer. 2 Remove the language sheet from the documentation folder that came with the - Dell V725w All In One Wireless Inkjet Printer | User's Guide - Page 17
three seconds to turn off the printer. 2 Display View: Note: The display is turned off in Sleep mode. • Printer status • Messages • Menus the previous screen. • Exit from one menu level to a higher one. • Select menu options. • Save settings. • Feed or eject paper. Press and hold the button for - Dell V725w All In One Wireless Inkjet Printer | User's Guide - Page 18
only when you have already begun entering the number. Dial the telephone number manually using the keypad before sending the fax. 11 Address Book Access fax numbers from connection status of your printer and access the network settings. 17 Wi‑Fi indicator Check the wireless connection of your - Dell V725w All In One Wireless Inkjet Printer | User's Guide - Page 19
the keypad to enter the value of the Sleep timeout, and then press . Saving paper and energy To significantly cut paper usage and reduce paper waste, activate duplex printing: 1 From the printer control panel, navigate to: > Setup > > Print Mode Setup > > 2‑Sided Copy, Standalone > 2 Press the up - Dell V725w All In One Wireless Inkjet Printer | User's Guide - Page 20
arrow button to scroll to Yes, and then press . The printer restarts automatically after resetting to factory default settings. 4 When prompted to set the initial settings of your printer, make your selections using the printer control panel buttons. Initial Setup Complete appears on the display. - Dell V725w All In One Wireless Inkjet Printer | User's Guide - Page 21
or photo and send it to your computer. Notes: • Make sure the printer driver is installed with a network printer connection. • Make sure the printer is connected to the computer, either locally (USB) or through the same Ethernet or wireless network. Scan a document or photo and save it to a network - Dell V725w All In One Wireless Inkjet Printer | User's Guide - Page 22
you may create the shortcuts through your printer software. Launching the shortcuts page using the printer software Before you begin, make sure: • Your printer and computer are each connected to the network through an Ethernet or wireless connection. • Your printer is turned on. For Windows users - Dell V725w All In One Wireless Inkjet Printer | User's Guide - Page 23
> enter the shortcut number > Note: If you configured the shortcut to show the settings before running, then the settings will appear on the printer display. Adjust the settings if necessary. Modifying or deleting a shortcut 1 Launch the shortcuts page, and then select a shortcut. 2 Do either of the - Dell V725w All In One Wireless Inkjet Printer | User's Guide - Page 24
• PCLinux OS 2010.12 and 2010.10* * The printer driver for this operating system is available only at http://support.dell.com. Using the Windows printer software Software installed during printer installation When you set up the printer using the installation software CD, all the necessary software - Dell V725w All In One Wireless Inkjet Printer | User's Guide - Page 25
Maintain ink cartridges. • Register the printer. • Contact technical support. • Access the User's Guide. Order ink. Manage your fax contacts. Scan a document and produce text that you can edit with a word‑processing program. • Set up the wireless printer on a wireless network. • Change the wireless - Dell V725w All In One Wireless Inkjet Printer | User's Guide - Page 26
up usual tasks with your printer. Set up the printer on a wireless network. Note: This application is automatically installed with the printer software if the printer has wireless capability. Remove the printer software from your computer. Notes: • Your printer may not come with these applications - Dell V725w All In One Wireless Inkjet Printer | User's Guide - Page 27
Click All Programs or Programs, and then select the printer program folder from the list. 3 Navigate to: Printer Home > select your printer > Support > Online support 4 From the Web site, select your printer and then download the driver. 5 Install additional or optional software. For Macintosh users - Dell V725w All In One Wireless Inkjet Printer | User's Guide - Page 28
. If the installation dialog screen does not appear after a minute, then launch the CD manually: a Click , or click Start and then click Run. b In the Start Search follow the instructions on the computer screen. Using the Internet Updated printer software may be available at http://support.dell.com. - Dell V725w All In One Wireless Inkjet Printer | User's Guide - Page 29
Loading paper and original documents Loading the paper tray Make sure: • You use paper designed for inkjet printers. • The paper is not used or damaged. • If you are using specialty paper, you follow the instructions that came with it. • The paper does not buckle when you adjust the paper guides to - Dell V725w All In One Wireless Inkjet Printer | User's Guide - Page 30
paper and original documents 30 3 If you are loading A4‑ or legal‑size paper, then squeeze the tab and pull to extend the tray. Note: When you pull the extension out, the first stop accommodates A4‑size paper. When the extension is fully out, it accommodates legal‑size paper. 4 Load the paper - Dell V725w All In One Wireless Inkjet Printer | User's Guide - Page 31
the paper guides to rest gently against the left, right, and bottom edges of the paper. 6 Insert the tray. Note: If you extended the tray to accommodate A4- or legal-size paper, then the tray sticks out from the front of the printer when inserted. 7 Flip up the paper stop to catch the paper as - Dell V725w All In One Wireless Inkjet Printer | User's Guide - Page 32
Loading paper and original documents 32 Loading envelopes or photo paper 1 Pull tray completely out of the printer. 2 Move the paper guides to the sides of tray. - Dell V725w All In One Wireless Inkjet Printer | User's Guide - Page 33
types in the tray. You can load either envelopes or photo paper, but not both. 4 Load envelopes or photo paper. Note: Load envelopes or photo paper with the printable side facedown. (If you are not sure which side is the printable side, then see the instructions that came with the envelopes or photo - Dell V725w All In One Wireless Inkjet Printer | User's Guide - Page 34
and original documents 34 5 Adjust the paper guides to rest gently against the left, right, and bottom edges of the envelopes or photo paper. 6 Insert the tray. 7 Flip up the paper stop to catch the envelopes or photos as they exit. Note: For best results, allow photos to dry at least 24 hours - Dell V725w All In One Wireless Inkjet Printer | User's Guide - Page 35
with inkjet printers. • The paper guides rest against the left, right, and bottom edges of the paper. • The glossy or printable side of the paper faces down. (If you are not sure which side is the printable side, then see the instructions that came with the paper.) • The paper guides rest against - Dell V725w All In One Wireless Inkjet Printer | User's Guide - Page 36
inkjet printers. • The print side of the envelopes faces down with the flap to the left as shown. • You load the envelopes in the center of the tray as indicated by the icon. Load them all the way to the back of the tray. • You print the envelopes in landscape orientation. • The paper guides - Dell V725w All In One Wireless Inkjet Printer | User's Guide - Page 37
allow it to dry to avoid ink smudging. • You follow the loading instructions that came with the iron-on transfers. • The print side of the transfers faces down. • The paper guides rest against the edges of the transfers. Note: For best results, load transfers one at a time. • The thickness does not - Dell V725w All In One Wireless Inkjet Printer | User's Guide - Page 38
settings for your print and copy jobs to match the paper size and type you have loaded in the printer. 1 From the printer control panel, press . 2 Adjust the settings as needed: • If you want to set the paper size, then navigate to: Setup > > Paper Setup > > Paper Size > • If you want to set the - Dell V725w All In One Wireless Inkjet Printer | User's Guide - Page 39
35 sheets of an original document into the ADF for scanning, copying, and faxing. You can load A4‑, letter‑, or legal‑size paper into the ADF. 1 Adjust the paper guide on the ADF tray to the width of the original document. 2 Load the original document faceup and top edge first into the ADF - Dell V725w All In One Wireless Inkjet Printer | User's Guide - Page 40
appropriate paper for your print job. • Select a higher print quality for better prints. • Make sure there is enough ink in the ink cartridges. • number of copies to print, the type of paper to use, and how the pages should print. 4 Click OK to close any printer software dialogs. 5 Click OK or Print. - Dell V725w All In One Wireless Inkjet Printer | User's Guide - Page 41
a document open, choose File > Page Setup. 2 From the Page Setup dialog, set the printer, paper size, and orientation. 3 Click OK. 4 From the menu bar, choose File > Print. 5 From the Printer pop‑up menu, choose your printer. 6 From the Copies area, enter the number of copies that you want to print - Dell V725w All In One Wireless Inkjet Printer | User's Guide - Page 42
, choose your printer. 6 From the print options pop-up menu, choose Paper Handling. 7 From the Page Order pop‑up menu, choose a page order: • To print the first page first, choose Normal. • To print the last page first, choose Reverse. 8 Click Print. Printing multiple pages on one sheet For Windows - Dell V725w All In One Wireless Inkjet Printer | User's Guide - Page 43
are supported by the printer. For more information, see "Supported file types" on page 46. 1 Insert a flash drive. When the printer detects settings as needed to create a custom size, and then click OK. 5 Navigate to: Paper type list > select the created custom type 6 Navigate to: Layout tab > Page - Dell V725w All In One Wireless Inkjet Printer | User's Guide - Page 44
labels Notes: • Make sure the top of the label sheet feeds into the printer first. • Make sure the adhesive on the labels does not extend to within 1 mm of the edge of the label sheet. • Make sure the paper guide or paper guides rest against the edges of the label sheet. • Use full label sheets - Dell V725w All In One Wireless Inkjet Printer | User's Guide - Page 45
. 6 Click OK or Print. For Macintosh users 1 With a document open, choose File > Page Setup. 2 From the "Format for" pop‑up menu, choose your printer. 3 From the Paper Size pop‑up menu, choose Manage Custom Sizes. 4 Adjust the settings as needed to create a custom size, and then click OK. 5 Click OK - Dell V725w All In One Wireless Inkjet Printer | User's Guide - Page 46
Photographic Experts Group) • .tiff, .tif (Tagged Image File Format) Using a flash drive with the printer Make sure the flash drive contains files that are supported by the printer. For more information, see "Supported file types" on page 46. 1 Insert a flash drive into the USB port. Notes: • The - Dell V725w All In One Wireless Inkjet Printer | User's Guide - Page 47
supported file types will be shown. 3 Use the up or down arrow button to select a photo printing option, and then press . • Select and Print allows you to choose a layout, the number of photos per page, paper Note: For best results, allow the . 1 Insert one end of the front of the printer. Notes: • - Dell V725w All In One Wireless Inkjet Printer | User's Guide - Page 48
printer is performing another job, then wait for the job to finish before printing from the camera. Printing on both sides of the paper (duplexing) Printing on both sides of the paper (duplexing) automatically Notes: • The automatic duplex unit supports A4‑ and letter‑size paper. It also supports - Dell V725w All In One Wireless Inkjet Printer | User's Guide - Page 49
one side only For Macintosh users 1 With a document open, choose File > Page Setup. 2 From the Page Setup dialog, set the printer, paper Printer pop‑up menu, choose your printer. 6 From the print options pop‑up menu, choose Quality & Media. 7 From the Paper Type pop‑up menu, choose a supported paper - Dell V725w All In One Wireless Inkjet Printer | User's Guide - Page 50
time does not allow the ink to dry completely, select Extended. 4 Click OK. For Macintosh users 1 From the Apple menu, navigate to: System Preferences > Print & Fax > select your printer 2 Navigate to: Open Print Queue > Printer Setup > Driver tab or Printer Setup > Installable Options 3 From the - Dell V725w All In One Wireless Inkjet Printer | User's Guide - Page 51
printer is connected (USB, Ethernet, wireless). Make sure you know how your printer is connected to the computer to be able to select the correct print queue. For Windows users 1 Open the printers 1 From the Printer Tasks area, click Add a Printer. 2 Follow the instructions on the computer screen - Dell V725w All In One Wireless Inkjet Printer | User's Guide - Page 52
print job. If you have to manually select your printer, then it is not the default printer. To set the default printer: For Windows users 1 Click , the printer from the Default Printer pop‑up menu, or select the printer and click Make Default. Changing the default printing mode To conserve ink, you - Dell V725w All In One Wireless Inkjet Printer | User's Guide - Page 53
If you want to pause all print jobs in the queue, then click Pause Printer or Stop Jobs. Resuming print jobs For Windows users 1 Click , or click • If you want to resume all print jobs in the queue, then click Printer, and then clear the selection for Pause Printing. For Macintosh users 1 From the - Dell V725w All In One Wireless Inkjet Printer | User's Guide - Page 54
right‑click the document name, and then select Cancel. • If you want to cancel all print jobs in the queue, then click Printer > Cancel All Documents. For Macintosh users 1 Click the printer icon on the Dock. The print queue dialog appears. 2 Choose the job you want to cancel, and then click Delete. - Dell V725w All In One Wireless Inkjet Printer | User's Guide - Page 55
If you purchased a printer without an ADF, then load original documents or photos on the scanner glass. Tips for copying • Make sure you load the original document faceup into the ADF or facedown at the placement corner of the scanner glass. • When using the ADF, adjust the paper guide on the ADF to - Dell V725w All In One Wireless Inkjet Printer | User's Guide - Page 56
document or photo as necessary to print a borderless copy on the paper size that you selected. For best results with this setting, use photo paper and set the paper type to Photo. • If you select Fit to Page, then the printer scales the document or photo proportionately to fit a single page. 5 Press - Dell V725w All In One Wireless Inkjet Printer | User's Guide - Page 57
right arrow button to set the copy quality. 5 Press . Making a copy lighter or darker 1 Load paper. 2 Load the original document faceup into the ADF or facedown on the scanner glass. 3 From the printer control panel, navigate to: > Copy > > Darkness 4 Press the left or right arrow button to adjust - Dell V725w All In One Wireless Inkjet Printer | User's Guide - Page 58
. You may print up to four page images on one sheet. 5 Press . Placing an overlay message on each page 1 Load paper. 2 Load the original document faceup into the ADF or facedown on the scanner glass. 3 From the printer control panel, navigate to: > Copy > > Overlay 4 Press the left or right arrow - Dell V725w All In One Wireless Inkjet Printer | User's Guide - Page 59
Making a two‑sided (duplex) copy automatically The automatic duplex unit supports A4‑ and letter‑size paper. If you need to make two‑sided copies using other paper sizes, then see the instructions for making a two‑sided copy manually. Note: You cannot make two‑sided copies on envelopes, card stock - Dell V725w All In One Wireless Inkjet Printer | User's Guide - Page 60
color or black‑only printing, the light that corresponds to your choice comes on. 7 Press to print on one side of the paper. 8 Load the next page of the document. • If you are copying a one‑sided document, then load the next page faceup into the ADF or facedown on the scanner glass. • If - Dell V725w All In One Wireless Inkjet Printer | User's Guide - Page 61
. Tips for scanning • Use the scanner glass when scanning two‑sided pages if your printer does not support duplex scanning or the ADF does not support the original document size. • When using the ADF, adjust the paper guide on the ADF to the width of the original document. • When using the scanner - Dell V725w All In One Wireless Inkjet Printer | User's Guide - Page 62
printer control panel, navigate to: > Scan > > Computer 3 Press the left or right arrow button to manually scan documents using a network printer and save the scan output. Scanning are available only in select printer models. • Make sure 2 From the printer control panel navigate to: > Scan > > - Dell V725w All In One Wireless Inkjet Printer | User's Guide - Page 63
, press each time you make a selection. 5 Press . Follow the instructions on the printer display. Scanning photos for editing For Windows users 1 Load photo or photos want to use. Note: Use any application that supports your printer and lets you work with photos, such as Image Capture. 3 From - Dell V725w All In One Wireless Inkjet Printer | User's Guide - Page 64
application you want to use. Notes: • Use any application that supports your printer and lets you work with the OCR software, ABBYY FineReader. • If printer software using the custom install option so you can manually select all of the packages listed. 3 From the list of devices, select your printer - Dell V725w All In One Wireless Inkjet Printer | User's Guide - Page 65
printer software Make sure you have set up your e‑mail settings before proceeding. For more information, see the section on e‑mailing in the User's Guide application that supports both your printer and an e‑mailing option, such as Image Capture. 3 From the list of devices, select your printer. Note: - Dell V725w All In One Wireless Inkjet Printer | User's Guide - Page 66
to use. Note: Use any application that supports your printer. 3 From the list of devices, select your printer. Note: For information on finding the list to requires one. To learn how PINs get assigned to network computers, see the Help for the printer software associated with your operating system. - Dell V725w All In One Wireless Inkjet Printer | User's Guide - Page 67
Scanning 67 Canceling scan jobs Do one or more of the following: • From the printer control panel, press , and then press . Scanning stops and the printer returns to the previous menu. • If you are sending the scan job using the printer software, then cancel the scan job from the software dialog. - Dell V725w All In One Wireless Inkjet Printer | User's Guide - Page 68
. 2 Click All Programs or Programs, and then select the printer program folder from the list. 3 Navigate to: Printer Home > select your printer > Settings > Set up the printer to e‑mail The E‑mail Setup Wizard opens. 4 Follow the instructions on the computer screen. For Macintosh users 1 From the - Dell V725w All In One Wireless Inkjet Printer | User's Guide - Page 69
OK. For Macintosh users 1 From the Finder, navigate to: Applications > select your printer folder 2 Double‑click Printer Settings. 3 Navigate to: Contacts tab > Individuals tab 4 Click to open the Address postcards or photos), transparencies, photo paper, or thin media (such as magazine clippings). - Dell V725w All In One Wireless Inkjet Printer | User's Guide - Page 70
addresses repeatedly. • Use the scanner glass when scanning two‑sided pages if your printer does not support duplex scanning or the ADF does not support the original document size. • When using the ADF, adjust the paper guide on the ADF to the width of the original document. • To easily retrieve - Dell V725w All In One Wireless Inkjet Printer | User's Guide - Page 71
a dedicated fax line To connect: Connect the cable from the wall jack to the port of the printer. Tips for this setup: • You can set the printer to receive faxes automatically (Auto Answer On) or manually (Auto Answer Off). • If you want to receive faxes automatically (Auto Answer On), then set the - Dell V725w All In One Wireless Inkjet Printer | User's Guide - Page 72
to the same telephone wall jack To connect: 1 Connect the cable from the wall jack to the port of the printer. 2 Remove the protective plug from the port of the printer, and then connect the answering machine to the port. Connected to different wall jacks To connect: Connect the cable from - Dell V725w All In One Wireless Inkjet Printer | User's Guide - Page 73
only one telephone number on your line, then you need to set the printer to receive faxes automatically (Auto Answer On). • Set the printer to ring service provided by your telephone company, then make sure that you set the correct ring pattern for the printer. Otherwise, the printer will - Dell V725w All In One Wireless Inkjet Printer | User's Guide - Page 74
hear fax tones, press *9* or the manual answer code on the telephone to receive the fax. • You can also set the printer to receive faxes automatically (Auto Answer On), but you need to turn off the voice mail service when you are expecting a fax. This setting works best if you are using voice mail - Dell V725w All In One Wireless Inkjet Printer | User's Guide - Page 75
the computer to the DSL HPN port on the DSL filter. 4 To connect a telephone to the printer, remove the protective plug from the port of the printer and then connect the telephone to the port. Scenario 3: VoIP telephone service To connect: 1 Connect one end of a telephone cable to the port of the - Dell V725w All In One Wireless Inkjet Printer | User's Guide - Page 76
76 Scenario 4: Digital telephone service through a cable provider Setup 1: Printer is connected directly to a cable modem Follow this setup if you normally connect your telephone to a cable modem. To connect: 1 Connect one end of a telephone cable to the port of the printer. 2 Connect the other - Dell V725w All In One Wireless Inkjet Printer | User's Guide - Page 77
plug your devices into the cable modem. Your cable telephone service comes from the wall jacks. To connect: 1 Connect the cable from the wall jack to the port of the printer. 2 Remove the protective plug from the port of the printer, and then connect the telephone to the port. Scenario 5: Country - Dell V725w All In One Wireless Inkjet Printer | User's Guide - Page 78
a non‑RJ‑11 wall jack To connect: 1 Connect one end of a telephone cable to the port of the printer. 2 Connect the other end of the cable to the RJ‑11 adapter, and then connect the adapter to the wall jack. 3 If you want to - Dell V725w All In One Wireless Inkjet Printer | User's Guide - Page 79
remove the wrap plug and connect the device to the port of the printer. Connecting the printer in countries or regions that use serial connection In some countries or a telephone or answering machine into the port of the printer. This is called serial connection. Austria Belgium Denmark France - Dell V725w All In One Wireless Inkjet Printer | User's Guide - Page 80
Faxing 80 To connect: Connect the cable from the wall jack to the port of the printer. Connecting the printer to a wall jack in Germany The German wall jack has two kinds of ports. The N ports are for fax machines, modems, and answering machines. The F port is for telephones. - Dell V725w All In One Wireless Inkjet Printer | User's Guide - Page 81
the N ports. To connect: 1 Connect one end of a telephone cable to the port of the printer. 2 Connect the other end of the cable information, so make sure that you enter this information in your printer. Setting the fax header 1 From the printer control panel, navigate to: > Setup > > Fax Setup > - Dell V725w All In One Wireless Inkjet Printer | User's Guide - Page 82
or transmission reports. These reports let you know if the faxes that you send are sent successfully. Ringing and Answering • Set the printer to receive faxes automatically or manually. Turn Auto Answer to On or Off. • Adjust the ringing volume. • Set the number of rings. This is important if you - Dell V725w All In One Wireless Inkjet Printer | User's Guide - Page 83
Sending Fax Blocking You can • Set the printer to print incoming faxes on both sides of the paper. • Set your fax name and fax service and connection. The wizard configures optimal fax settings based on your connection. Note: If you want to configure the advanced fax settings, then from the Printer - Dell V725w All In One Wireless Inkjet Printer | User's Guide - Page 84
you add contacts to the fax software, the printer automatically saves them to the printer Address Book. You can save up to 89 whether you want to add a contact manually or import a contact. Press when you make a selection. • If you want to add a contact manually, then use the keypad to enter the - Dell V725w All In One Wireless Inkjet Printer | User's Guide - Page 85
the phone books on your computer that are supported by the fax software. In addition to the Finder desktop, double-click the printer folder. 2 Double-click Printer Settings. 3 Click the Contacts tab. such as postcards or photos), transparencies, photo paper, or thin media (such as magazine clippings - Dell V725w All In One Wireless Inkjet Printer | User's Guide - Page 86
printer model, use the ADF when scanning two‑sided (duplex) pages. • To easily retrieve a document after copying or scanning, lift the ADF input tray. • When using the ADF, adjust the paper guide field. You can enter fax numbers manually or by using the Phone Book feature. 5 If necessary, enter - Dell V725w All In One Wireless Inkjet Printer | User's Guide - Page 87
a dial tone. • If you set the printer to receive faxes manually (Auto Answer Off), then make sure that the ringer volume is not set to Off. • If you have set the printer to receive faxes automatically (Auto Answer On), then load paper in the printer. Receiving faxes automatically 1 Make sure that - Dell V725w All In One Wireless Inkjet Printer | User's Guide - Page 88
service provided by your telephone company, then make sure that you set the correct ring pattern for the printer. Otherwise, the printer you have set it to receive faxes automatically. Receiving faxes manually 1 Turn off Auto Answer: From the printer control panel, navigate to: > Setup > > Fax - Dell V725w All In One Wireless Inkjet Printer | User's Guide - Page 89
Pattern Detection (DRPD) service offered by telephone companies, then your fax number is the number that you assigned to the printer. Make sure that you the printer control panel. If you have more than one telephone line, then make sure that you enter the number for the line on which the printer is - Dell V725w All In One Wireless Inkjet Printer | User's Guide - Page 90
This feature allows you to have multiple telephone numbers on one telephone line. Each telephone number has a designated ring pattern the telephone line is working or if the printer is properly connected to the telephone line. If you encounter problems sending and receiving faxes, then make sure you - Dell V725w All In One Wireless Inkjet Printer | User's Guide - Page 91
a distinctive ring service offered by your telephone company. This feature allows you to have multiple telephone numbers on one telephone line. service, then set the printer to receive faxes manually (Auto Answer Off). This setting lets you receive both voice calls and fax calls, but works best - Dell V725w All In One Wireless Inkjet Printer | User's Guide - Page 92
then press . How do I know that the fax was sent successfully? You can set the printer to print a confirmation page, or transmission report, every time you send a fax. This report • If you want to save on ink and print a report only when a fax job is unsuccessful, then select Print only for error. - Dell V725w All In One Wireless Inkjet Printer | User's Guide - Page 93
Print Job Log. • If you want to print the log of all calls to and from your printer, then select Print Call Log. How do I print a fax on both sides of the paper? 1 From the printer control panel, navigate to: > Setup > > Fax Setup > > 2‑Sided Faxes > 2 Press the arrow buttons to select a setting - Dell V725w All In One Wireless Inkjet Printer | User's Guide - Page 94
to On, and then press to save the setting. Can I retrieve failed faxes? The printer saves an incoming fax to the printer memory before it prints the fax. If the printer runs out of ink or runs out of paper, then you can print the fax later after the error is resolved. However, you cannot - Dell V725w All In One Wireless Inkjet Printer | User's Guide - Page 95
that the current mode setting is compatible with g devices, as this setting varies depending on the router brand or model. Supported network security options The printer supports three wireless security options: WPA2/WPA, WEP, and no security. WPA2/WPA WPA (Wi-Fi Protected Access) and WPA2 (Wi-Fi - Dell V725w All In One Wireless Inkjet Printer | User's Guide - Page 96
> > Print Network Setup Page > Information you will need during wireless setup To set up the printer for wireless printing, you need to know the following: • The name of your wireless network, which is also known as the SSID (Service Set Identifier) • If encryption was used to secure your network - Dell V725w All In One Wireless Inkjet Printer | User's Guide - Page 97
system support person. Information you will need during advanced wireless setup The Wireless Setup Utility does not detect the wireless network SSID for you during advanced wireless setup. You must know the following information before configuring the wireless printer settings manually: Wireless - Dell V725w All In One Wireless Inkjet Printer | User's Guide - Page 98
launch the CD manually: a Click , or click Start and then click Run. b In the Start Search or Run box, type D:\setup.exe, where D is the letter of your CD or DVD drive. c Press Enter, or click OK. 3 Follow the instructions on the computer screen. Note: Select Wireless connection when prompted to - Dell V725w All In One Wireless Inkjet Printer | User's Guide - Page 99
, or both, depending on your printer model. To find out if your printer has Ethernet or wireless capability, see the Quick Reference Guide, or contact your system support person. • The printer supports one local (USB) connection and one network connection (Ethernet or wireless) at a time. It is not - Dell V725w All In One Wireless Inkjet Printer | User's Guide - Page 100
your box is turned on and that your computer is on and connected to your wireless network. Adding the printer to your wireless network 1 Set up your printer for wireless networking using the setup instructions provided. Stop when you are prompted to select a network. 2 If there is an association - Dell V725w All In One Wireless Inkjet Printer | User's Guide - Page 101
, contact your system support person. Changing wireless settings after installation To change the wireless settings on the printer, such as the printer program folder from the list. 3 Select your printer, and then navigate to: Printer Home > Settings > Wireless setup utility 4 Follow the instructions - Dell V725w All In One Wireless Inkjet Printer | User's Guide - Page 102
1 Click or Start. 2 Click All Programs or Programs, and then select the printer program folder from the list. 3 Select your printer, and then navigate to: Printer Home > Settings > Wireless setup utility 4 Follow the instructions on the computer screen. Note: Windows Vista computers may need to be - Dell V725w All In One Wireless Inkjet Printer | User's Guide - Page 103
103 Configuring Wi‑Fi Protected Setup manually Note: Make sure your access point (wireless router) is Wi‑Fi Protected Setup (WPS) certified. For more information, see the User's Guide. If your printer or device has not yet been configured for wireless connection and you want to configure - Dell V725w All In One Wireless Inkjet Printer | User's Guide - Page 104
modes of authentication, then you can select and configure more than one authentication mechanism. 1 From the Configure 802.1X Authentication dialog, follow the instructions on the computer screen. Installing the printer on an Ethernet network Information you will need to set up the printer on an - Dell V725w All In One Wireless Inkjet Printer | User's Guide - Page 105
that the printer drivers are installed on the computer. See related topics on troubleshooting specific connection types if you encounter difficulties during configuration. Note: The printer supports one active local (USB) connection and one active network connection (Ethernet or wireless) at a time - Dell V725w All In One Wireless Inkjet Printer | User's Guide - Page 106
1 Click or Start. 2 Click All Programs or Programs, and then select the printer program folder from the list. 3 Select your printer, and then navigate to: Printer Home > Settings > Wireless setup utility 4 Follow the instructions on the computer screen. Note: There is no need to remove the USB cable - Dell V725w All In One Wireless Inkjet Printer | User's Guide - Page 107
and that the drivers are installed on the computer. See related topics on troubleshooting specific connection types if you encounter difficulties during configuration. Note: The printer supports one active local connection (USB) and one active network connection (Ethernet or wireless) at a time. It - Dell V725w All In One Wireless Inkjet Printer | User's Guide - Page 108
Networking 108 3 Double‑click Dell Extras > Dell Setup Assistant. 4 Follow the instructions on the computer screen. Note: There is no need to remove the USB cable connecting the printer to the computer during wireless configuration. If the printer is currently set up for Ethernet 1 Unplug the - Dell V725w All In One Wireless Inkjet Printer | User's Guide - Page 109
wireless network. If the printer is currently set up locally (using USB connection) 1 Plug an Ethernet cable into the printer and to an available port on a switch or wall jack. 2 Insert the installation software CD into the computer you want to use to configure the printer. 3 Follow the instructions - Dell V725w All In One Wireless Inkjet Printer | User's Guide - Page 110
Mac OS X version 10.4 or later use any printer connected to your Macintosh computer. • Sharing your printer with Windows users-Let Windows computers on the network use any printer connected to your Macintosh computer. 4 Follow the instructions on the computer screen. Note: Windows users should see - Dell V725w All In One Wireless Inkjet Printer | User's Guide - Page 111
documentation that came with it or contact your system support person. - If you are using a proxy printers and computers to join your wireless network. 3 Look for the WEP key or WPA/WPA2 preshared key/passphrase. What is an SSID? A Service Set Identifier (SSID) is the name that identifies a wireless - Dell V725w All In One Wireless Inkjet Printer | User's Guide - Page 112
contact your system support person. What is a network? A network is a collection of devices such as computers, printers, Ethernet hubs, access points, and routers connected together for communication through cables or through a wireless connection. A network can be wired, wireless, or designed to - Dell V725w All In One Wireless Inkjet Printer | User's Guide - Page 113
the access point. The password lets you access the access point settings. The WEP key or WPA/WPA2 preshared key/passphrase allows printers and computers to join your wireless network. 3 Look for the WEP key or WPA/WPA2 preshared key/passphrase. How are home networks configured? For desktop computers - Dell V725w All In One Wireless Inkjet Printer | User's Guide - Page 114
access • A computer is directly connected to a printer without going through a wireless router. • This configuration is referred to as an ad hoc network. • The network has no connection to the Internet. Note: Most computers can connect to only one wireless network at a time. If you access the - Dell V725w All In One Wireless Inkjet Printer | User's Guide - Page 115
hard drives. For many of those devices, USB has become the standard connection method. Why do I need a USB cable? When setting up the printer on your wireless network, the printer will need to temporarily connect to a computer using the USB cable. This temporary connection may be used to set up the - Dell V725w All In One Wireless Inkjet Printer | User's Guide - Page 116
cable into the back of the printer. 3 Firmly plug the rectangular end of the USB cable into the USB port of the computer. 4 Follow the instructions on the computer screen. How are infrastructure and ad hoc networks different? Wireless networks can operate in one of two modes: infrastructure or ad - Dell V725w All In One Wireless Inkjet Printer | User's Guide - Page 117
• Easier setup Finding the signal strength The signal strength tells you how strongly the computer or printer is receiving the wireless signal from the wireless network. Poor signal quality could affect connectivity during configuration. Checking computer connectivity 1 From your computer system - Dell V725w All In One Wireless Inkjet Printer | User's Guide - Page 118
(wireless router) and the printer. If you think signal strength is a problem between your access point and the printer, then try one or causing the problem. For more information on printing a network setup page, see the User's Guide. MOVE THE PRINTER CLOSER TO THE ACCESS POINT If the printer is too - Dell V725w All In One Wireless Inkjet Printer | User's Guide - Page 119
objects absorb enough to cause communications problems. Place your access point as high in the room as possible to avoid signal absorption. How can I make sure my computer and printer are connected to the same wireless network? If the printer is not on the same wireless network as the computer, then - Dell V725w All In One Wireless Inkjet Printer | User's Guide - Page 120
at the same time? Yes; the printer supports a simultaneous USB and network connection. The printer can be configured in the following ways: • Locally attached (connected to a computer using a USB cable) • Wireless network • Ethernet network • Wireless network and locally attached simultaneously - Dell V725w All In One Wireless Inkjet Printer | User's Guide - Page 121
, as well as prevent access from unwanted devices. If your network uses MAC address filtering, then be sure to add the MAC address of the printer to the list of allowed devices. How do I find the MAC address? Network devices have a unique hardware identification number to distinguish them from other - Dell V725w All In One Wireless Inkjet Printer | User's Guide - Page 122
IP address is a unique number used by devices (such as a wireless printer, computer, or access point (wireless router)) on an IP network to locate and communicate with each other. pane, choose Network. 3 If you are connected over a wireless network, then choose AirPort from the Active Services list. - Dell V725w All In One Wireless Inkjet Printer | User's Guide - Page 123
setup to manually enter an address and other network information after selecting your printer from the available list. What is a key index? An access point (wireless router) can be configured with as many as four WEP keys. Only one key is used on the network at a time, however. The keys are - Dell V725w All In One Wireless Inkjet Printer | User's Guide - Page 124
to align the printhead. 1 Load plain paper. 2 From the printer control panel, navigate to: > Setup > >Maintenance > > Align Printer > An alignment page prints. Note: Do not remove the alignment page until printing is finished. If you aligned the cartridges to improve print quality, then print your - Dell V725w All In One Wireless Inkjet Printer | User's Guide - Page 125
, so try the Clean Printhead option first to save ink. • If the ink levels are too low, you must replace the ink cartridges before you can clean the printhead nozzles. 1 Load paper. 2 From the printer control panel, navigate to: > Setup > > Maintenance > 3 Press the up or down arrow button to scroll - Dell V725w All In One Wireless Inkjet Printer | User's Guide - Page 126
precautions: • Make sure the printer is turned off. • Any cart used to move the printer must have a surface able to support the full footprint of the printer and the dimensions of the paper trays. • Remove all paper from the trays. • Make sure the paper stop and paper trays are in their original - Dell V725w All In One Wireless Inkjet Printer | User's Guide - Page 127
Maintaining the printer 127 • Keep the printer in an upright position to prevent the ink from leaking. • Avoid severe jarring movements. - Dell V725w All In One Wireless Inkjet Printer | User's Guide - Page 128
cartridges if necessary. • Turn the printer off, wait about 10 seconds, and then turn the printer back on. Note: Make sure the printer is not in Sleep mode. Press and hold for three seconds to turn off the printer. If Troubleshooting does not solve your problem Visit our Web site at http://support - Dell V725w All In One Wireless Inkjet Printer | User's Guide - Page 129
troubleshoot" checklist does not solve the problem, then try the following: LAUNCH THE PRINTER CD MANUALLY instructions on the computer screen. Software did not install If you encountered problems while installing, or if your printer does not appear in the list in the printers folder or as a printer - Dell V725w All In One Wireless Inkjet Printer | User's Guide - Page 130
the "Before you troubleshoot" checklist does not solve the problem, then try one or more of the following: MAKE SURE THE INK CARTRIDGES ARE INSERTED CORRECTLY 1 Turn the printer on, and then open the printer. 2 Make sure the cartridges are inserted correctly. The cartridges should click firmly into - Dell V725w All In One Wireless Inkjet Printer | User's Guide - Page 131
prints. Note: Do not remove the alignment page until printing is finished. Printer is busy or does not respond If the "Before you troubleshoot" checklist does not solve the problem, then try one or more of the following: MAKE SURE THE PRINTER IS NOT IN SLEEP MODE If the power light is blinking on - Dell V725w All In One Wireless Inkjet Printer | User's Guide - Page 132
communicating. RESTART THE COMPUTER AND TRY AGAIN REMOVE AND RECONNECT THE USB CABLE CONNECTED TO YOUR PRINTER Cannot print through USB If the "Before you troubleshoot" checklist does not solve the problem, then try one or more of the following: CHECK THE USB CONNECTION 1 Check the USB cable for any - Dell V725w All In One Wireless Inkjet Printer | User's Guide - Page 133
Troubleshooting 133 REMOVE AND REINSTALL THE PRINTER SOFTWARE Understanding printer messages Alignment Problem Try any of the following: • Check the ink cartridges. 1 Open the printer, and then remove and reinstall the ink cartridges. 2 Load a plain and unmarked A4‑ or letter‑size paper. The - Dell V725w All In One Wireless Inkjet Printer | User's Guide - Page 134
sure the duplex unit is properly installed at the back of the printer to clear the message. • Cancel the current job. Ink Cartridge Error The printer is unable to authenticate one or more of the installed ink cartridges. Try one or more of the following: • Press to cancel the current job. • Install - Dell V725w All In One Wireless Inkjet Printer | User's Guide - Page 135
and continue printing. Note: Depending on your printer settings, you may not be allowed to continue printing until you replace the specified cartridge. • See the User's Guide for a list of supported ink cartridges. Load [Paper Source] with [Size] Paper Try one or more of the following: • Load the - Dell V725w All In One Wireless Inkjet Printer | User's Guide - Page 136
Troubleshooting 136 Network [x] Software Error [x] is the number of the network connection. Try one or more of the following: • Press to clear the message. • Turn the printer off and then back on to reset the printer. Out of Paper in Tray [x] Try one or more of the following: • Load the specified - Dell V725w All In One Wireless Inkjet Printer | User's Guide - Page 137
Troubleshooting 137 Printhead Error Remove and reinsert the printhead Warning-Potential Damage: Do not touch the cartridge contacts with bare hands to avoid damage and print quality problems. 1 Open the printer, and then lift the latch. 2 Remove the printhead. 3 Wipe the printhead contacts and - Dell V725w All In One Wireless Inkjet Printer | User's Guide - Page 138
Troubleshooting 138 Printhead Missing Try one or more of the following: • Install the printhead. 1 Open the printer, and then lift the carrier latch. 2 Insert the printhead, and then close the latch until it clicks into place. Note: Make sure to install the ink cartridges into the printhead. For - Dell V725w All In One Wireless Inkjet Printer | User's Guide - Page 139
. 5 Insert the supported printhead, and then close the latch until it clicks into place. Note: Make sure to install the ink cartridges into the printhead. For more information, see "Replacing ink cartridges" in the User's Guide. 6 Close the printer. Printhead Warning One or more cartridges may have - Dell V725w All In One Wireless Inkjet Printer | User's Guide - Page 140
on how to clean the printhead nozzles. Replace Ink Cartridge Try one or more of the following: • Replace the ink cartridge with one that is supported by your printer. • Press to clear the message. • See the User's Guide for a list of supported ink cartridges. Scanned Document Too Long The scan job - Dell V725w All In One Wireless Inkjet Printer | User's Guide - Page 141
Troubleshooting 141 Unrecoverable Scan Error Try one or more of the following: • Restart your printer. • Update your printer firmware. For more information, visit http://support.dell.com. USB Device Not Supported Remove the unrecognized USB device and replace it with a supported device. USB Hub - Dell V725w All In One Wireless Inkjet Printer | User's Guide - Page 142
sides, and then gently pull it out. Note: Make sure all paper fragments are removed. 4 Reattach the jam clearance cover until it clicks into place. 5 Close the printer. 6 Touch OK or press , depending on your printer model. Check the paper tray Note: If the tray is removed, then make sure to clear - Dell V725w All In One Wireless Inkjet Printer | User's Guide - Page 143
Troubleshooting 143 1 Pull the tray completely out of the printer. 2 Firmly grasp the paper on both sides, and then gently pull it out. Note: Make sure all paper fragments are removed. 3 Insert the tray. 4 Touch OK or press , depending on your printer model. - Dell V725w All In One Wireless Inkjet Printer | User's Guide - Page 144
Troubleshooting 144 Paper jam in the exit tray 1 Firmly grasp the paper, and then gently pull it out. Note: Make sure all paper fragments are removed. 2 Touch OK or press , depending on your printer model. Paper jam in the duplex unit Note: The parts inside the printer are sensitive. Avoid - Dell V725w All In One Wireless Inkjet Printer | User's Guide - Page 145
Troubleshooting 145 3 Reinsert the duplex unit. 4 Touch OK or press , depending on your printer model. Paper jam in the ADF (select models only) Note: The parts inside the printer are sensitive. Avoid unnecessarily touching these parts while clearing jams. Check the ADF 1 Press the ADF button, - Dell V725w All In One Wireless Inkjet Printer | User's Guide - Page 146
Troubleshooting 146 Scenario 1 Scenario 2 Note: Make sure all paper fragments are removed. 3 Close the ADF cover. 4 Touch OK or press , depending on your printer model. Check under the ADF tray 1 Remove the ADF tray. - Dell V725w All In One Wireless Inkjet Printer | User's Guide - Page 147
into the printer. • Load paper with the print side facedown. (If you are not sure which side is the printable side, see the instructions that came with the paper.) • Check the loading instructions for your paper or specialty media. REMOVE EACH PAGE AS IT IS PRINTED ADJUST THE PAPER GUIDES TO FIT - Dell V725w All In One Wireless Inkjet Printer | User's Guide - Page 148
the page If the "Before you troubleshoot" checklist does not solve the problem, then try one or more of the following: CHECK , choose your printer. 3 From the Paper Size pop‑up menu, choose a paper size that has "(Borderless)" in its name. For example, if you loaded a 4 x 6 photo paper, then choose - Dell V725w All In One Wireless Inkjet Printer | User's Guide - Page 149
lines on the printed image, then contact technical support. Print speed is slow If the "Before you troubleshoot" checklist does not solve the problem, then try one or more of the following: SELECT A LOWER PRINT QUALITY FROM THE PRINTER SOFTWARE MANUALLY SELECT A PAPER TYPE THAT MATCHES THE TYPE OF - Dell V725w All In One Wireless Inkjet Printer | User's Guide - Page 150
freezes the computer" on page 152 • "Cannot scan to a computer over a network" on page 152 Copier or scanner does not respond If the "Before you troubleshoot" checklist does not solve the problem, then try one or more of the following: SET YOUR PRINTER AS THE DEFAULT PRINTER REMOVE AND REINSTALL THE - Dell V725w All In One Wireless Inkjet Printer | User's Guide - Page 151
unit. Poor copy or scanned image quality If the "Before you troubleshoot" checklist does not solve the problem, then try one or more of the following: CLEAN THE SCANNER GLASS ADJUST THE SCAN QUALITY FROM THE PRINTER SOFTWARE REVIEW THE TIPS FOR COPYING, SCANNING, AND IMPROVING PRINT QUALITY USE - Dell V725w All In One Wireless Inkjet Printer | User's Guide - Page 152
THAT ARE NOT BEING USED RESTART THE COMPUTER Cannot scan to a computer over a network If the "Before you troubleshoot" checklist does not solve the problem, then try one or more of the following: MAKE SURE THE PRINTER AND THE DESTINATION COMPUTER ARE CONNECTED TO THE SAME NETWORK MAKE SURE THE - Dell V725w All In One Wireless Inkjet Printer | User's Guide - Page 153
. Do not use a line splitter. Cannot send faxes If the "Fax troubleshooting checklist" does not solve the problem, then try one or more of the following: MAKE SURE THAT YOU HAVE REGISTERED YOUR USER INFORMATION IN THE PRINTER If you did not enter your user information during initial setup, then - Dell V725w All In One Wireless Inkjet Printer | User's Guide - Page 154
. 1 From the printer control panel, navigate support support. 1 From the printer printer printer is correct for your network. 1 From the printer troubleshooting checklist" does not solve the problem, then try one printer picks up on a greater number of rings than the answering machine. • The printer - Dell V725w All In One Wireless Inkjet Printer | User's Guide - Page 155
digital signals into analog signals. MAKE SURE THAT THE PRINTER MEMORY IS NOT FULL The printer saves an incoming fax to the printer memory before it prints the fax. If the printer runs out of ink or runs out of paper while receiving the fax, then the printer saves the fax so you can print it later - Dell V725w All In One Wireless Inkjet Printer | User's Guide - Page 156
Troubleshooting 156 Fax error messages on the printer a problem with printer automatically converts color faxes to black and lowers the scan resolution of the document. • Lower the fax quality. • Reformat the document on Letter‑size paper. The fax modem of the receiving fax machine does not support - Dell V725w All In One Wireless Inkjet Printer | User's Guide - Page 157
Line Not Connected Phone Line Busy No Answer No Caller ID Call Stopped What it indicates: Possible solutions: The printer cannot detect a dial tone. See the "Fax troubleshooting checklist." Your telephone line or the telephone line of the receiving fax machine is busy. This happens especially if - Dell V725w All In One Wireless Inkjet Printer | User's Guide - Page 158
158 Network troubleshooting checklist Before beginning to troubleshoot the wireless printer, verify the following: General Networking Make sure: • The printer, the computer, and the access point (wireless router) are all plugged in and turned on. • The wireless network is working properly - Dell V725w All In One Wireless Inkjet Printer | User's Guide - Page 159
's Guide. RECONNECT THE PRINTER POWER SUPPLY 1 Turn off the printer. Note: Make sure the printer is not in Sleep mode. Press and hold for three seconds to turn off the printer. 2 Unplug the power cord from the wall outlet, and then pull out the power cord from the power supply. 3 After one minute - Dell V725w All In One Wireless Inkjet Printer | User's Guide - Page 160
problem with your computer and its USB support. The computer must recognize the USB connection in order for installation to work. Computer firewall is blocking communication with the printer Firewall settings may have stopped the printer the driver on the computer or before running the wireless setup - Dell V725w All In One Wireless Inkjet Printer | User's Guide - Page 161
the printer to the computer using a USB cable. For more information, see the User's Guide. Wireless troubleshooting • "Resetting the wireless settings troubleshooting checklist, and then do the following: TURN THE ACCESS POINT (WIRELESS ROUTER) OFF AND THEN BACK ON Wait one minute for the printer - Dell V725w All In One Wireless Inkjet Printer | User's Guide - Page 162
wireless network. If you are using one of these boxes and need more information, then see the documentation that came with your box, or contact your Internet Service are having trouble printing, then try placing the computer and printer no more than 100 feet apart. CHECK THE WIRELESS SIGNAL QUALITY - Dell V725w All In One Wireless Inkjet Printer | User's Guide - Page 163
them from your computer. MAKE SURE THAT YOUR COMPUTER AND PRINTER ARE CONNECTED TO THE SAME WIRELESS NETWORK If the printer is not on the same wireless network as the computer, then you will not be able to print wirelessly. The SSID of the printer must match the SSID of the computer, if the computer - Dell V725w All In One Wireless Inkjet Printer | User's Guide - Page 164
be your wireless router, is working and is configured to assign IP addresses. If you are not sure how to do this, then refer to the manual that came with your wireless router. If the printer and computer have valid IP addresses and the network is operating correctly, then continue troubleshooting. - Dell V725w All In One Wireless Inkjet Printer | User's Guide - Page 165
You may notice that your printer works for a short time and then stops working, although apparently nothing has changed on your wireless network. Many different issues can interrupt network communications, and sometimes more than one problem exists at the same time. Try one or more of the following - Dell V725w All In One Wireless Inkjet Printer | User's Guide - Page 166
Troubleshooting 166 TURN OFF THE ACCESS POINT (WIRELESS ROUTER) AND TURN IT BACK ON Wait one minute for the printer and computer to reestablish the connection. This can sometimes refresh network connections and resolve connectivity issues. ELIMINATE NETWORK CONGESTION If a wireless network is too - Dell V725w All In One Wireless Inkjet Printer | User's Guide - Page 167
NETWORK ADAPTER UPDATES If you are having trouble printing from one particular computer, then check the Web site of the manufacturer of the wireless network adapter card in that computer. It is possible that there is an updated driver available that could resolve the issue. CHANGE ALL NETWORK - Dell V725w All In One Wireless Inkjet Printer | User's Guide - Page 168
Notices 168 Notices Product information Product name: Dell V725w Machine type: 4449 Model(s): 7d1, 7dE Edition notice radio frequency energy and, if not installed and used in accordance with the instructions, may cause harmful interference to radio communications. However, there is no guarantee - Dell V725w All In One Wireless Inkjet Printer | User's Guide - Page 169
on, the user is encouraged to try to correct the interference by one or more of the following measures: • Reorient or relocate the receiving antenna receiver is connected. • Consult your point of purchase or service representative for additional suggestions. The manufacturer is not responsible for - Dell V725w All In One Wireless Inkjet Printer | User's Guide - Page 170
for electronic products in countries of the European Union. We encourage the recycling of our products. Product disposal Do not dispose of the printer or supplies in the same manner as normal household waste. Consult your local authorities for disposal and recycling options. Battery notice This - Dell V725w All In One Wireless Inkjet Printer | User's Guide - Page 171
Notices 171 Power consumption Product power consumption The following table documents the power consumption characteristics of the product. Note: Some modes may not apply to your product. Mode Description Power consumption (Watts) Printing The product is generating hard‑copy output from - Dell V725w All In One Wireless Inkjet Printer | User's Guide - Page 172
trouble with this equipment, for repair or warranty information, contact your point of purchase. If the equipment is causing harm to the telephone network, the telephone company may request that you disconnect the equipment until the problem is resolved. This equipment contains no user serviceable - Dell V725w All In One Wireless Inkjet Printer | User's Guide - Page 173
public utility commission, public service commission, or corporation commission This has been identified as a major nationwide problem. It is recommended that the customer install an appropriate AC surge arrestor is defined as one that is suitably rated, and certified by UL (Underwriter's - Dell V725w All In One Wireless Inkjet Printer | User's Guide - Page 174
for the Facsimile User Instructions. The grant of a services. This equipment shall not be set up to make automatic calls to the Telecom's 111 Emergency Service period for any single manual call initiation, and • The equipment shall seconds between the end of one call attempt and the beginning - Dell V725w All In One Wireless Inkjet Printer | User's Guide - Page 175
section for further compliance information. Regulatory notices for wireless products This section contains the following regulatory information pertaining to wireless products that contain transmitters, for example, but not limited to, wireless network cards or proximity card readers. Exposure to - Dell V725w All In One Wireless Inkjet Printer | User's Guide - Page 176
the antenna provided. Use of any other antenna is strictly prohibited per regulations of Industry Canada. To prevent radio interference to the licensed service, this device is intended to be operated indoors and away from windows to provide maximum shielding. Equipment (or its transmit antenna) that - Dell V725w All In One Wireless Inkjet Printer | User's Guide - Page 177
from the Authorized Representative. This product satisfies the Class B limits of EN 55022 and safety requirements of EN 60950. Products equipped with 2.4GHz Wireless LAN option are in conformity with the protection requirements of EC Council directives 2004/108/EC, 2006/95/EC, 1999/5/EC, and 2005/32 - Dell V725w All In One Wireless Inkjet Printer | User's Guide - Page 178
relevantnimi določili direktive 1999/5/ES. Svenska Härmed intygar Lexmark International, Inc. att denna produkt står i överensstämmelse med de väsentliga egenskapskrav och övriga relevanta bestämmelser som framgår av direktiv 1999/5/EG. - Dell V725w All In One Wireless Inkjet Printer | User's Guide - Page 179
10 ADF paper guide location 10 ADF press plate cleaning 126 ADF scanner glass cleaning 126 ADF tray location 10 adjusting dialing and ringer volume 91 adjusting speaker volume 91 advanced wireless setup 97 AliceBox 100 aligning the printhead 124 Alignment Problem 133 answering machine best settings - Dell V725w All In One Wireless Inkjet Printer | User's Guide - Page 180
for editing 64 scanning using the printer control panel 62 scanning using the touch screen 61 downloading PCL drivers 27 downloading PS drivers 27 downloading Universal Print Driver 27 drivers downloading 27 DSL filter 74 duplex copying, automatic 59 copying, manual 59 faxing 93 printing, automatic - Dell V725w All In One Wireless Inkjet Printer | User's Guide - Page 181
8 information needed for setting up printer on Ethernet network 104 information you will need during wireless setup 96 infrastructure network 116 ink conserving 7 ink cartridge access area location 11 Ink Cartridge Error 134 Ink Cartridge Missing 135 ink cartridges installing 13 ordering 12 removing - Dell V725w All In One Wireless Inkjet Printer | User's Guide - Page 182
iron-on transfers loading 37 J jam clearance cover location 10 jams and misfeeds troubleshooting paper jam in the ADF 145 paper jam in the duplex unit 144 paper jam in the exit tray 144 paper jam in the printer 141 paper or specialty media 147 junk faxes blocking 93 K key index 123 L labels loading - Dell V725w All In One Wireless Inkjet Printer | User's Guide - Page 183
Ink Cartridge 140 Scanned Document Too Long 140 Scanner ADF Cover Open 140 Scanner Disabled 140 Short Paper 140 Unrecoverable Scan Error 141 Unsupported Cartridge 135 USB Device Not Supported 141 USB Hub Not Supported 141 printer parts diagram 10 printer printing blank pages 131 printer problems - Dell V725w All In One Wireless Inkjet Printer | User's Guide - Page 184
digital telephone service 76 DSL connection 74 standard telephone line connection 71 VoIP connection 75 setting up printer faxing 88 on wired network (Macintosh) 105 on wired network (Windows) 105 on wireless network (Macintosh) 98 on wireless network (Windows) 98 setup troubleshooting cannot print - Dell V725w All In One Wireless Inkjet Printer | User's Guide - Page 185
59 copying, manual 59 two‑sided printing 48 two‑sided printing dry time setting 50 TX report, fax 92 U UK special wireless setup instructions 100 uninstalling printer software 27 Universal Print Driver downloading 27 Unrecoverable Scan Error 141 Unsupported Cartridge 135 Unsupported printhead - Dell V725w All In One Wireless Inkjet Printer | User's Guide - Page 186
resetting to factory defaults 161 wireless setup advanced 97, 123 guided 123 information needed for 96 wireless signal strength 117 wireless signal absorption 118 wireless signal quality 118 wireless troubleshooting cannot print over wireless network 161 changing wireless settings after installation
-
 1
1 -
 2
2 -
 3
3 -
 4
4 -
 5
5 -
 6
6 -
 7
7 -
8
-
9
-
10
-
11
-
12
-
13
-
14
-
15
-
16
-
17
-
18
-
19
-
20
-
21
-
22
-
23
-
24
-
25
-
26
-
27
-
28
-
29
-
30
-
31
-
32
-
33
-
34
-
35
-
36
-
37
-
38
-
39
-
40
-
41
-
42
-
43
-
44
-
45
-
46
-
47
-
48
-
49
-
50
-
51
-
52
-
53
-
54
-
55
-
56
-
57
-
58
-
59
-
60
-
61
-
62
-
63
-
64
-
65
-
66
-
67
-
68
-
69
-
70
-
71
-
72
-
73
-
74
-
75
-
76
-
77
-
78
-
79
-
80
-
81
-
82
-
83
-
84
-
85
-
86
-
87
-
88
-
89
-
90
-
91
-
92
-
93
-
94
-
95
-
96
-
97
-
98
-
99
-
100
-
101
-
102
-
103
-
104
-
105
-
106
-
107
-
108
-
109
-
110
-
111
-
112
-
113
-
114
-
115
-
116
-
117
-
118
-
119
-
120
-
121
-
122
-
123
-
124
-
125
-
126
-
127
-
128
-
129
-
130
-
131
-
132
-
133
-
134
-
135
-
136
-
137
-
138
-
139
-
140
-
141
-
142
-
143
-
144
-
145
-
146
-
147
-
148
-
149
-
150
-
151
-
152
-
153
-
154
-
155
-
156
-
157
-
158
-
159
-
160
-
161
-
162
-
163
-
164
-
165
-
166
-
167
-
168
-
169
-
170
-
171
-
172
-
173
-
174
-
175
-
176
-
177
-
178
-
179
-
180
-
181
-
182
-
183
-
184
-
185
-
186
 |
 |

Dell V725w User's Guide
January 2012
www.dell.com | support.dell.com
Machine type(s):
4449
Model(s):
7d1, 7dE