Dell V725w All In One Wireless Inkjet Printer User's Guide - Page 60
Canceling copy jobs
 |
View all Dell V725w All In One Wireless Inkjet Printer manuals
Add to My Manuals
Save this manual to your list of manuals |
Page 60 highlights
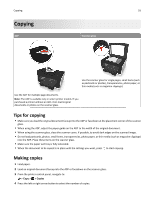
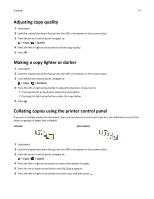
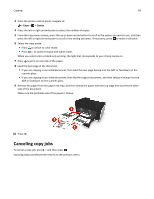
Copying 60 3 From the printer control panel, navigate to: > Copy > > Copies 4 Press the left or right arrow button to select the number of copies. 5 From the Copy menu screen, press the up or down arrow button to scroll to the option you want to set, and then press the left or right arrow button to scroll to the setting you want. If necessary, press to make a selection. 6 Select the copy mode: • Press to switch to color mode. • Press to switch to black‑and‑white mode. When you select color or black‑only printing, the light that corresponds to your choice comes on. 7 Press to print on one side of the paper. 8 Load the next page of the document. • If you are copying a one‑sided document, then load the next page faceup into the ADF or facedown on the scanner glass. • If you are copying a two‑sided document, then flip the original document, and then reload it faceup into the ADF or facedown on the scanner glass. 9 Remove the paper from the paper exit tray, and then reload the paper with the top edge first to print the other side of the document. Make sure the printable side of the paper is faceup. 10 Press . Canceling copy jobs To cancel a copy job, press , and then press . Scanning stops and the printer returns to the previous menu.
-
 1
1 -
2
-
3
-
4
-
5
-
6
-
7
-
8
-
9
-
10
-
11
-
12
-
13
-
14
-
15
-
16
-
17
-
18
-
19
-
20
-
21
-
22
-
23
-
24
-
25
-
26
-
27
-
28
-
29
-
30
-
31
-
32
-
33
-
34
-
35
-
36
-
37
-
38
-
39
-
40
-
41
-
42
-
43
-
44
-
45
-
46
-
47
-
48
-
49
-
50
-
51
-
52
-
53
-
54
-
 55
55 -
 56
56 -
 57
57 -
 58
58 -
 59
59 -
 60
60 -
 61
61 -
 62
62 -
 63
63 -
 64
64 -
 65
65 -
66
-
67
-
68
-
69
-
70
-
71
-
72
-
73
-
74
-
75
-
76
-
77
-
78
-
79
-
80
-
81
-
82
-
83
-
84
-
85
-
86
-
87
-
88
-
89
-
90
-
91
-
92
-
93
-
94
-
95
-
96
-
97
-
98
-
99
-
100
-
101
-
102
-
103
-
104
-
105
-
106
-
107
-
108
-
109
-
110
-
111
-
112
-
113
-
114
-
115
-
116
-
117
-
118
-
119
-
120
-
121
-
122
-
123
-
124
-
125
-
126
-
127
-
128
-
129
-
130
-
131
-
132
-
133
-
134
-
135
-
136
-
137
-
138
-
139
-
140
-
141
-
142
-
143
-
144
-
145
-
146
-
147
-
148
-
149
-
150
-
151
-
152
-
153
-
154
-
155
-
156
-
157
-
158
-
159
-
160
-
161
-
162
-
163
-
164
-
165
-
166
-
167
-
168
-
169
-
170
-
171
-
172
-
173
-
174
-
175
-
176
-
177
-
178
-
179
-
180
-
181
-
182
-
183
-
184
-
185
-
186
 |
 |