Dell V725w All In One Wireless Inkjet Printer User's Guide - Page 139
Printhead Warning
 |
View all Dell V725w All In One Wireless Inkjet Printer manuals
Add to My Manuals
Save this manual to your list of manuals |
Page 139 highlights
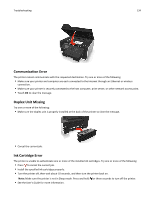
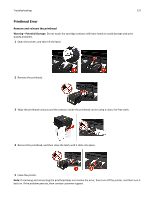
Troubleshooting 139 3 Lift the carrier latch. 4 Remove the unsupported printhead. 5 Insert the supported printhead, and then close the latch until it clicks into place. Note: Make sure to install the ink cartridges into the printhead. For more information, see "Replacing ink cartridges" in the User's Guide. 6 Close the printer. Printhead Warning One or more cartridges may have been missing for more than two hours since the printer was turned on. Clean or Deep Clean the printhead to restore print quality. A cleaning page prints. Notes: • Cleaning the printhead nozzles uses ink, so clean them only when necessary. • Deep cleaning uses more ink, so try the Clean Printhead option first to save ink.
-
 1
1 -
2
-
3
-
4
-
5
-
6
-
7
-
8
-
9
-
10
-
11
-
12
-
13
-
14
-
15
-
16
-
17
-
18
-
19
-
20
-
21
-
22
-
23
-
24
-
25
-
26
-
27
-
28
-
29
-
30
-
31
-
32
-
33
-
34
-
35
-
36
-
37
-
38
-
39
-
40
-
41
-
42
-
43
-
44
-
45
-
46
-
47
-
48
-
49
-
50
-
51
-
52
-
53
-
54
-
55
-
56
-
57
-
58
-
59
-
60
-
61
-
62
-
63
-
64
-
65
-
66
-
67
-
68
-
69
-
70
-
71
-
72
-
73
-
74
-
75
-
76
-
77
-
78
-
79
-
80
-
81
-
82
-
83
-
84
-
85
-
86
-
87
-
88
-
89
-
90
-
91
-
92
-
93
-
94
-
95
-
96
-
97
-
98
-
99
-
100
-
101
-
102
-
103
-
104
-
105
-
106
-
107
-
108
-
109
-
110
-
111
-
112
-
113
-
114
-
115
-
116
-
117
-
118
-
119
-
120
-
121
-
122
-
123
-
124
-
125
-
126
-
127
-
128
-
129
-
130
-
131
-
132
-
133
-
 134
134 -
 135
135 -
 136
136 -
 137
137 -
 138
138 -
 139
139 -
 140
140 -
 141
141 -
 142
142 -
 143
143 -
 144
144 -
145
-
146
-
147
-
148
-
149
-
150
-
151
-
152
-
153
-
154
-
155
-
156
-
157
-
158
-
159
-
160
-
161
-
162
-
163
-
164
-
165
-
166
-
167
-
168
-
169
-
170
-
171
-
172
-
173
-
174
-
175
-
176
-
177
-
178
-
179
-
180
-
181
-
182
-
183
-
184
-
185
-
186
 |
 |
3
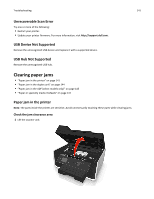
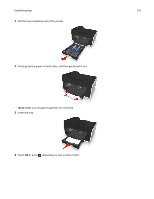
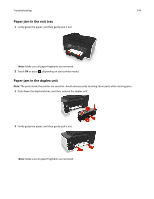
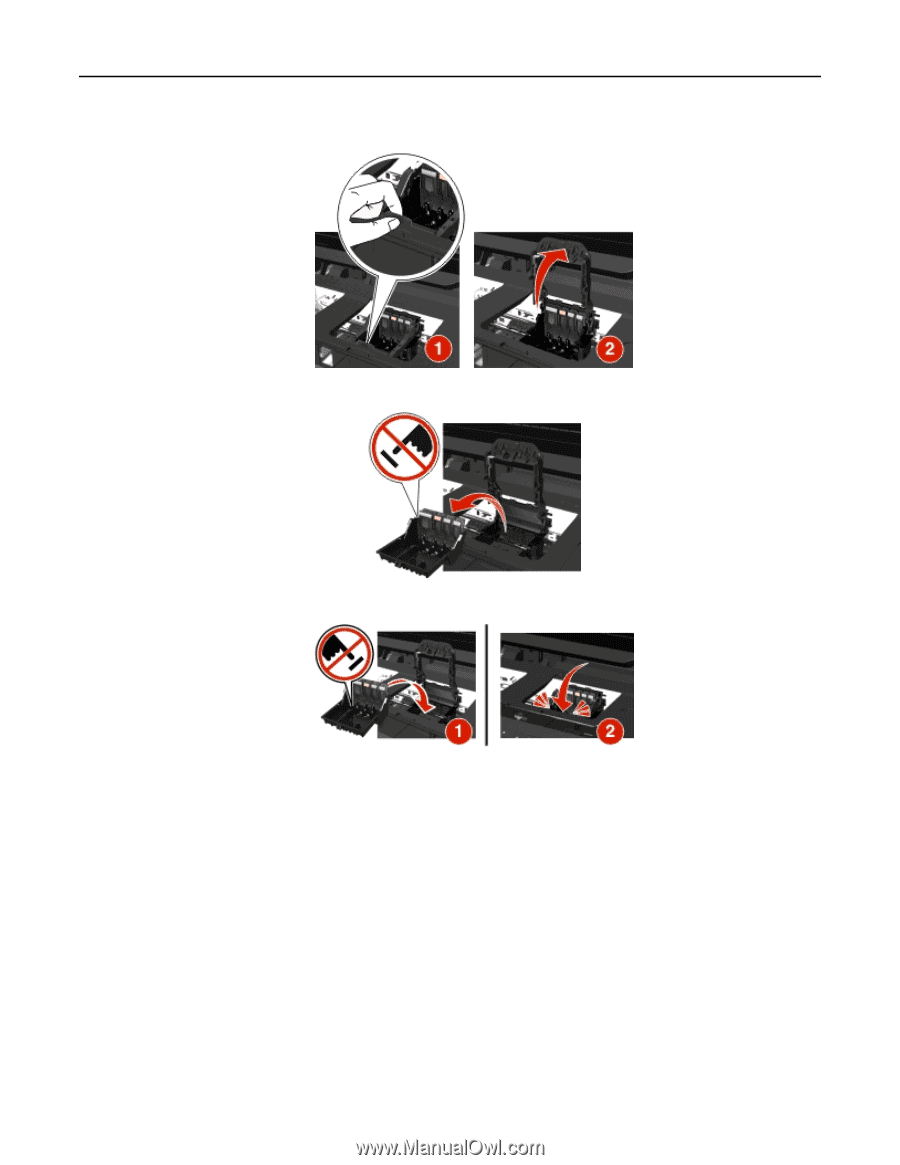
Lift the carrier latch.
4
Remove the unsupported printhead.
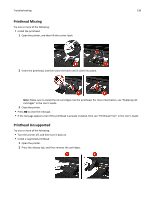
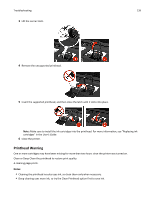
5
Insert the supported printhead, and then close the latch until it
clicks
into place.
Note:
Make sure to install the ink cartridges into the printhead. For more information, see “Replacing ink
cartridges” in the
User’s Guide
.
6
Close the printer.
Printhead Warning
One or more cartridges may have been missing for more than two hours since the printer was turned on.
Clean or Deep Clean the printhead to restore print quality.
A cleaning page prints.
Notes:
•
Cleaning the printhead nozzles uses ink, so clean them only when necessary.
•
Deep cleaning uses more ink, so try the Clean Printhead option first to save ink.
Troubleshooting
139