Denon AVR 2805 Owners Manual
Denon AVR 2805 - AV Receiver Manual
 |
UPC - 081757506076
View all Denon AVR 2805 manuals
Add to My Manuals
Save this manual to your list of manuals |
Denon AVR 2805 manual content summary:
- Denon AVR 2805 | Owners Manual - Page 1
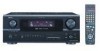
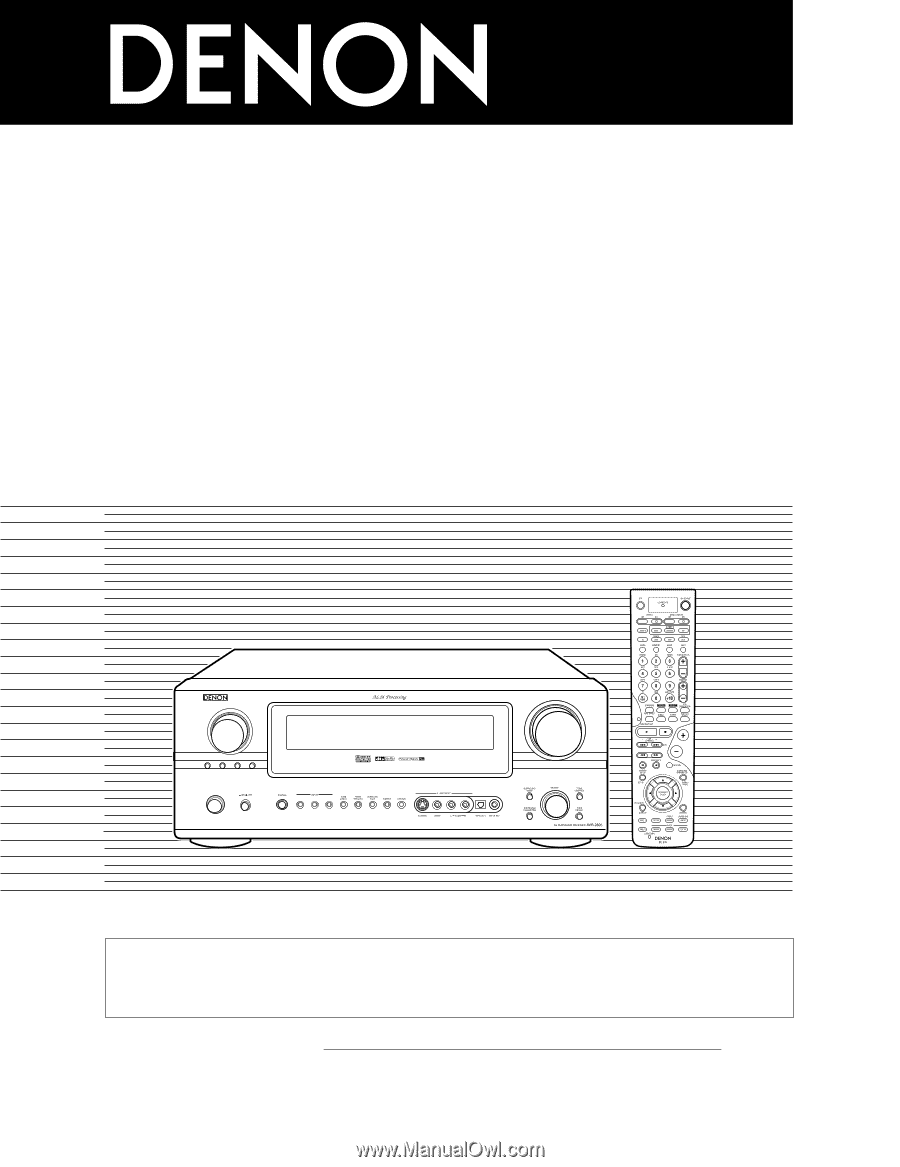
AV SURROUND RECEIVER AVR-2805/985 OPERATING INSTRUCTIONS FUNCTION SOURCE TUNING PRESET ZONE 2 / REC SELECT VIDEO SELECT ON / STANDBY MODE ANALOG EXT. IN MASTER VOLUME 2 We greatly appreciate your purchase of the AVR-2805/985. 2 To be sure you take maximum advantage of all the features the - Denon AVR 2805 | Owners Manual - Page 2
user to the presence of important operating and maintenance (servicing) instructions POUSSER JUSQU' AU FOND. This device complies with Part 15 of the FCC Rules. Operation is subject to contre l'humidité, l'eau et lapoussière. • Unplug the power cord when not using the set for long periods of time. - Denon AVR 2805 | Owners Manual - Page 3
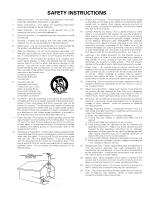
EQUIPMENT NEC - NATIONAL ELECTRICAL CODE ANTENNA LEAD IN WIRE ANTENNA DISCHARGE UNIT (NEC SECTION 810-20) GROUNDING CONDUCTORS (NEC SECTION 810-21) GROUND CLAMPS POWER SERVICE GROUNDING ELECTRODE SYSTEM (NEC ART 250, PART H) 13. Power-Cord Protection - Power-supply cords should be routed so that - Denon AVR 2805 | Owners Manual - Page 4
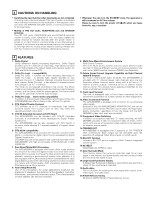
85 ⁄6 Troubleshooting 86 ⁄7 Additional Information 87~97 ⁄8 Specifications 98 2 ACCESSORIES Check that the following parts are included in addition to the main unit: q Operating instructions.......1 w Warranty ( for North America model only 1 e Service station list 1 r Remote control unit - Denon AVR 2805 | Owners Manual - Page 5
.Future Sound Format Upgrade Capability via Eight Channel Inputs & Outputs For future multi-channel audio format(s), the AVR-2805/985 is provided with 7.1 channel (seven main channels, plus one low frequency effects channel) inputs, along with a full set of 7.1 channel pre-amp outputs, controlled by - Denon AVR 2805 | Owners Manual - Page 6
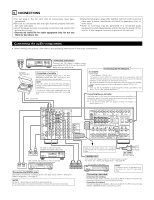
CD player's analog output jacks (ANALOG OUTPUT) to this unit's CD jacks using pin plug cords. Connecting the AC OUTLETS Turntable (MM cartridge) Connecting a turntable Connect the turntable's output cord to the AVR2805/985's PHONO jacks, the L (left) plug to the L jack, the R (right) plug to the - Denon AVR 2805 | Owners Manual - Page 7
cord. Using an improper cable can result in a drop in video quality. • When making connections, also refer to the operating instructions of the other components. • The AVR-2805/985 connected for simultaneous recording or video copying. Video input/output connections: • Connect the video deck's video - Denon AVR 2805 | Owners Manual - Page 8
instructions of the other components. • A note on the S input jacks The input selectors for the S inputs and Video inputs work in conjunction with each other. • The AVR-2805/985 S-VIDEO TV or DBS IN jack using an S-Video connection cord. S-VIDEO OUT IN Video deck 1 Connecting the video decks - Denon AVR 2805 | Owners Manual - Page 9
The AVR-2805/985 is equipped with a function for up-converting video signals. Because of this, the AVR-2805/985's MONITOR OUT jack can be connected to the monitor (TV) with a set of cables offering a higher quality connection, regardless of how the player and the AVR2805/985's video input jacks - Denon AVR 2805 | Owners Manual - Page 10
future multi-channel sound format decoder. • When making connections, also refer to the operating instructions of the other components. Decoder with 8- or 6-channel analog output 10 Front Surround Surround back Subwoofer Center R L R L RL For instructions on playback using the external input (EXT - Denon AVR 2805 | Owners Manual - Page 11
instructions on operations using the MULTI ZONE FUNCTIONS. (See page 65 ~ 67) [1] ZONE 2 preout CONNECTIONS • If another power power amplifier SENSOR OUTPUT B + RC-616 INFRARED RETRANSMITTER INPUT + AUX OUT L R Extension jacks for future use. CONTROL at System Setup Menu "Power Amp Assign". - Denon AVR 2805 | Owners Manual - Page 12
the video signal, connect using a 75 Ω/ohms video signal cable cord. MASTER VOLUME Video game OUTPUT R L OPTICAL VIDEO OUT S-VIDEO component • Connect the Video game component's output jacks to this unit's V. AUX INPUT jacks. LINE OUT DIGITAL OUT VIDEO OUT S-VIDEO OUT LR RL Video camera OUTPUT - Denon AVR 2805 | Owners Manual - Page 13
polarities will result in weak central sound, unclear orientation of the various instruments cord come in contact with adjacent terminals, with other speaker cord conductors, or with the rear panel. NOTE: NEVER touch the speaker terminals when the power to the operating instructions of the other - Denon AVR 2805 | Owners Manual - Page 14
circuit is activated, the speaker output is cut off and the power supply indicator LED flashes. Should this occur, please follow these steps: be even though there are no problems with the wiring or the ventilation around the unit, switch off the power and contact a DENON service center. Note on speaker - Denon AVR 2805 | Owners Manual - Page 15
input jacks 12) !4 SETUP MIC jack 21) !5 SURROUND MODE button 78) !6 SURROUND PARAMETER button 70 ~ 80) !7 SELECT knob 60, 63, 69 ~ 74, 78, 80) !8 TONE DEFEAT button 63) !9 TONE CONTROL button 63, 80) @0 MASTER VOLUME control 60) @1 MASTER VOLUME indicator 60) @2 Display @3 Remote control - Denon AVR 2805 | Owners Manual - Page 16
in the PCM input signal. !1 INPUT MODE indicator This lights corresponding to the setting of the INPUT mode. !2 AUTO indicator This lights when the broadcast station is selected in the AUTO tuning mode. !3 TUNED indicator This lights when an FM/AM broadcast has been received. !4 STEREO indicator - Denon AVR 2805 | Owners Manual - Page 17
details on the functions of these parts, refer to the pages given in parentheses ( ). LED (indicator 50 ~ 57) ZONE 2 buttons 67) Mode selector buttons 18, 49 ~ 51, 53 ~ 58) Input source selector buttons....(50 ~ 52, 59) Remote control signal transmitter 48) Power buttons 50 ~ 58) ZONE1 (MAIN - Denon AVR 2805 | Owners Manual - Page 18
room's AV system centered around the AVR-2805/985. Use the following buttons to set up the system • Use the following buttons to set up the system. 1 Check that the remote control unit set to AMP mode.(TAPE, CDR/MD, CD) (Remote control unit) 2 SYSTEM SETUP button Press this to display the - Denon AVR 2805 | Owners Manual - Page 19
are input to the AVR-2805/985 from a video source (VDP, etc.) connected to both the S-Video and video input jacks, the on-screen display signals are output with priority to the S-Video monitor output. If you wish to output the signals to the video monitor output jack, do not connect a cord to - Denon AVR 2805 | Owners Manual - Page 20
turn on the main unit's power. Setup will not be possible when the unit is set to Pure Direct ON, or when the headphones are plugged in. Therefore, please cancel the mode or reverse the condition. 2 Display the System Setup Menu. (Remote control unit) *System Setup Auto Set/RoomEQ NOTES: • The - Denon AVR 2805 | Owners Manual - Page 21
as your ears. Use a tripod or level surface at positioning. Listening position 1 Setting the Auto Setup / Room EQ 1 Select "Auto Setup / Room EQ" at the System Setup Menu. (Remote control unit) *System Setup Auto Set/RoomEQ 2 Display the Auto Setup / Room EQ menu. (Remote control unit) 21 - Denon AVR 2805 | Owners Manual - Page 22
the Auto Setup 1 Select "Auto Setup" at the Auto Setup / Room EQ Menu. (Remote control unit) *AutoSet/RoomEQ Auto Setup 2 Display the Auto Setup screen. (Remote control unit) 3 Check the "Power Amp Assign" setting. • When "Surround Back" is selected, the test tone during Auto Setup will be - Denon AVR 2805 | Owners Manual - Page 23
3 When "ZONE2" is selected, this is not displayed. After each channel is measured, "Calculating" appears. The display switches to Auto Setup check screen automatically. About automatic retry Remeasurement starts automatically to receive proper result of measurement. Remeasurement is performed to - Denon AVR 2805 | Owners Manual - Page 24
can be checked here. (Remote control unit) *Auto Setup Sp Config.Check 2 Press the ENTER button and display the verification screen. NOTE: Check] [Delay Time Check] [Channel Level Check] 3 If the check ends, press the ENTER button again. (Remote control unit) 4 Select from the following - Denon AVR 2805 | Owners Manual - Page 25
subwoofer speaker while listening to the sound (music). 1 Select "Manual EQ Setup" at the Auto Setup / Room EQ Menu. (Remote control unit) *AutoSet/RoomEQ Manual EQ Setup 2 Display the Manual EQ Setup screen. (Remote control unit) *ManualEQ Setup Channel : FL 3 Select the speaker to be - Denon AVR 2805 | Owners Manual - Page 26
of an Equalizer that has been set with Auto Setup or Manual EQ. 1 Select "Room EQ Setup" at the Auto Setup / Room EQ Menu. (Remote control unit) *AutoSet/RoomEQ Room EQ Setup 2 Display the Room EQ Setup screen. (Remote control unit) *Room EQ Setup SurMode:ALL 3 Select All or Assign. • All - Denon AVR 2805 | Owners Manual - Page 27
setting of Room EQ when the surround mode is Direct or Pure Direct. 1 Select "Direct Mode Setup" at the Auto Setup / Room EQ Menu. (Remote control unit) *AutoSet/RoomEQ Direct Mode 2 Display the Direct Mode Setup screen. (Remote control unit) *Direct Mode Room EQ : OFF 3 Select ON or OFF - Denon AVR 2805 | Owners Manual - Page 28
Please ask the DENON Authorized Service Center about the usable microphone other than the option setup. 1 Select "Mic Input Select" at the Auto Setup / Room EQ Menu. (Remote control unit) *AutoSet/RoomEQ Mic In Select 2 Display the Mic Input Select screen. (Remote control unit) 3 Select the - Denon AVR 2805 | Owners Manual - Page 29
the Equalizer curve. (Remote control unit) 4 Display the parameter screen. (Remote control unit) 5 Select the speaker channel. 7 If the check ends, select "Exit" and press the ENTER button. The Auto Setup / Room EQ Menu reappears. (Remote control unit) (Remote control unit) 8 Select - Denon AVR 2805 | Owners Manual - Page 30
channels and the frequency response are adjusted automatically according to the combination of speakers actually being used. 1 Select "Speaker Config." at the Speaker Setup Menu. (Remote control unit) *Speaker Setup Speaker Config. 2 Display for reproducing bass sound below the frequency set - Denon AVR 2805 | Owners Manual - Page 31
L5 Listening position SL L3 L4 SR SBL SBR (Remote control unit) *Speaker Setup Delay Time 2 Display the Delay Time screen. (Remote control unit) *Delay Time Meters : Feet 3 Select the desired unit, meters or feet. (Remote control unit) 4 Once "Meters" or "Feet" is selected in step - Denon AVR 2805 | Owners Manual - Page 32
7 Enter the setting. The Speaker Setup Menu reappears. The AVR-2805/985 automatically sets the optimum surround delay time for the listening room. (Remote control unit) NOTE: • If the distance unit is changed after the delay time is set, the settings are reset to the factory default values (see - Denon AVR 2805 | Owners Manual - Page 33
3 Select the mode. Select "Auto" or "Manual". *Channel Level T.Tone: Auto (Remote control unit) • Auto: Adjust the level while listening to the test tones produced automatically from each speaker. • Manual: Example: When the "Auto" mode is selected Select the speaker from which you want to - Denon AVR 2805 | Owners Manual - Page 34
being used. 1 Select the "Crossover Frequency" at the Speaker Setup Menu. (Remote control unit) *Speaker Setup Crossover Freq. 2 Display the Crossover Frequency screen. (Remote control unit) 3 Select the frequency. (Remote control unit) *Crossover Freq 80Hz • 40 / 60 / 80 / 100 / 120 - Denon AVR 2805 | Owners Manual - Page 35
speaker system being used. 1 Select the "Subwoofer Mode Setup" at the Speaker Setup Menu. (Remote control unit) *Speaker Setup Subwoofer Mode 2 Display the Subwoofer mode screen. (Remote control unit) 3 Select the setting. (Remote control unit) *Subwoofer Mode LFE 4 Enter the setting - Denon AVR 2805 | Owners Manual - Page 36
3 Setting the Input Setup 1 At the System Setup Menu select "Input Setup". (Remote control unit) *System Setup Input Setup 2 Display the Input Setup Menu screen. (Remote control unit) 36 - Denon AVR 2805 | Owners Manual - Page 37
• This setting assigns the digital input jacks of the AVR-2805/985 for the different input sources. 1 At the Input Setup Menu select "Digital In Assign". (Remote control unit) *Input Setup Digital In 2 Display the Digital Inputs screen. (Remote control unit) *Digital In CD : COAX1 - Denon AVR 2805 | Owners Manual - Page 38
the color difference (component) video input jacks of the AVR-2805/985 for the different input sources. 1 Select "Component In Assign" at the Input Setup Menu. (Remote control unit) *Input Setup Component In 2 Display the Component In Assign screen. (Remote control unit) *Component In DVD - Denon AVR 2805 | Owners Manual - Page 39
reset to the factory defaults. 4 Enter the setting. The Input Setup Menu reappears. (Remote control unit) 3-4 Setting the Video Input Mode 1 Select "Video Input Mode" at the Input Setup Menu . (Remote control unit) *Input Setup Video In Mode 2 Display the Video Input Mode screen. (Remote - Denon AVR 2805 | Owners Manual - Page 40
, use the "Manual tuning" operation to tune in the station, then preset it using the manual "Preset memory" operation. 1 Select "Auto Tuner Presets"at the Input Setup Menu. (Remote control unit) *Input Setup Auto Tuner 2 Display the Auto Preset Memory screen. (Remote control unit) *Auto - Denon AVR 2805 | Owners Manual - Page 41
ENTER button. Display the Dolby Digital Setup screen. (Remote control unit) 3 Select "ON" if you want to use the Compression, "OFF" if you do not want to use it. *Dolby D Setup Comp. : OFF (Remote control unit) NOTE: When a center speaker or surround speakers, are not used the sound is played - Denon AVR 2805 | Owners Manual - Page 42
Remote control unit) Contents stored in the auto surround mode can be checked with the on-screen display. 5 Setting the Option Setup 1 Select "Option Setup" at the System Setup Menu. (Remote control unit) *System Setup Option Setup 2 Display the Option Setup Menu Screen. 42 (Remote control - Denon AVR 2805 | Owners Manual - Page 43
" at the Option Setup Menu. (Remote control unit) *Option Setup P.Amp Assign 2 Press the ENTER button. Display the Power Amp Assign screen. (Remote control unit) 3 Select "Surround Back" to use as the surround back channel, "Zone2" to use as Zone2 out. (Remote control unit) *P.Amp Assign - Denon AVR 2805 | Owners Manual - Page 44
1.Power Amp Assign", the Zone2 vol. Level is all set to "Variable" including preout level and this menu is not displayed. 4 Enter the setting. The Option Setup Menu reappears. (Remote control unit) 5-3, 5-4 Setting the Trigger Out Setup • Set the Trigger Out output 1 for the different input - Denon AVR 2805 | Owners Manual - Page 45
as may happen according to the TV being used. 1 Select "On Screen Display" at the Option Setup Menu. (Remote control unit) *Option Setup On Screen 2 Display the On screen display setup screen. (Remote control unit) 3 Select "ON" or "OFF". (Remote control unit) *On Screen ON/OFF: ON 45 - Denon AVR 2805 | Owners Manual - Page 46
activated, the settings listed below cannot be changed, and "SETUP LOCKED" is displayed when related buttons are operated. • System setup settings (Remote control unit) • Surround parameter settings • Tone control settings • Channel level settings (including test tones) To unlock, press the - Denon AVR 2805 | Owners Manual - Page 47
button at the System Setup Menu. The changed settings are entered and the on-screen display turns off. (Remote control unit) • On-screen display signals Signals input to the AVR-2805/985 On-screen display signal output VIDEO signal input jack (yellow) S-video signal input jack Video signal - Denon AVR 2805 | Owners Manual - Page 48
be used to operate not only the AVR-2805/985 but other remote control compatible DENON components as well. In addition, the memory contains the control signals for other remote control units, so it can be used to operate non-Denon remote control compatible products. Inserting the batteries q Remove - Denon AVR 2805 | Owners Manual - Page 49
DENON , refer to the component's operating instructions. It may not be possible to operate TUNING +, - : Tuning up/down BAND : Switch between AM and FM bands MODE : Switch between AUTO and MANUAL MEMORY : Preset memory SHIFT : Switch preset channel range CHANNEL +, - : Preset channel - Denon AVR 2805 | Owners Manual - Page 50
your device's remote control signals in the included remote control unit. 1 Press the power ON/SOURCE button codes are as follows upon shipment from the factory and after resetting: TV, VCR HITACHI CD, TAPE DENON CDR/MD DENON (CDR) DVD/VDP DENON (DVD) DBS/CABLE ABC (CABLE) DVD preset codes - Denon AVR 2805 | Owners Manual - Page 51
. • For details, refer to the component's operating instructions. Some models cannot be operated with this remote control unit. 1. Digital video disc player (DVD, DVD SETUP) system buttons POWER : Power on/standby (ON/SOURCE) 6,7 : Manual search (forward and reverse) 2 : Stop 1 : Play 8,9 : Auto - Denon AVR 2805 | Owners Manual - Page 52
deck (VCR) system buttons POWER : Power on/standby (ON/SOURCE) 6,7 : Manual search (forward and reverse) 2 : Stop 1 : Play 3 : Pause Channel +, - : Channels 4. Monitor TV (TV), digital broadcast satellite (DBS) tuner and cable (CABLE) system buttons POWER : Power on/standby (ON/SOURCE - Denon AVR 2805 | Owners Manual - Page 53
Learning function If your AV component is not a Denon product or if it cannot be operated using the preset memory, it can be controlled with the accessorious remote control unit by storing its remote control signals in the remote control unit. For some remote control signals it is not possible to " - Denon AVR 2805 | Owners Manual - Page 54
call" function allowing a series of remote control signals to be transmitted by pressing a single button. This function can be used for example to turn on the amplifier's power, select the input source, turn on the monitor TV's power, turn on the source component's power and set the source to the - Denon AVR 2805 | Owners Manual - Page 55
can be assigned to the buttons shown on the diagram at the right which are not normally used mode, the CD mode's PLAY, STOP, MANUAL SEARCH, AUTO SEARCH, PAUSE and DISC SKIP buttons' signals 3 (2) Making the punch through setting 1 Press the power ON/SOURCE button and the OFF button at the same - Denon AVR 2805 | Owners Manual - Page 56
Hold for 4 seconds or longer the mode button of the equipment that is to be reset and the ON/SOURCE button. • The mode button and the LEARNED/TX indicator will again flash, and the learned remote control signal of the selected equipment will be deleted. 4 Press the USE/LEARN button. 1, 4 56 - Denon AVR 2805 | Owners Manual - Page 57
the power ON/SOURCE button and the OFF button at the same time. 1 1 • The LEARNED/TX indicator flashes. 3, 4 2 Press the 1 (play) button. • TV and DBS/CABLE mode buttons and LEARNED/TX indicator flash. 3 Press the mode button of the equipment (TV or DBS/CABLE) that is to be reset. • The - Denon AVR 2805 | Owners Manual - Page 58
be turned on and off from the remote control unit. 4 Turn on the power Press the POWER ON/STANDBY switch (button). ON / STANDBY (Remote control unit) (Main unit) When pressed, the power turns on and the display lights. The sound is muted for several seconds, after which the unit operates - Denon AVR 2805 | Owners Manual - Page 59
EXT. IN button on the remote control unit) to switch the external input. EXT. IN (Remote control unit) (Main unit) • Selecting the AUTO, PCM and DTS modes The mode switches as shown below each time the INPUT MODE button is pressed. AUTO PCM DTS MODE (Remote control unit) (Main unit) Note - Denon AVR 2805 | Owners Manual - Page 60
the selected component. • For operating instructions, refer to the component's manual. 5 Adjust the volume. MASTER VOLUME • In the EXT.IN mode Input signal display • DOLBY DIGITAL The volume level is displayed on the master volume level display. (Remote control unit) (Main unit) The volume - Denon AVR 2805 | Owners Manual - Page 61
mode To cancel the external input (EXT. IN) setting, press the input mode (AUTO, PCM, DTS) or ANALOG button to switch to the desired input mode. (See page 59) MODE ANALOG (Remote control unit) (Main unit) • When the input mode is set to the external input (EXT. IN), the surround mode (DIRECT - Denon AVR 2805 | Owners Manual - Page 62
sound while watching images. 1 (Remote control unit) 2 3 NOTES: • The system setup function cannot be used when the PURE DIRECT mode is set. To use the system setup function, cancel the PURE DIRECT mode. • The ZONE2 video output is not output in the PURE DIRECT mode. • The channel level - Denon AVR 2805 | Owners Manual - Page 63
output) is automatically turned off when headphone are connected. PHONES 1 [3] Turning the sound off temporarily (MUTING) 1 Use this to mute the audio output temporarily. Press the MUTING button. (Remote control unit) Cancelling MUTING mode. Press the MUTING button again. 1 NOTE: To prevent - Denon AVR 2805 | Owners Manual - Page 64
Remote control unit) during playback by pressing the remote control unit's ON SCREEN button. Such information as the position of the input selector and the surround parameter settings is output in sequence. (Main unit) Front panel display For operating instructions, refer to the manual of the - Denon AVR 2805 | Owners Manual - Page 65
(Refer to ZONE2 on the diagram below.) • ZONE2 SPEAKER OUT can be used when "ZONE2" is selected at System Setup Menu "Power Amp Assign".In this case, Surround Back Speaker OUT cannot be used for MAIN ZONE. (See page 43.) • When a sold separately room-to-room remote control unit (DENON RC-616, 617 or - Denon AVR 2805 | Owners Manual - Page 66
. MAIN ZONE 5.1-channel systems Monitor FL DVD player B Input C This unit FR ZONE 2 VIDEO OUT SW ZONE2 SPEAKER OUT SL RC-616 SR SYSTEM REMOTE CONTROL UNIT RC-974 ZONE 2 Monitor RC-617 PROGRAMMABLE REMOTE CONTROL UNIT ROOM-TO-ROOM REMOTE CONTROL SYSTEM (separately sold) control line MULTI - Denon AVR 2805 | Owners Manual - Page 67
" at Zone2 Control in System Setup Menu. (see page 43,44) DEFAULT SETTING (ZONE2 VOLUME LEVEL) : - - - dB (MINIMUM) 5 When the ZONE2 SOURCE function is set to TUNER, the preset channel can be selected using the CHANNEL + and - buttons on the remote control unit. (Remote control unit) The - Denon AVR 2805 | Owners Manual - Page 68
level of the selected speaker. (Remote control unit) When the surround back speaker setting is set to "1spkr" for "Speaker Configuration", this is set to "SB". NOTES: • The adjustment range for the different channels is +12 dB to -12 dB. • The sound from the subwoofer can be cut by lowering the SW - Denon AVR 2805 | Owners Manual - Page 69
mode, set "Surround Back" at the Power Amp Assign setting. 1 1 1, 4, 6 3, 5 1 Select the Dolby Pro Logic IIx mode. SELECT (Remote control unit) (Main unit) 2 Play a program source with the mark. • For operating instructions, refer to the manuals of the respective components. The Dolby - Denon AVR 2805 | Owners Manual - Page 70
normal display reappears after several seconds. When the settings are made using the buttons on the remote control unit, press the "ENTER" or "SURROUND PARAMETER" button to finish. NOTE: • There are four Dolby Surround Pro Logic modes (NORMAL, PHANTOM, WIDE and 3 STEREO). The AVR-2805/985 sets - Denon AVR 2805 | Owners Manual - Page 71
performed for the analog input and PCM digital input 2-channel signals. 1 Select the DTS NEO:6 mode. SELECT (Remote control unit) (Main remote control unit during playback in the DTS NEO:6 mode. (Remote control unit) 4 Select the play mode. (Main unit) SELECT (Remote control unit) Display - Denon AVR 2805 | Owners Manual - Page 72
buttons after completing the settings. The settings are automatically finalized and the normal display reappears after several seconds. When the settings are made using the buttons on the remote control unit, press the "ENTER" or "SURROUND PARAMETER" button to finish. NOTE: • When "Default - Denon AVR 2805 | Owners Manual - Page 73
(DTS, DOLBY DIGITAL, PCM, etc.). fs: Displays the input signal's sampling frequency. (Remote control unit) FORMAT: Displays the input signal's number of channels. "Number of front channels/Number of surround channels/LFE on/off" "SURROUND" is displayed for 2-channel signal sources recorded in - Denon AVR 2805 | Owners Manual - Page 74
audio delay to delay the sound and synchronize it with the picture. The audio delay setting is stored separately for each input source. 1 q Select the input source. 2 FUNCTION Press the SYSTEM SETUP button and display the System Setup Menu. (Remote control unit) w Set the input mode to "AUTO - Denon AVR 2805 | Owners Manual - Page 75
is synchronized with the sound. 8 Enter the setting. The Advanced Playback Menu reappears. (Remote control unit) 9 Press the SYSTEM SETUP button to complete the setting. NOTE: The audio delay setting does not apply when playing in the EXT. IN mode or in the analog input direct mode or stereo - Denon AVR 2805 | Owners Manual - Page 76
12 DSP SURROUND SIMULATION • The AVR-2805/985 is equipped with a high performance DSP (Digital Signal Processor) which uses digital signal processing to synthetically recreate the sound field. One of ten preset surround modes can be selected according to the program source and the parameters can be - Denon AVR 2805 | Owners Manual - Page 77
each input channel. (Remote control unit) The surround mode switches in the following order each time the DSP SIMULATION button is pressed: WIDE SCREEN SUPER STADIUM ROCK ARENA JAZZ CLUB VIRTUAL MATRIX VIDEO GAME MONO MOVIE CLASSIC CONCERT 2 Press the surround patameter button. Display the - Denon AVR 2805 | Owners Manual - Page 78
adjusting the surround parameters or tone control, press the surround mode button 3 Display the parameter you want to adjust, then turn the SELECT knob to set it. NOTE: • When playing PCM digital signals or analog signals in the DOLBY PRO LOGIC IIx, DTS NEO:6 modes and the input signal - Denon AVR 2805 | Owners Manual - Page 79
) 3 Display the Room RQ / Tone Control screen. *Surr Parameter EQ/TONE (Remote control unit) 4 Select the Equalizer setting. OFF Normal Front Manual Flat (Remote control unit) NOTES: • The equalizer setting of Normal, Flat, and Front can be selected after performing the Auto Setup. • When - Denon AVR 2805 | Owners Manual - Page 80
" button again. (Remote control unit) • Operate the Room EQ from the main unit. 1 Press the surround parameter button. Display the surround parameter screen . • To increase the bass or treble: Turn the control clockwise. (The bass or treble sound can be increased to up to +6 dB in steps of 1 - Denon AVR 2805 | Owners Manual - Page 81
set in the Manual EQ setup 2 Surround modes and parameters Signals and adjustability in the different modes Channel output Mode FRONT L/R CENTER SURROUND SURROUND L/R BACK L/R SUBWOOFER DIRECT / PURE DIRECT C E E E B STEREO C E E E B EXTERNAL INPUT C B B B B DOLBY PRO - Denon AVR 2805 | Owners Manual - Page 82
signals Mode DIRECT / PURE DIRECT STEREO EXTERNAL INPUT DOLBY PRO LOGIC II DOLBY PRO LOGIC II E E E E C C E E E E E E E E E E SB CH OUT (MODE) E E E C C C C C C C C C C C C C C E TONE CONTROL E C (0dB) E C (0dB) C (0dB) C (0dB) C (0dB) C (0dB) C (0dB) C (0dB) C (Note1) C (Note2) C (0dB) C (0dB) C - Denon AVR 2805 | Owners Manual - Page 83
on the display when a stereo broadcast is tuned in. At open frequencies, the noise is muted and the "TUNED" and (Remote control unit) "STEREO" indicators turn off. • When the manual tuning mode is set, FM stereo broadcasts are 3 Press the MODE button to set the manual tuning mode. received in - Denon AVR 2805 | Owners Manual - Page 84
Use the "Auto tuning" or "Manual tuning" operation to tune in the station to be preset in the memory. 2 Press the MEMORY button. (Remote control unit) 2, 5 3 Press the SHIFT button and select the desired memory block (A to G). 3 (Remote control unit) 4 Press the CHANNEL + (UP) or - (DOWN - Denon AVR 2805 | Owners Manual - Page 85
memory block. (Remote control unit) 2 Watching the display, press the CHANNEL + (UP) or - (DOWN) button to select the desired preset channel. 1 (Remote control unit) • Recalling preset stations from the main unit's panel. 2 1 Press the TUNING PRESET button. TUNING PRESET (Main unit - Denon AVR 2805 | Owners Manual - Page 86
problems when listening to the CD's, Records, Tapes and FM broadcasts, etc. Symptom Cause DISPLAY not lit and sound not produced • Power cord not plugged in securely. when power switch set to on. Measures • Check the insertion of the power cord plug. • Turn the power on with the remote control - Denon AVR 2805 | Owners Manual - Page 87
channel SR: Surround R channel SB: Surround back channel SB Multiple surround speakers (For 6.1-channel system) • Other types of audio These signals are designed to recreate a 360° sound required in order to achieve the ideal sound. The AVR-2805/985 is equipped the function of surround speakers - Denon AVR 2805 | Owners Manual - Page 88
in conventional Dolby Surround as well as Dolby Digital 5.1-channel and DTS Surround 5.1-channel sources. Furthermore, all the Denon original surround modes (see page 76) are compatible with 7.1-channel playback, so you can enjoy 7.1-channel sound with any signal source. 2 Number of surround back - Denon AVR 2805 | Owners Manual - Page 89
different purposes. Use these examples as guides to set up your system according to channels reflect off the walls as shown on the diagram at the left, creating an enveloping and realistic surround sound than the front speakers. • Consult the owner's manual for your subwoofer for advice on placing - Denon AVR 2805 | Owners Manual - Page 90
the "bit stream + PCM" jacks to the AVR-2805/985. (2) Dolby Pro Logic IIx • Dolby Pro Logic IIx furthers the matrix decoding technology of Dolby Pro Logic II to decode audio signals recorded on two channels into up to 7.1 playback channels, including the surround back channel. Dolby Pro Logic IIx - Denon AVR 2805 | Owners Manual - Page 91
sound. There are two types of DVD Dolby surround recording signals. q 2-channel PCM stereo signals w 2-channel Dolby Digital signals When either of these signals is input to the AVR-2805/985 Recent DENON DVD player models feature DTS-compatible digital output - consult the player's owner's manual for - Denon AVR 2805 | Owners Manual - Page 92
optimum playing mode is selected. However, some Matrix 6.1 sources may be detected as having a 5.1-channel format, so the DTS-ES Matrix 6.1 mode must be set manually to play these sources. (For instructions on selecting the surround mode, see page 74.) The DTS-ES decoder includes another function - Denon AVR 2805 | Owners Manual - Page 93
channel sources. For example, there are high picture/sound quality DVD video sources with 96 kHz/24 bit stereo PCM Processing 2 Pure Direct Mode/AL24 processing The AVR-2805/985 is equipped with a pure direct mode allowing the AL24 processing which compensates the input digital data to produce the - Denon AVR 2805 | Owners Manual - Page 94
and default values (set upon shipment from the factory) 1. Auto Setup/Room EQ Auto Setup/Room EQ 1 Auto Setup Power Amp Set this to switch the surround back channel's Assignment power amplifier for use for zone2. 2 Manual EQ Setup This parameter is for optimizing the Room EQ with which the - Denon AVR 2805 | Owners Manual - Page 95
the output level for the speaker terminals. ---dB(minimum) 6 On Screen Display 7 Setup Lock This sets whether or not to display the on-screen display that appears on the monitor screen when the controls on the remote control unit or main unit are operated. A setting to prevent flickering. Set - Denon AVR 2805 | Owners Manual - Page 96
signals Mode DIRECT / PURE DIRECT STEREO EXTERNAL INPUT DOLBY PRO LOGIC II DOLBY PRO LOGIC II E E E E C C E E E E E E E E E E SB CH OUT (MODE) E E E C C C C C C C C C C C C C C E TONE CONTROL E C (0dB) E C (0dB) C (0dB) C (0dB) C (0dB) C (0dB) C (0dB) C (0dB) C (Note1) C (Note2) C (0dB) C (0dB) C - Denon AVR 2805 | Owners Manual - Page 97
Signal input E : No signal Input signals S-VIDEO E C C E E C C VIDEO C E C E C E C COMPONENT VIDEO E VIDEO E VIDEO E VIDEO MONITOR OUT S-VIDEO VIDEO E VIDEO E VIDEO E VIDEO VIDEO VIDEO E VIDEO E VIDEO E VIDEO E : Not output COMPONENT : On-screen display only displayed for SYSTEM SETUP, SURR - Denon AVR 2805 | Owners Manual - Page 98
1 kHz): MONO 0.15% STEREO 0.3% 2 General Power supply: AC 120 V, 60 Hz Power consumption: 5.6 A 1 W Max (Standby) Maximum external dimensions: 434 (W) x 171 (H) x 429 (D) mm (17-3/32" x 6-47/64" x 16-57/64") Mass: 13.5 kg (29 lbs 12 oz) 2 Remote control unit (RC-974) Batteries: R6P/AA - Denon AVR 2805 | Owners Manual - Page 99
- Denon AVR 2805 | Owners Manual - Page 100
16-11, YUSHIMA 3-CHOME, BUNKYO-KU, TOKYO 113-0034, JAPAN Telephone: (03) 3837-5321 Printed in Japan 511 4172 007
-
 1
1 -
 2
2 -
 3
3 -
 4
4 -
 5
5 -
 6
6 -
 7
7 -
8
-
9
-
10
-
11
-
12
-
13
-
14
-
15
-
16
-
17
-
18
-
19
-
20
-
21
-
22
-
23
-
24
-
25
-
26
-
27
-
28
-
29
-
30
-
31
-
32
-
33
-
34
-
35
-
36
-
37
-
38
-
39
-
40
-
41
-
42
-
43
-
44
-
45
-
46
-
47
-
48
-
49
-
50
-
51
-
52
-
53
-
54
-
55
-
56
-
57
-
58
-
59
-
60
-
61
-
62
-
63
-
64
-
65
-
66
-
67
-
68
-
69
-
70
-
71
-
72
-
73
-
74
-
75
-
76
-
77
-
78
-
79
-
80
-
81
-
82
-
83
-
84
-
85
-
86
-
87
-
88
-
89
-
90
-
91
-
92
-
93
-
94
-
95
-
96
-
97
-
98
-
99
-
100
 |
 |
MODE
ANALOG
EXT. IN
ZONE 2 /
REC SELECT
SOURCE
VIDEO
SELECT
TUNING
PRESET
ON / STANDBY
MASTER VOLUME
FUNCTION
AV SURROUND RECEIVER
AVR-2805/985
OPERATING INSTRUCTIONS
2
We greatly appreciate your purchase of the AVR-2805/985.
2
To be sure you take maximum advantage of all the features the AVR-2805/985 has to offer, read these
instructions carefully and use the set properly. Be sure to keep this manual for future reference, should any
questions or problems arise.
“SERIAL NO.
PLEASE RECORD UNIT SERIAL NUMBER ATTACHED TO THE REAR OF THE
CABINET FOR FUTURE REFERENCE”