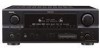
Denon AVR2307CI Owners Manual - English - Page 14
Enter, On/standby, On/source], Power, Mode Selector 1] - standby mode
 |
UPC - 081757507103
View all Denon AVR2307CI manuals
Add to My Manuals
Save this manual to your list of manuals |
Page 14 highlights
ENGLISH Easy Setup Procedure w Before performing the Auto Setup procedure 1 Turn on your subwoofer. Set the volume to halfway and set the crossover frequency to the maximum or Low pass filter off if your subwoofer can adjust the output volume and the crossover frequency. Some subwoofers have a standby mode. Be sure to turn this function off before performing the Auto Setup procedure. 2 Turn on your monitor. 3 Press . ¢ ON: The power indicator lights red. £ OFF: The power turns off and the indicator is off. 4 Press or [ON/SOURCE]. • The power indicator blinks green and the power turns on. e Perform the Auto Setup procedure 1 Press SYSTEM SETUP. 2 Press D H to select "Auto Setup / Room EQ", then press ENTER. 3 Press D H to select "Auto Setup", then press ENTER. The message "Connect Microphone" is displayed if no microphone is connected. If so, connect the auto setup microphone. 1 2 3 Easy Setup Procedure r Assigning power amplifiers The surround back output can be assigned to the "Front" or "ZONE2" output. Press D H to select "Power Amp Assign", then press F G to set. Surround Back: Assign to use as surround back speaker. ZONE2: Assign to use as "ZONE2" speakers. Front A, Front B: Assign to use the "Front A" or "Front B" speakers with bi-amp connections. When assigned to "Front" or "ZONE2", skip the surround back channel measurement. During the auto setup procedure, test tones are not output to "ZONE2". 5 Set [MODE SELECTOR 1] to "AUDIO". • "System Setup Menu" is not displayed when using headphones. t Switching the front speaker Press D H to select "Front Sp", then press F G to select the speaker. Front A Front B Front A+B 11 ENGLISH
-
 1
1 -
2
-
3
-
4
-
5
-
6
-
7
-
8
-
 9
9 -
 10
10 -
 11
11 -
 12
12 -
 13
13 -
 14
14 -
 15
15 -
 16
16 -
 17
17 -
 18
18 -
 19
19 -
20
-
21
-
22
-
23
-
24
-
25
-
26
-
27
-
28
-
29
-
30
-
31
-
32
-
33
-
34
-
35
-
36
-
37
-
38
-
39
-
40
-
41
-
42
-
43
-
44
-
45
-
46
-
47
-
48
-
49
-
50
-
51
-
52
-
53
-
54
-
55
-
56
-
57
-
58
-
59
-
60
-
61
-
62
-
63
-
64
-
65
-
66
-
67
-
68
-
69
-
70
-
71
-
72
-
73
-
74
-
75
-
76
-
77
-
78
-
79
-
80
-
81
-
82
 |
 |
