Dewalt DW369CSK Instruction Manual - Page 12
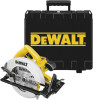
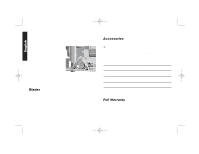
Brushes, Maintenance, Important, Cleaning and Lubrication, Electric Brake DW369 Only - case
 |
View all Dewalt DW369CSK manuals
Add to My Manuals
Save this manual to your list of manuals |
Page 12 highlights
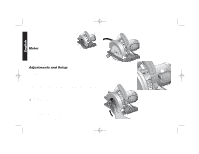
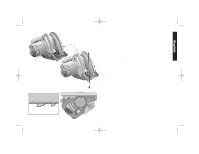
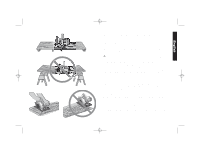
DW368/605266 7/2/02 11:50 AM Page 9 English on "Adjustments And Set-Up" and "Operation" for procedures and techniques that will minimize the occurrence of kickback. Maintenance Brushes DISCONNECT PLUG FROM POWER SUPPLY BEFORE SERVICING Inspect carbon brushes regularly by unplugging tool, removing the End Important Cap (Detail Page 4) and withdrawing the brush assembly. Keep brushes clean and sliding freely in their guides. Always replace a used To assure product SAFETY and RELIABILITY, repairs, maintenance and adjustment should be performed by authorized service centers or other qualified service organizations, always using identical replacement parts.(See Brushes section for brush replacement information) brush in the same orientation in the holder as it was prior to removal. Carbon brushes have varying symbols stamped into their sides, and if either brush is worn down to the line closest to the spring, they must be replaced. Use only identical DEWALT brushes. New brush assemblies are available at your local service center. Always replace end cap after inspecting or servicing brushes. The tool should be allowed to Cleaning and Lubrication Use only mild soap and a damp cloth to clean the tool. Many household cleaners contain chemicals which could seriously damage plastic. Also, do not use gasoline, turpentine, lacquer or paint thinner, dry cleaning fluids or similar products. Never let any liquid get inside the tool; never immerse any part of the tool into a liquid. "run in" (run at no load without a blade) for 5 minutes before use to seat new brushes. While "running in" DO NOT TIE, TAPE, OR OTHERWISE LOCK THE TRIGGER SWITCH ON. HOLD BY HAND ONLY. SHOE ADJUSTMENT DISCONNECT PLUG FROM POWER SUPPLY. Self lubricating ball and roller bearings are used in the tool and relubrication is not required. However, it is recommended that, once a year, you take or send the tool to a service center for a thorough Your shoe has been factory set to assure that the blade is perpendicular to the shoe. If after extended use, you need to re-align the blade as follows: cleaning, inspection and lubrication of the gear case. ADJUSTING FOR 90 DEGREE CUTS Electric Brake (DW369 Only) Your saw has an automatic electric brake which is designed to stop the blade from coasting in about two seconds, after you release the trigger switch. It is useful when making certain cuts in wood where a coasting blade would result in a wide, imprecise cut. Occasionally, under certain conditions, the brake will not function properly and won't stop the saw in the 2 seconds discussed above. If this condition persists, turn the saw on and off four or five times. If the brake still does not stop the blade in about 2 seconds, the 1. Return the saw to 0 degrees bevel. 2. Place the saw on its side, and retract the lower guard. 3. Loosen the Bevel Adjustment Lever (Figure 8 (A). Place a square against the blade and the shoe. 4. Using an allen wrench, turn the set screw on the underside of the shoe until the blade and the shoe are both in flush contact with the square. Retighten the Bevel Adjust Lever. problem may be worn brushes. Replace the brushes as described below and try the saw again. If the problem still persists, have the tool serviced at a DEWALT certified service center. 9
-
 1
1 -
2
-
3
-
4
-
5
-
6
-
 7
7 -
 8
8 -
 9
9 -
 10
10 -
 11
11 -
 12
12 -
 13
13 -
 14
14 -
 15
15 -
 16
16 -
 17
17 -
18
-
19
-
20
-
21
-
22
-
23
-
24
-
25
-
26
-
27
-
28
-
29
-
30
-
31
-
32
-
33
-
34
-
35
-
36
-
37
-
38
-
39
-
40
-
41
 |
 |
