Epson 5550C User Manual
Epson 5550C - PowerLite SVGA LCD Projector Manual
 |
UPC - 010343820807
View all Epson 5550C manuals
Add to My Manuals
Save this manual to your list of manuals |
Epson 5550C manual content summary:
- Epson 5550C | User Manual - Page 1
EPSON ® PowerLite® 5550C/7550C User's Guide - Epson 5550C | User Manual - Page 2
alterations to this product, or (excluding the U.S.) failure to strictly comply with SEIKO EPSON CORPORATION's operating and maintenance instructions. SEIKO EPSON CORPORATION shall not be liable against any damages or problems arising from the use of any options or any consumable products other than - Epson 5550C | User Manual - Page 3
cover on the projector, except the lamp and filter covers. Dangerous electrical voltages inside the projector can severely injure you. Except as specifically explained in this User's Guide, do not attempt to service this product yourself. Refer all servicing to qualified service personnel. Warning - Epson 5550C | User Manual - Page 4
installation. This equipment generates, uses, and can radiate radio frequency energy and, if not installed and used in accordance with the instructions, may cause harmful interference to radio or television reception. However, there is no guarantee that interference will not occur in a particular - Epson 5550C | User Manual - Page 5
3 About This Manual 4 Safety Instructions 5 Where to Get Help 7 Electronic Support Services 7 Automated Telephone Services 8 1 Setting Up the Projector 11 Unpacking the Projector 12 Additional Components 14 Attaching the Hand Strap 16 Installing the Remote Control Batteries 18 - Epson 5550C | User Manual - Page 6
54 Resizing the Projected Image 56 Controlling the Projector 57 Using the Remote Control 58 Using the Control Panel 63 Projector Status Lights 65 Power Light 65 Projector Lamp Light 66 Temperature Light 66 3 Adjusting Projector Settings 67 Accessing the Main Menu 69 Changing - Epson 5550C | User Manual - Page 7
Logo 78 Creating the User Logo 78 Assigning the Logo to the AV/Mute Button 80 Modifying the Special Effects 81 Displaying Information About Your Projector 82 Resetting All Menu Options 83 4 Using ELP Link III 85 Unpacking the ELP Link III Kit 86 Connecting the ELP Link III Cables 87 - Epson 5550C | User Manual - Page 8
Case 132 Cleaning the Air Filter 133 Replacing the Lamp 134 Transporting the Projector 137 6 Troubleshooting 139 Using the Online Help Menu 140 Problems with the Projector 141 Problems with the Remote Control 144 Problems with the Image or Sound 145 7 Technical Specifications 149 - Epson 5550C | User Manual - Page 9
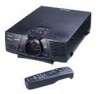
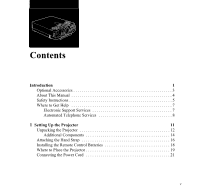
The EPSON® PowerLite® projector is a compact, lightweight projector that lets you project full-color images and video onto a large screen for presentations. It supports IBM® compatible PCs and laptops, as well as Apple® Macintosh,® Power Macintosh,™ and PowerBook® computers. Note: The projector also - Epson 5550C | User Manual - Page 10
System for rich, powerful audio output. You projector's new patented SizeWize™ chip supports remote control, and even program the keyboard and remote control with your own customized functions. p The projector's sleep mode conserves electricity by automatically turning off the lamp after the projector - Epson 5550C | User Manual - Page 11
Optional Accessories To enhance your use of the projector, EPSON provides the following optional accessories: Accessory Replacement lamp and filter Soft travel case for projector and laptop Hard travel case Computer cable ELP Link III kit for PC for Windows (includes ELP Link III software and - Epson 5550C | User Manual - Page 12
About This Manual This manual describes how to set up and use the EPSON PowerLite 5550C and PowerLite 7550C projectors. Except where noted, the instructions apply to both projectors. Chapter 1, "Setting Up the Projector," gives step-by-step instructions for connecting your projector to a computer, - Epson 5550C | User Manual - Page 13
Always follow these safety instructions: 1. Place the projector on a flat, stable surface. 2. Don't use the projector near water or sources of heat. Don't place the projector or remote control on top of heat-producing equipment, and avoid places subject to shocks and vibrations, or high or - Epson 5550C | User Manual - Page 14
to qualified service personnel under the following conditions: p When the power cord or plug is damaged or frayed p If liquid has been spilled into the projector, or if it has been exposed to rain or water p If it doesn't operate normally when you follow the operating instructions, or if it - Epson 5550C | User Manual - Page 15
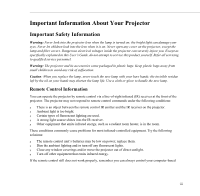
Help If you're having trouble setting up or using your projector, see the projector's Help menu or read Chapter 6, "Troubleshooting." If you can't resolve the problem, EPSON provides technical assistance through electronic support services and automated telephone services 24 hours a day, as listed - Epson 5550C | User Manual - Page 16
service. EPSON Referral Service For the location of your nearest Authorized EPSON Reseller or Customer Care Center, call (800) 922-8911. When support is required, follow the calling instructions on the back of the EPSON Private Line Technical Support card included with the projector. Technical - Epson 5550C | User Manual - Page 17
p Computer configuration p Description of the problem You can purchase accessories from EPSON Accessories at (800) 873-7766; or visit our web site at www.epsonsupplies.com (U.S. sales only). In Canada, please call (800) 873-7766 for dealer referral. Where to Get Help 9 - Epson 5550C | User Manual - Page 18
10 Introduction - Epson 5550C | User Manual - Page 19
source, such as a computer, VCR, camcorder, or DVD player. If you want, you can connect your projector to both a computer and a second video source. You can also do any of the following: p Connect the projector to an audio source for one or both video sources. The audio source can be the computer - Epson 5550C | User Manual - Page 20
controls the screen cursor. p Connect the projector to an external speaker or public address (PA) system to amplify the audio. Unpacking the Projector When you unpack the projector, make sure you have all these components: Projector Remote control 2 AA batteries Power cord 12 1 • Setting Up the - Epson 5550C | User Manual - Page 21
Projector video cable Audio cable Audio/video (A/V) cable PS/2® mouse cable (for the PC) Mac mouse cable (for the Macintosh) Hand strap (with 2 screws) Soft carrying case Unpacking the Projector 13 - Epson 5550C | User Manual - Page 22
See "Transporting the Projector" on page 137 for instructions.) Additional Components Depending on how you plan to use the projector, you may need these additional components: p For complete control of the projector from your computer or to program enhanced special effects on the remote control, you - Epson 5550C | User Manual - Page 23
, you need an RCA-to-3.5 mm stereo audio cable. You can obtain one from your computer dealer. p To use the remote control when the projector is not in line-of-sight of the remote, you need an optional infrared repeater. For more information, call (800) 843-5465 or visit this web address: www - Epson 5550C | User Manual - Page 24
Attaching the Hand Strap Follow the steps below to attach the hand strap to the projector with the two screws included with the strap. 1. Gently place the projector on its side, so you are looking at the bottom and the back of the projector is facing left. Caution: Do not lift or hold the - Epson 5550C | User Manual - Page 25
3. Place one end of the strap through the front strap connector and use a screwdriver to fasten one of the screws through the strap. Make sure the screw is securely fastened. screw 4. Place the other end of the strap through the rear strap connector and fasten it with the other screw. (There is no - Epson 5550C | User Manual - Page 26
Batteries You can use the remote control as a wireless mouse instead of your computer's mouse to control your presentation Slide off the battery compartment cover. 2. Insert the two AA batteries included with the projector. Make sure the polarity of the batteries is correct. 18 1 • Setting Up the - Epson 5550C | User Manual - Page 27
near sources of heat, or in a location where the cord is likely to be stepped on. p Because the distance between the projector and screen determines image size, position the projector the proper distance from the screen for the size image you want to project. Use the following table to determine the - Epson 5550C | User Manual - Page 28
Note: In addition to front projection, your projector supports rear and ceiling projection. To use rear or ceiling projection, you need to select the Ceiling or Rear Projection mode in the Setting menu. See "Changing Basic Projector Settings" on page 76 for more information. Image size (diagonal) - Epson 5550C | User Manual - Page 29
. The PowerLite 7550C is also capable of projecting SXGA images. (The projector resizes VGA and XGA images for the PowerLite 5550C and VGA, SVGA, and SXGA images for the 7550C.) The following types of computers are supported: p IBM compatible desktop or laptop PC p Apple Macintosh desktop computer - Epson 5550C | User Manual - Page 30
ELP Link III software, you'll also need to connect the ELP Link III cables. See Chapter 4 for instructions after you finish connecting the projector to your computer. Note: If you want to use the remote as a mouse and your computer doesn't have a PS/2 mouse connector, you must use the ELP Link III - Epson 5550C | User Manual - Page 31
; you may want to refer to this as you connect your computer or other equipment to the projector. Left Audio Video In S-Video In Computer Out power switch Computer In Mouse/Com AC inlet Right Audio Repeater Audio In Audio Out Connecting to a PC Desktop Computer This section describes - Epson 5550C | User Manual - Page 32
monitor cable (optional) Note: Computer configurations vary. See your computer manual for the location of the ports needed to connect your projector. 1. Turn off the projector and computer, if they're on. 2. Connect either end of the projector's video cable to the Computer In port. 3. Disconnect the - Epson 5550C | User Manual - Page 33
cable 1. If you will be using audio, connect one end of the audio cable that came with the projector to the Audio In jack on the projector. Audio In jack audio cable 2. Connect the other end of the audio cable to the audio out port on a sound card in the computer. Connecting - Epson 5550C | User Manual - Page 34
cable if you want to use the projector's remote control as a mouse pointer for the computer. Note: If you'll be using the optional ELP Link III software, you need to connect the mouse cable included in the ELP Link III kit instead. See Chapter 4 for instructions. Mouse/Com port PS/2 mouse cable - Epson 5550C | User Manual - Page 35
and mouse cables are optional.) Connecting the projector's video cable Computer In port projector video cable Note: Laptop configurations vary. See your computer manual for the location of ports needed to connect your projector. 1. Turn off the projector and computer, if they're on. 2. Connect - Epson 5550C | User Manual - Page 36
on both connectors. 5. Check the documentation for your laptop for instructions on setting the display to appear on an external monitor (the projector screen) only or on both the LCD screen and the projector screen. If the projector's image is dim or not displayed correctly, try setting up the - Epson 5550C | User Manual - Page 37
2. Connect the other end of the audio cable to the audio out port on your laptop. Connecting to a Computer 29 - Epson 5550C | User Manual - Page 38
cable if you want to use the projector's remote control as a mouse pointer for your computer. Note: If you'll be using the optional ELP Link III software, you need to connect the mouse cable included in the ELP Link III kit instead. See Chapter 4 for instructions. Mouse/Com port PS/2 mouse cable - Epson 5550C | User Manual - Page 39
cable; the audio and mouse cables are optional.) Make sure you also have ready the Macintosh desktop adapter and monitor adapter that came with the projector. (You'll need the monitor adapter only if you'll be displaying the image on your monitor screen as well.) Connecting to a Computer 31 - Epson 5550C | User Manual - Page 40
cable Note: Macintosh computer configurations vary. See your computer manual for the location of the ports needed to connect your projector. 1. Turn off the projector and your Macintosh, if they're on. 2. Connect either end of the projector's video cable to the Computer In port. 32 1 • Setting - Epson 5550C | User Manual - Page 41
-inch mode). See your Macintosh documentation for instructions. 5. Connect the small terminal of the Macintosh desktop adapter to the other end of the projector's video cable (now attached to the projector's Computer In port). projector video cable Macintosh desktop adapter Connecting to a Computer - Epson 5550C | User Manual - Page 42
on the back of your Macintosh. 8. If you want to view images on your computer's monitor, locate the Macintosh monitor adapter that came with your projector. 9. Attach the large end of the adapter to your computer's monitor cable, and attach the small end of the Macintosh monitor adapter to the - Epson 5550C | User Manual - Page 43
Connecting the projector's audio cable 1. If you will be using audio, connect one end of the audio cable that came with the projector to the projector's Audio In jack. Audio In jack audio cable 2. Connect the other end of the audio cable to the audio out port on your computer. Connecting - Epson 5550C | User Manual - Page 44
if you want to use the projector's remote control as a mouse pointer for your Macintosh. Note: If you'll be using the optional ELP Link III software, you need to connect the Macintosh mouse cable included in the ELP Link III kit instead. See Chapter 4 for instructions. Mouse/Com port mouse cable - Epson 5550C | User Manual - Page 45
cables, you may need to choose Mirroring in the Display Control Panel to display the image on the PowerBook screen as well as the projector screen. See your Macintosh documentation for details. (This step is not necessary on some newer systems, which can detect a dual video signal.) Connecting to - Epson 5550C | User Manual - Page 46
-out cable. In addition, PowerBook configurations vary, so the location of your computer's ports may not match the illustration. See your computer manual for additional information on connecting a video cable. 1. Turn off the projector and your PowerBook, if they're on. 2. Connect either end of the - Epson 5550C | User Manual - Page 47
select the resolutions you want to use. See your Macintosh documentation for instructions. 5. Connect the small terminal of the Macintosh desktop adapter to the other end of the video cable that came with your projector. projector video cable Macintosh desktop adapter Connecting to a Computer 39 - Epson 5550C | User Manual - Page 48
a video-out cable, connect the smaller end to the video-out connector on the back of the PowerBook. Then connect the other end to the projector's video cable (with the Macintosh desktop adapter attached). 7. Tighten the screws on all the connectors. 40 1 • Setting Up the - Epson 5550C | User Manual - Page 49
Connecting the projector's audio cable 1. If you want to use audio, connect one end of the audio that came with the projector to the projector's Audio In jack. Audio In jack audio cable 2. Connect the other end of the audio cable to the audio out port on your computer. Connecting to a Computer 41 - Epson 5550C | User Manual - Page 50
if you want to use the projector's remote control as a mouse pointer for your Macintosh. Note: If you'll be using the optional ELP Link III software, you need to connect the Macintosh mouse cable included in the ELP Link III kit instead. See Chapter 4 for instructions. Mouse/Com port Mac mouse - Epson 5550C | User Manual - Page 51
a Video Source Other Than a Computer In addition to your computer, you can connect a VCR, camcorder, DVD player, or any other compatible video source to your projector. If you want, you can connect a single video source, such as a VCR. You don't have to connect a computer unless you want to use the - Epson 5550C | User Manual - Page 52
the Video Signal setting in the Setting menu to specify a particular video format, the projector will be able to detect only the format specified. To have the projector automatically detect any supported video format, reset the Video Signal setting to Auto. Follow these steps to connect a video - Epson 5550C | User Manual - Page 53
. S-Video In connector S-Video cable If you want to use your S-Video device as an audio source too, follow the instructions earlier in this chapter for connecting the projector's audio cable, except connect it to your S-Video device instead of your computer. Connecting to a Video Source Other Than - Epson 5550C | User Manual - Page 54
the yellow RCA plug on one end of the audio/video cable to the projector's Video In port. Connect the other yellow RCA plug to the video- too, connect the other plugs on the audio/video cable to the Audio jacks on the projector: insert the white plug into the L Audio jack and the red plug into the - Epson 5550C | User Manual - Page 55
to an external speaker or public address (PA) system for large rooms or to gain maximum benefit from the projector's built-in 3D sound function. To connect the projector to an external sound system, you need to get an RCA-to-3.5 mm stereo audio cable from your computer dealer. 1. Turn off the - Epson 5550C | User Manual - Page 56
3. Connect the RCA plugs to the speaker or PA system. Insert the cable's red plug into the Audio R jack, and the white plug into the Audio L jack. 48 1 • Setting Up the Projector - Epson 5550C | User Manual - Page 57
(see instructions below) 5. Computer When you're ready to turn off the equipment, do so in the reverse order. Turning the Projector On and Off Before you turn on the projector, make sure it is plugged in and connected to your video source. 1. Remove the projector lens cap. 2. Turn on the main power - Epson 5550C | User Manual - Page 58
images, press the Power button again. The fan remains on and the power light flashes orange for about two minutes as the projector cools down. Note: Projecting an image for an extended time may cause an afterimage to appear on the screen. power light projector lamp light temperature light 50 - Epson 5550C | User Manual - Page 59
's circuitry remains on. This conserves electricity, cools the projector, and extends the life of the lamp. When the projector is in sleep mode, press the Power button to resume projecting images, or press the power switch on the back of the projector to turn it off. Turning the Equipment On and - Epson 5550C | User Manual - Page 60
2 Using the Projector This chapter provides instructions for the following: p Positioning the projector relative to the screen p Focusing and positioning the screen image p Using the remote control and control panel to control the projector p Monitoring the projector's operating status 49 - Epson 5550C | User Manual - Page 61
The illustration below identifies the parts of your projector. status lights control panel speakers projector lens/focus/zoom rear feet (left foot not visible) hand strap connectors infrared receiver foot adjust levers adjustable foot 50 2 • Using the Projector - Epson 5550C | User Manual - Page 62
Positioning the Projector Your projector supports front, rear, and ceiling projection, allowing you to choose the best method for displaying your images. If you use rear or ceiling projection, you need to select a special mode in the projector's Setting menu. See page 76 for more information. To get - Epson 5550C | User Manual - Page 63
, align the lens as closely as possible with the top of your screen: Calculating Image Size and Projection Distance The distance between the projector and the screen determines the actual image size. To determine the exact distance required for a particular image size (or to determine the size - Epson 5550C | User Manual - Page 64
) − 3.0229 Minimum projection distance = (1.6562 × diagonal size) − 3.1291 p Centimeters: Maximum projection distance = (2.1593 × diagonal size) − 7.6782 Minimum projection distance = (1.6562 × diagonal size) − 4.2068 Positioning the Projector 53 - Epson 5550C | User Manual - Page 65
Minimum Maximum 494 inches (12.6 m) 639 inches (16.3 m) 328 inches (8.4 m) 423 inches (10.8 m) 163 inches (4.2 m) 213 inches (5.4 m) * For an image size of 300 inches, the projector may be up to 53.7 feet away from the screen, depending on the setting of the zoom ring. 54 2 • Using the - Epson 5550C | User Manual - Page 66
ring on the lens). p To adjust the size of the image, rotate the zoom ring (the rear ring). Rotate the zoom ring clockwise (facing the projector) to make the screen image larger or counterclockwise to make it smaller. Focusing and Positioning the Screen Image 55 - Epson 5550C | User Manual - Page 67
If you need to raise or lower the image on the screen, extend or retract the foot at the bottom front of the projector as follows: 1. Stand behind the projector and support the front of it while you lift the blue foot adjust levers above the adjustable foot. This unlocks the foot so it - Epson 5550C | User Manual - Page 68
certain types of image signals input from a computer. Press the Resize button on the control panel or the remote control to select one of the following projection methods for your projector. PowerLite 5550C: p With images less than SVGA size (800 × 600 pixels), you can either display the image in - Epson 5550C | User Manual - Page 69
. Note: The Resize button cannot be used with images at XGA resolution. Controlling the Projector You can use the remote control or the control panel on top of the projector to do the following: p Turn the power on or off p Display the help menu p Switch between input sources (video or computer - Epson 5550C | User Manual - Page 70
the remote control, point it toward the infrared receiver located at the front of the projector (see page 50). Note: To be able to use the remote control as a wireless mouse, make sure you've connected the mouse cable to the projector and your computer. (See Chapter 1 for instructions.) Controlling - Epson 5550C | User Manual - Page 71
control so that it is within ± 30° left or right of, and ± 15° higher or lower than, the infrared receiver. Note: If the projector doesn't respond to remote commands, the room may be too light or a strong light source (such as direct sunlight) may be hitting the infrared receiver. The presence of - Epson 5550C | User Manual - Page 72
Power Function Acts as a right mouse click. Press to open submenus. Acts as a left mouse click. Press to open submenus. Turns the projector's . Adjusts the volume. Turns the projector lamp on or off. Using the Effects buttons The Effects buttons on the remote control allow you to enhance your - Epson 5550C | User Manual - Page 73
to move the pointer. Then press the bottom multipurpose button again to define the position of the opposite corner of the box. 62 2 • Using the Projector - Epson 5550C | User Manual - Page 74
the process. (This function can create horizontal and vertical bars only; it cannot draw diagonal lines.) Clears the screen of all special effects. Controlling the Projector 63 - Epson 5550C | User Manual - Page 75
use the remote control to access custom features, such as functions assigned to the Effects buttons, you can use the control panel to perform most standard operations, such as selecting menu options, adjusting volume, or resizing the image on the screen. Enter button 64 2 • Using the Projector - Epson 5550C | User Manual - Page 76
the functions on the control panel. Button Power Function Turns the projector lamp on or off. Source Switches the input the resolution of your computer display. See page 56 for details. AV/Mute Turns the projector's audio and video output off and back on again-clears all special effects, and - Epson 5550C | User Manual - Page 77
Status Lights The lights on top of the projector tell you about its operating status. power light projector lamp light temperature light Caution: A red light warns you if a serious problem occurs. See Chapter 6, "Troubleshooting," for what to do if a warning light comes on. 66 2 • Using the - Epson 5550C | User Manual - Page 78
in sleep mode. (The projector is plugged in, but not projecting.) Power and projector lamp are on. The projector is warming up. Allow about 30 seconds. The projector is cooling down. There is an internal projector problem, or the power to the projector has been cut off. Projector Status Lights 67 - Epson 5550C | User Manual - Page 79
on flashing alternately page 134 for instructions. Steady red Projector lamp has burned out. Replace it to project images. See "Replacing the Lamp" on page 134 for instructions. Flashing red There's a problem with the projector lamp, lamp power supply, or lamp fuse, or a circuit malfunctioned in - Epson 5550C | User Manual - Page 80
You can use the buttons on the remote control or the projector's control panel to access seven projector menus, which let you control the tone setting, and stereo sound. p The Setting menu lets you adjust basic projector options. p The User's Logo menu lets you define a logo for the screen and assign - Epson 5550C | User Manual - Page 81
the default special effects assigned to the Effects buttons on the remote control. (To assign different functions to the buttons, you need information.) p The About menu displays basic information about the projector, such as the number of hours the lamp has been used or the video signal being used. - Epson 5550C | User Manual - Page 82
Accessing the Main Menu To display the Main menu, press the Menu button on the control panel or the remote control. The Main menu appears: Press the Menu button again to hide the menu. Accessing the Main Menu 69 - Epson 5550C | User Manual - Page 83
. 2. Press the up or down arrows (control panel) or press up or down on the pointer button (remote) to scroll through the menu choices. up and down buttons pointer button As you select a menu, a submenu the current image source is the computer or a video source. 70 3 • Adjusting Projector Settings - Epson 5550C | User Manual - Page 84
) to scroll through the submenu options. 5. Press either the left or right arrow buttons (control panel) or press right or left on the pointer button (remote) to change a setting on one of the submenus. 6. When you have finished changing settings, press the Menu button to go back to the Main menu - Epson 5550C | User Manual - Page 85
must be set to Computer for you to access these menu options. To change the image source on the projector, press the Source button on the remote control or control panel. Menu item Position Description Select this item by pressing the Enter button (control panel) or the top or bottom multi - Epson 5550C | User Manual - Page 86
button on the remote. The projector enters color adjustment mode. Use the pointer button (remote) or up and projector settings. If the projector doesn't automatically recognize the video source, disable this option. Then adjust the tracking and sync settings. If this does not resolve the problem - Epson 5550C | User Manual - Page 87
be projecting an image from a video tape, if you're using a VCR). To change the image source on the projector, press the Source button on either the remote control or control panel. Menu item Brightness Contrast Description Lightens or darkens the overall image. Increase brightness to lighten an - Epson 5550C | User Manual - Page 88
or the Enter button (control panel) to reset the Video Menu. If you change your mind, select No and then press a multi-purpose button (remote) or the Enter button (control panel) to clear the confirmation screen without changing any settings. Adjusting Audio Settings You can use the Audio menu to - Epson 5550C | User Manual - Page 89
change your mind, select No and then press a multipurpose button (remote) or the Enter button (control panel) to clear the confirmation screen without changing any settings. Changing Basic Projector Settings You can adjust basic projector settings by using the Setting menu. Menu item Prompt Color - Epson 5550C | User Manual - Page 90
button (remote) or the Enter button (control panel) to reset the Setting menu. If you change your mind, select No and then press a multi-purpose button (remote) or the Enter button (control panel) to clear the confirmation screen without changing any settings. Changing Basic Projector Settings 77 - Epson 5550C | User Manual - Page 91
these steps to create and store a logo: 1. Display the image (with the projector) you wish to use as a logo. 2. Press the Menu button to open the down arrow button on the control panel or the pointer button on the remote control. Then press the Enter button to display the User's Logo Setting window - Epson 5550C | User Manual - Page 92
and press the Enter button. If you don't want to save the logo, select No. Note: Saving the logo may take a moment. Don't use the projector or other sources (computer, video, speaker, etc.) while the logo is being saved. 9. When the message "Saving the user logo is completed." appears on the - Epson 5550C | User Manual - Page 93
Logo. 4. Press the Menu button to return to the Main menu. Now you can press the AV/Mute button on the control panel or the remote control to display your logo. Press it again when you want to stop displaying the logo. 80 3 • Adjusting - Epson 5550C | User Manual - Page 94
defaults. Select this item and then press the Enter button (control panel) or a multi-purpose button (remote) to display the confirmation screen. Next, select Yes and then press a multi-purpose button (remote) or the Enter button (control panel) to reset the Effect menu. If you change your mind - Epson 5550C | User Manual - Page 95
of the computer video output. Displays the number of hours the current lamp has been used. The lamp light flashes orange and red when the projector lamp is near the end of its normal life. When this happens, replace the projector lamp with a new one as soon as possible. You see the following when - Epson 5550C | User Manual - Page 96
may have stored. You will be prompted to confirm the reset action. Select Yes or No, then press the top or bottom multi-purpose button (remote) or the Enter button (control panel) to reset all the settings. Resetting All Menu Options 83 - Epson 5550C | User Manual - Page 97
84 3 • Adjusting Projector Settings - Epson 5550C | User Manual - Page 98
. Its most important advantage is that it allows you to control the projector from a computer. However, it also lets you do the following: p Reconfigure the remote control's Effects buttons with a wider range of functions, and even program Effects buttons with your own functions p Assign functions - Epson 5550C | User Manual - Page 99
you purchased the optional ELP Link III kit, you need to connect the special ELP Link III cables after you've finished connecting the projector's power cable, video cable, and audio cable (if needed), as described in Chapter 1. This chapter covers: p Unpacking the ELP Link III kit p Connecting the - Epson 5550C | User Manual - Page 100
(PC or Mac) * These mouse cables are different from the cables included with your projector. Connecting the ELP Link III Cables To use the ELP Link III software, you need ELP Link III serial cable. If you want to use the remote control as a mouse, you also need to connect the ELP Link III mouse cable - Epson 5550C | User Manual - Page 101
the power cord, the projector's video show the power, video, or other cables you already connected. Connecting to a PC Desktop or Laptop The following instructions explain how to software and the Effects buttons on the remote control. If you want to use your remote control as a computer mouse, you - Epson 5550C | User Manual - Page 102
: This illustration shows a desktop, but the steps are the same if you have a laptop. 1. If you connected the PS/2 mouse cable that came with the projector-as described on page 26 (desktop) or page 30 (laptop)-disconnect it from the computer and the - Epson 5550C | User Manual - Page 103
2. Connect the round end of the main cable to the projector's Mouse/Com port. 3. Connect one end of the PC serial cable to the PC SERIAL terminal on the use the ELP Link III software if your system has only one serial port that is being used to support a serial mouse. 90 4 • Using ELP Link III - Epson 5550C | User Manual - Page 104
of your computer. 5. If you want to use the remote control as a mouse for your computer, connect the 9- projector. Some laptops let you change this setting with the keyboard's function keys, or by using a setup utility provided by the computer manufacturer. Check your laptop's manual for instructions - Epson 5550C | User Manual - Page 105
to a Macintosh Desktop or PowerBook The following instructions explain how to connect the ELP Link III cables kit to use the ELP Link III software and the Effects buttons on the remote control. If you want to use your remote control as a computer mouse, you need to connect the Mac mouse cable that - Epson 5550C | User Manual - Page 106
: This illustration shows a desktop, but the steps are the same if you have a PowerBook. 1. If you connected the Mac mouse cable that came with the projector-as described on page 36 (desktop) or page 42 (PowerBook)-disconnect it from your computer and the - Epson 5550C | User Manual - Page 107
2. Connect the round end of the main cable to the projector's Mouse/Com port. 3. Connect one end of the Mac serial cable that came with the ELP Link III kit to . 4. Connect the other end of the Mac serial cable to the or modem port on the back of your computer. printer 94 4 • Using ELP Link III - Epson 5550C | User Manual - Page 108
5. If you want to use the remote control as a mouse for your Macintosh, connect the Mirroring in the Display Control Panel to display the image on the PowerBook screen as well as the projector screen. See your Macintosh documentation for details. (This step is not necessary on some newer systems, - Epson 5550C | User Manual - Page 109
Close any open Windows applications and turn off any screen savers. 3. Insert the Projector Software CD into your CD-ROM drive. 4. If you have Windows 95, 98 you want to use and click OK. 6. Select your projector model (ELP/EMP/PowerLite 5500 [or 7500] series) from the pull-down list and click Next. - Epson 5550C | User Manual - Page 110
's Guide if you want to install it and Acrobat Reader if it is not already installed on your system. Then click Install. 8. Follow the instructions on the screen to install the software. When the installation is complete, click Finish. Installing the Software on a Macintosh 1. Insert the Projector - Epson 5550C | User Manual - Page 111
be installed, but the User's Guide and Acrobat Reader are optional. Decline. Otherwise, click Accept and follow the instructions on screen. 11. When installation is projector p Disabled any screen savers Note: You can also run the software without the projector, although you can't change projector - Epson 5550C | User Manual - Page 112
Starting the Program from Windows If you have Windows 95, 98, or NT, click Start, point to Programs, ELPLink3, and then click the ELPLink3 program icon. The ELP Link III program icon appears minimized on the taskbar. Click the minimized icon. If you have Windows 3.1x, double-click the ELPLink3 - Epson 5550C | User Manual - Page 113
Unconnected and Execute. If the projector is connected, click Select a port, and retry, then select the COM port you're using on the next screen. 3. If you're starting ELP Link III for the first time, select COM Port from the Option menu, then choose either the printer or modem port (whichever - Epson 5550C | User Manual - Page 114
If you didn't select the correct COM (communication) port when setting up the software, or if you've changed the COM port to which the projector is connected, you can change the COM port setting from the ELP Link III software. 1. Select Com Port from the Option menu. 2. Choose a COM port - Epson 5550C | User Manual - Page 115
Assigning Functions to the Effects Buttons You can use the ELP Link III software to assign different functions to the remote control's Effects buttons or program Effects buttons with your own customized functions. You can also save the assignments you make as a set, then recall that - Epson 5550C | User Manual - Page 116
each button to which you want to assign a new function. 3. If you want to modify any of the functions, click Detail Setting and follow the instructions in "Modifying Functions" on page 107. 4. If you want to create more than one set of button assignments, go to "Saving and Recalling Effects Button - Epson 5550C | User Manual - Page 117
define the start position of the ellipse. Move the pointer using the remote pointer button. Then press the bottom multi-purpose button again to define the position of one corner of the box. Move the pointer using the remote pointer button. Then press the bottom multi-purpose button again to define - Epson 5550C | User Manual - Page 118
can use this function to highlight (or underline) a portion of the screen. Press the Effects button assigned to this effect. Move the bar using the remote pointer button. Press the bottom multi-purpose button to lock the bar in place. To draw another bar, move the pointer to the new bar - Epson 5550C | User Manual - Page 119
, click the right mouse button (Windows), double-click your mouse (Macintosh) or press the top multi-purpose button (if you're using the remote control as a mouse). Modifying Functions Once you've assigned a function to an Effects button, you can specify detailed options for that function. 1. Click - Epson 5550C | User Manual - Page 120
on the preceding pages. 4. To end the test, click the right mouse button (Windows) or double-click the mouse (Macintosh). If you're using the remote control as a mouse pointer, press the top multi-purpose button. 5. Click OK to save your changes and return to the ELP Link III main dialog - Epson 5550C | User Manual - Page 121
to 16 preset key commands (16 different custom functions) for the specified Effects button. See "Defining and Using Key Macros" below for step-by-step instructions. 108 4 • Using ELP Link III - Epson 5550C | User Manual - Page 122
Defining and Using Key Macros You can use key macros to assign your own customized functions to Effects buttons. Follow these steps to define a key macro: 1. Select Key Macro as the function for an Effects button. (See "Assigning Functions to the Effects Buttons" on page 102 for details.) 2. Click - Epson 5550C | User Manual - Page 123
3. Position the cursor in the Registration key field and press a key to enter a key macro. In addition to single keys, you can enter combination key macros, such as Ctrl + S. You can also enter key macros that help you navigate a presentation, such as Home, End, Page Up, and Page Down. If you enter - Epson 5550C | User Manual - Page 124
Saving and Recalling Effects Button Assignments You can save more than one set of Effects button assignments if you want to use different functions with different presentations. You might also want to save more than one set if you want to use the same functions, but apply a different look to - Epson 5550C | User Manual - Page 125
Note: If you have multiple sets of Effects button assignments, make sure you register and name each new set. If you fail to register the set, it disappears as soon as you recall another set. To recall a set of button assignments, select its name from the list box in the upper left corner of the ELP - Epson 5550C | User Manual - Page 126
effect until you clear them, you can customize the keyboard of a computer that you frequently use with the projector. You can then use the keyboard instead of the Effects keys on the remote control. click to display the Keyboard Customize Setting dialog box Assigning Functions to the Keyboard 113 - Epson 5550C | User Manual - Page 127
III main dialog box. A dialog box similar to the following appears. (The functions listed are those currently assigned to the Effects buttons on the remote control.) 2. Position the cursor in the field beside each function and press a key or key combination. To use the combination of the Ctrl key - Epson 5550C | User Manual - Page 128
on page 104. Instead of using the remote control's multi-purpose button, click the Projector Setting Dialog Box You can use the Projector Setting dialog box to do the following: p Change projector settings p Test projector performance p Enhance details in your projected image by correcting problems - Epson 5550C | User Manual - Page 129
Setting button on the ELP Link III main dialog box. You see the Projector Setting window: Note: Some options aren't available if you're running the software without the projector connected. See "Bringing out detail in your projected image" on page 128 for details. 116 4 • Using ELP Link III - Epson 5550C | User Manual - Page 130
settings, click one of the buttons on the Projector Setting toolbar. Power On, Off Volume Up, Down Contrast Up, Down Brightness Up, Down AV/Mute, Freeze Auto, Resize Video, Computer Changing Projector Settings The settings you can adjust from the Projector Setting dialog box are almost the same as - Epson 5550C | User Manual - Page 131
Follow these steps to change projector settings: 1. Click Projector Control on the Projector Setting dialog box. The following dialog box appears: 2. Click the tab for the settings you want to adjust. See the tables on the following pages - Epson 5550C | User Manual - Page 132
dark areas. Synchronizes with the tracking signal sent from the computer. Adjust this setting to correct fuzziness or screen flicker. Matches the projector's internal clock to various computer graphic signals. Adjust this setting to remove vertical lines from the image. Adjusts the balance of red - Epson 5550C | User Manual - Page 133
Video tab (video source other than a computer) If the image source on your projector is set to Video, you see the following options on the Video tab: Option Description Brightness Adjusts screen brightness. Increase brightness to lighten an image, - Epson 5550C | User Manual - Page 134
the SRS sound. Pattern Display Enables or disables display of the test pattern currently selected. Reset Resets all settings to their default values. Using the Projector Setting Dialog Box 121 - Epson 5550C | User Manual - Page 135
(AV/MUTE) displays when the screen is blanked. Install Prompt Specifies how the projector is installed (if you are not using front projection): Rear Proj Use this button on the control panel or press right on the remote's pointer button to increase the color temperature value; press the control panel - Epson 5550C | User Manual - Page 136
the Test Pattern dialog box to test your projector's focus, resolution, color fidelity, and grayscale quality. Each of the test patterns on the dialog box tests a different aspect of projector performance. 1. Click Test Pattern on the Projector Setting dialog box. The following dialog box appears - Epson 5550C | User Manual - Page 137
image resolution. 3. Check Pattern Display to display the test pattern selected. 4. When you're finished, click Close to end the test and return to the Projector Setting dialog box. 124 4 • Using ELP Link III - Epson 5550C | User Manual - Page 138
a User Logo You can create or edit a logo from the Projector Setting dialog box, then save it to a file on your hard disk or download it to the projector when you want to use it with a presentation. 1. Click User's Logo on the Projector Setting dialog box. The User's Logo Setting dialog box appears - Epson 5550C | User Manual - Page 139
2. Click the Edit button. The following dialog box appears. 3. Click the Open the File icon to locate and open a bitmap or logo (.lgo) file. The selected image appears in the display area. Note: If you see a screen requesting the image type, select the correct image type. 4. To crop the image, - Epson 5550C | User Manual - Page 140
You must save logo files with the extension .lgo. 7. To download a logo file to the projector, click the Download button and follow the instructions on the screen. 8. Click Close to return to the Projector Setting dialog box. Bringing out detail in your projected image If much of your image appears - Epson 5550C | User Manual - Page 141
You can run the ELP Link III software without the projector connected if you want to prepare for a presentation and the projector isn't available. You can assign new functions to the Effects buttons on the remote control, then save your changes as a set. You can assign functions to your keyboard - Epson 5550C | User Manual - Page 142
Running ELP Link III Without the Projector 129 - Epson 5550C | User Manual - Page 143
130 4 • Using ELP Link III - Epson 5550C | User Manual - Page 144
case when necessary. p Periodically clean the air filter at the bottom and rear of the projector. A clogged air filter can block ventilation needed to keep the projector from overheating. p Replace the lamp and air filter as needed. (If any other part needs replacing, contact your dealer or - Epson 5550C | User Manual - Page 145
any part of the projector, turn it off and unplug the power cord and any other cables that are attached. Never open any cover on the projector, except the lamp and filter covers. Dangerous electrical voltages in the projector can cause severe injury. Don't try to perform any servicing other than the - Epson 5550C | User Manual - Page 146
with dust, preventing proper ventilation. This can cause overheating and damage the projector. To clean the air filter, follow these steps: 1. Turn off the projector and unplug the power cord from the electrical outlet. 2. Place the projector on its side with the handle at the top so that the filter - Epson 5550C | User Manual - Page 147
or call EPSON Accessories at (800) 873-7766 in the U.S. to obtain a new one. Request part number ELPLP07. In Canada, call (800) 873-7766 for dealer referral. 5. Replace the air filter cover. 6. Plug the power cord back into the electrical outlet. Replacing the Lamp The projector lamp typically lasts - Epson 5550C | User Manual - Page 148
Also, don't touch the glass portion of the lamp assembly; this can cause premature lamp failure. 1. Turn off the projector and unplug the power cord from the electrical outlet and the projector. Wait at least 20 minutes for the bulb to cool. 2. Place the projector on its side with the handle at the - Epson 5550C | User Manual - Page 149
out the lamp assembly. 6. Gently lower the new lamp into position and make sure it's inserted securely. Tighten the screws on the new lamp assembly. 7. Replace the lamp cover and tighten the cover screw. (Make sure the lamp cover is securely fastened. The projector won't run if the lamp cover is - Epson 5550C | User Manual - Page 150
in a firm box, using cushioning around the case. p When you are carrying the projector by hand, be sure to store it in a hard-shell or soft carrying case (such as the optional cases offered by EPSON). Note: EPSON shall not be liable for any damages incurred during transportation. Transporting the - Epson 5550C | User Manual - Page 151
138 5 • Maintenance - Epson 5550C | User Manual - Page 152
Help Menu" on page 140 describes how to use the projector's online help for problems with the image or sound. p "Problems with the Projector" on page 141 tells you what to do if any of the projector's warning lights come on. p "Problems with the Remote Control" on page 144 tells you what to do if - Epson 5550C | User Manual - Page 153
For some of the problems listed above, you can make adjustments within the Help menu to correct the problem. Note: Each Help menu displays navigation buttons and descriptions at the bottom of the screen. Projector control functions are displayed as icons in the help text. 140 6 • Troubleshooting - Epson 5550C | User Manual - Page 154
unplug it. Then plug the power cord back in and turn the projector back on. If this doesn't solve the problem, check the lights on top of the projector. These lights alert you to problems with projector operation. power light projector lamp light temperature light Problems with the Projector 141 - Epson 5550C | User Manual - Page 155
temperature sensor. Call a service representative. The lamp needs to be replaced. See "Replacing the Lamp" on page 134 for instructions. There's a problem with the projector lamp, lamp power supply, or a lamp fuse; or there's a circuit malfunction in the projector. The projector is warming up. Allow - Epson 5550C | User Manual - Page 156
, and press the on/off switch at the back of the projector and then press the Power button. w Projected images get darker or start to deteriorate, or the projector lamp light is red. Replace the projector lamp as described in "Replacing the Lamp" on page 134. w The temperature light is red. The - Epson 5550C | User Manual - Page 157
person. Warning: Don't attempt to perform any servicing other than the maintenance procedures explained in Chapter 5. Problems with the Remote Control w The projector doesn't respond to remote control commands. The remote control may be too far from the projector, or at too wide an angle to the - Epson 5550C | User Manual - Page 158
mouse button, or the top multi-purpose button (if you're using the remote control as a mouse) to stop the screen saver. This will also clear any effects you have on the screen. You should disable any screen savers on your computer before using the projector. Problems with the Image or Sound 145 - Epson 5550C | User Manual - Page 159
from the Resolution box. For supported display settings, see "Supported Computers and Monitor Displays" on page manual for details. w The message NO SIGNAL is displayed. The problem may be any of the following: the wrong image source is selected, the image source is not connected to the projector - Epson 5550C | User Manual - Page 160
panel or remote control. Adjust the Brightness and Contrast settings on the Video menu. If there is no video for 30 minutes, the projector goes into sleep mode and the lamp is turned off. There may be dirt or smears on the lens. Clean the lens as described on page 132. Problems with the - Epson 5550C | User Manual - Page 161
is no sound. Make sure the volume setting isn't turned all the way down and that the audio cable is securely attached to both the projector and the audio source. Also, make sure that the Mute button is not enabled. The wrong source may be selected. Press the Source button on - Epson 5550C | User Manual - Page 162
7 Technical Specifications General Type of display Size of liquid crystal panels Lens Resolution Color reproduction Image brightness Image size Poly-silicon Thin-Film Transistor (TFT), active matrix Diagonal: 0.9 inches (22.9 mm) F=1.7 to 2.0, f=37 to 48 mm 5550C: SVGA 800 × 600 pixels 7550C: XGA - Epson 5550C | User Manual - Page 163
Sound Projector Lamp Projection distance Projection methods Optical aspect ratio Zoom ratio Tilt angle Supported video interface standards Internal 2 × 1 W SRS 3D stereo output 100 to 15000 Hz 71 dB Type Power consumption Lamp life Part number UHE (Ultra High Efficiency) 120 W 2000 hours at 50% - Epson 5550C | User Manual - Page 164
Remote Control Range Batteries I/R receiver interface Mouse Compatibility Repeater Interface Mechanical Electrical Height Width Depth Weight Rated frequency Power supply Noise Level Power consumption 32.8 feet (10 meters) Alkaline AA (2) Supports Xantech® IR repeaters, 3.5 mm stereo mini- - Epson 5550C | User Manual - Page 165
Environmental Temperature Humidity Safety United States Canada Operating: 41 to 95 °F (5 to 35 °C), non-condensing Storage: 14 to 140 °F (-10 to 60 °C), non-condensing Operating: 20 to 80% RH, non-condensing Storage: 10 to 90% RH, non-condensing FCC Part 15J Class B UL1950 Rev. 3 DOC SOR/88-475 - Epson 5550C | User Manual - Page 166
The following table lists the display formats supported by the projector. Computer type Formats Resolutions IBM PC and × 1024 TV NTSC 640 × 480 PAL, PAL60, SECAM 768 × 567 * PowerLite 7550 only. Note: The frequencies of some computers may not allow the image to be displayed correctly. 153 - Epson 5550C | User Manual - Page 167
Computer In and Computer Out connector pin assignments The Computer In and Computer Out connectors are female video RGB, 15-pin micro-D-style connectors. The pin assignments are: Computer Out Pin connector signals 1 Red analog input 2 Green analog input 3 Blue analog input 4 Reserved - Epson 5550C | User Manual - Page 168
Glossary Brightness The balance of light and dark shades in an image. Composite video A type of video signal that encodes picture, luminance, and synchronization information so it can be carried in one signal. Contrast A measure of the tonal differences between the highlights and shadows of an - Epson 5550C | User Manual - Page 169
. System Electronique pour Couleur Avec Memoire. A 625-line TV system used in France, Eastern Europe, Russia, and parts of Africa. A power-saving feature in which the projector's lamp is turned off when the projector has not been used for 30 minutes. In sleep mode, only a minimum amount of the - Epson 5550C | User Manual - Page 170
SVGA SXGA VGA XGA Super Video Graphics Array. SVGA provides higher resolution than VGA. Super Extended Graphics Array. SXGA provides higher resolution than XGA. Video Graphics Array. A high-resolution display adapter that provides a variety of video modes. Extended Graphics Array. IBM's next - Epson 5550C | User Manual - Page 171
158 Glossary - Epson 5550C | User Manual - Page 172
Index A Accessories, 3, 9 Adjusting bass, 75, 122 brightness, 72, 74, 118, 120, 121 color balance, 73, 74, 120, 121 color saturation, 74, 120, 121 contrast, 73, 74, 118, 120, 121 image position, 72 image quality, 72 to 75, 128 to 129 screen whiteness, 76, 123 sharpness, 74, 121 speaker tone, 75, - Epson 5550C | User Manual - Page 173
remote control, see Remote control C Camcorder adjusting the projected image, 74 to 75 connecting projector to, 11, 41 to 44 Case, cleaning, 132 Ceiling, hanging the projector adjusting the projected image, 72 to 75 Computers, supported, 153 Connecting projector to a desktop Macintosh, 29 to 34, 92 - Epson 5550C | User Manual - Page 174
correcting image problems, 128 to 129 creating a logo, 126 to 128 installing, 96 to 98 launching, 98 to 100 ordering, 14 Setting tab, 123 testing projector performance, 124 to 125 unpacking, 86 to 87 using without the projector, 129 Environmental specifications, 152 EPSON electronic support, 7 to - Epson 5550C | User Manual - Page 175
detail, 128 to 129 focusing, 54 to 56 problems, 145 to 148 resizing, 56 to 57, 64 Lamp light, 47, 66, 141 to 143 replacing, 134 to 136 specifications, 150 Language menu option, 77 Laptop, connecting projector 77 Lumens, 149 M Macintosh, connecting projector to, 15, 29 to 40, 92 to 95 Macro, - Epson 5550C | User Manual - Page 176
) User's Logo, 67, 78 to 80 Video, 67, 72 to 75 Monitors, supported, 153 Moving projector, 137 Mute, 64 N NO SIGNAL message, 147 Noise level, 151 NTSC, 155 O Optional accessories, 3 P PA system, connecting projector to, 45 PAL, 156 Pin assignments, connector, 154 Pointer, changing shape, 81, 105 - Epson 5550C | User Manual - Page 177
, 98 to 100 Sound problems, 148 Speakers adjusting the tone, 75, 122 adjusting the volume, 60, 64, 75, 118, 122 connecting projector to, 45 Specifications electrical, 151 environmental, 152 general, 149 to 150 lamp, 150 mechanical, 151 mouse compatibility, 151 remote control, 151 repeater interface - Epson 5550C | User Manual - Page 178
118 Tracking, 72, 120 Transporting projector, 137 Treble, 75, 122 Troubleshooting image and sound problems, 145 to 148 projector problems, 141 to 144 remote control problems, 144 to 145 Turning the projector on and off, 46 to 48 TV, supported display formats, 153 U Unpacking projector, 12 to 14 User
-
 1
1 -
 2
2 -
 3
3 -
 4
4 -
 5
5 -
 6
6 -
 7
7 -
8
-
9
-
10
-
11
-
12
-
13
-
14
-
15
-
16
-
17
-
18
-
19
-
20
-
21
-
22
-
23
-
24
-
25
-
26
-
27
-
28
-
29
-
30
-
31
-
32
-
33
-
34
-
35
-
36
-
37
-
38
-
39
-
40
-
41
-
42
-
43
-
44
-
45
-
46
-
47
-
48
-
49
-
50
-
51
-
52
-
53
-
54
-
55
-
56
-
57
-
58
-
59
-
60
-
61
-
62
-
63
-
64
-
65
-
66
-
67
-
68
-
69
-
70
-
71
-
72
-
73
-
74
-
75
-
76
-
77
-
78
-
79
-
80
-
81
-
82
-
83
-
84
-
85
-
86
-
87
-
88
-
89
-
90
-
91
-
92
-
93
-
94
-
95
-
96
-
97
-
98
-
99
-
100
-
101
-
102
-
103
-
104
-
105
-
106
-
107
-
108
-
109
-
110
-
111
-
112
-
113
-
114
-
115
-
116
-
117
-
118
-
119
-
120
-
121
-
122
-
123
-
124
-
125
-
126
-
127
-
128
-
129
-
130
-
131
-
132
-
133
-
134
-
135
-
136
-
137
-
138
-
139
-
140
-
141
-
142
-
143
-
144
-
145
-
146
-
147
-
148
-
149
-
150
-
151
-
152
-
153
-
154
-
155
-
156
-
157
-
158
-
159
-
160
-
161
-
162
-
163
-
164
-
165
-
166
-
167
-
168
-
169
-
170
-
171
-
172
-
173
-
174
-
175
-
176
-
177
-
178
 |
 |

EPSON
PowerLite
5550C/7550C
User’s Guide
®
®