Epson 5550C User Manual - Page 101
Connecting to a PC Desktop or Laptop
 |
UPC - 010343820807
View all Epson 5550C manuals
Add to My Manuals
Save this manual to your list of manuals |
Page 101 highlights
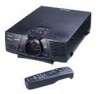
You should already have connected the power cord, the projector's video cable, and any other cables required for the equipment you are using, as described in Chapter 1. Note: To keep the illustrations in this section simple, the pictures show only how to connect the ELP Link III cables; they don't show the power, video, or other cables you already connected. Connecting to a PC Desktop or Laptop The following instructions explain how to connect the ELP Link III cables to your PC desktop or laptop computer. The steps are identical for both types of computers except where noted otherwise. You must connect both the main cable and the 9-pin serial cable that came with the ELP Link III kit to use the ELP Link III software and the Effects buttons on the remote control. If you want to use your remote control as a computer mouse, you need to connect either the PS/2 or the serial mouse cable that came with the kit. Before you start, make sure the projector and computer are turned off. 88 4 • Using ELP Link III
-
 1
1 -
2
-
3
-
4
-
5
-
6
-
7
-
8
-
9
-
10
-
11
-
12
-
13
-
14
-
15
-
16
-
17
-
18
-
19
-
20
-
21
-
22
-
23
-
24
-
25
-
26
-
27
-
28
-
29
-
30
-
31
-
32
-
33
-
34
-
35
-
36
-
37
-
38
-
39
-
40
-
41
-
42
-
43
-
44
-
45
-
46
-
47
-
48
-
49
-
50
-
51
-
52
-
53
-
54
-
55
-
56
-
57
-
58
-
59
-
60
-
61
-
62
-
63
-
64
-
65
-
66
-
67
-
68
-
69
-
70
-
71
-
72
-
73
-
74
-
75
-
76
-
77
-
78
-
79
-
80
-
81
-
82
-
83
-
84
-
85
-
86
-
87
-
88
-
89
-
90
-
91
-
92
-
93
-
94
-
95
-
 96
96 -
 97
97 -
 98
98 -
 99
99 -
 100
100 -
 101
101 -
 102
102 -
 103
103 -
 104
104 -
 105
105 -
 106
106 -
107
-
108
-
109
-
110
-
111
-
112
-
113
-
114
-
115
-
116
-
117
-
118
-
119
-
120
-
121
-
122
-
123
-
124
-
125
-
126
-
127
-
128
-
129
-
130
-
131
-
132
-
133
-
134
-
135
-
136
-
137
-
138
-
139
-
140
-
141
-
142
-
143
-
144
-
145
-
146
-
147
-
148
-
149
-
150
-
151
-
152
-
153
-
154
-
155
-
156
-
157
-
158
-
159
-
160
-
161
-
162
-
163
-
164
-
165
-
166
-
167
-
168
-
169
-
170
-
171
-
172
-
173
-
174
-
175
-
176
-
177
-
178
 |
 |
