Epson 7850p Product Information Guide - Page 12
Setting the Remote Control ID, Presenting Over a Wireless Network, Starting EasyMP
 |
UPC - 010343845992
View all Epson 7850p manuals
Add to My Manuals
Save this manual to your list of manuals |
Page 12 highlights
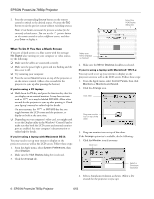
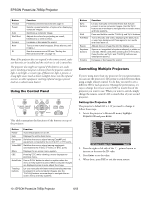
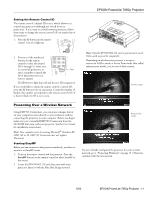
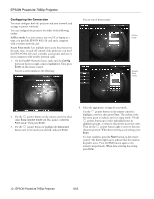
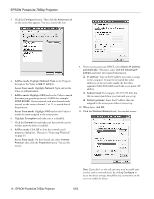
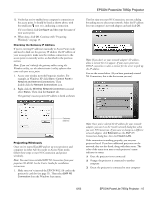
Setting the Remote Control ID The remote control's default ID is zero, which allows it to control any projector (although not switch between projectors). If you want to switch between projectors, follow these steps to change the remote control's ID to match that of the projector: 1. Press the ID button on the remote control. You see it light up. EPSON PowerLite 7850p Projector 2. Press one of the numbered buttons on the remote control to select the desired ID (0 through 9). Select zero to control all projectors, or Zero select a number to match the ID of the projector(s) you want to operate. The ID button's light shuts off and the new ID is registered. If you would like to check the remote control's current ID, press the ID button twice in succession. Count the number of flashes; this number corresponds to the remote control's ID. If it doesn't flash, the ID is set to zero. Note: Only the EPSON 802.11b card is guaranteed to work. Other cards may not be compatible. Depending on whether your projector is set up to connect in Ad Hoc mode or Access Point mode (also called infrastructure mode), you see one of these screens: Ad Hoc mode Presenting Over a Wireless Network Using EMP NS Connection, you can project images shown on your computer screen directly to your audience without connecting the projector to your computer. Before you begin, make sure you've installed EMP NS Connection from the CD-ROM that came with your projector. See the User's Guide for installation instructions. Note: Your computer must be running Microsoft® Windows XP, 2000, Me or 98. EMP NS Connection does not support Macitnosh. Starting EasyMP Before you can connect to the projector wirelessly, you have to switch it to EasyMP mode. 1. Turn on the remote control and the projector. Press the EasyMP button on the remote control to select EasyMP as the source. 2. Locate the EPSON 802.11b card that came with your projector. Insert it with the blue label facing outward. Access Point mode If you've already configured the projector for your wireless network, go to "Projecting Wirelessly" on page 15. Otherwise, continue with the next section. 6/03 EPSON PowerLite 7850p Projector - 11
-
 1
1 -
2
-
3
-
4
-
5
-
6
-
 7
7 -
 8
8 -
 9
9 -
 10
10 -
 11
11 -
 12
12 -
 13
13 -
 14
14 -
 15
15 -
 16
16 -
 17
17 -
18
-
19
-
20
-
21
-
22
-
23
-
24
-
25
 |
 |
