Epson AcuLaser CX11NF Start Here Card - Page 2
Install Toner Cartridges
 |
View all Epson AcuLaser CX11NF manuals
Add to My Manuals
Save this manual to your list of manuals |
Page 2 highlights
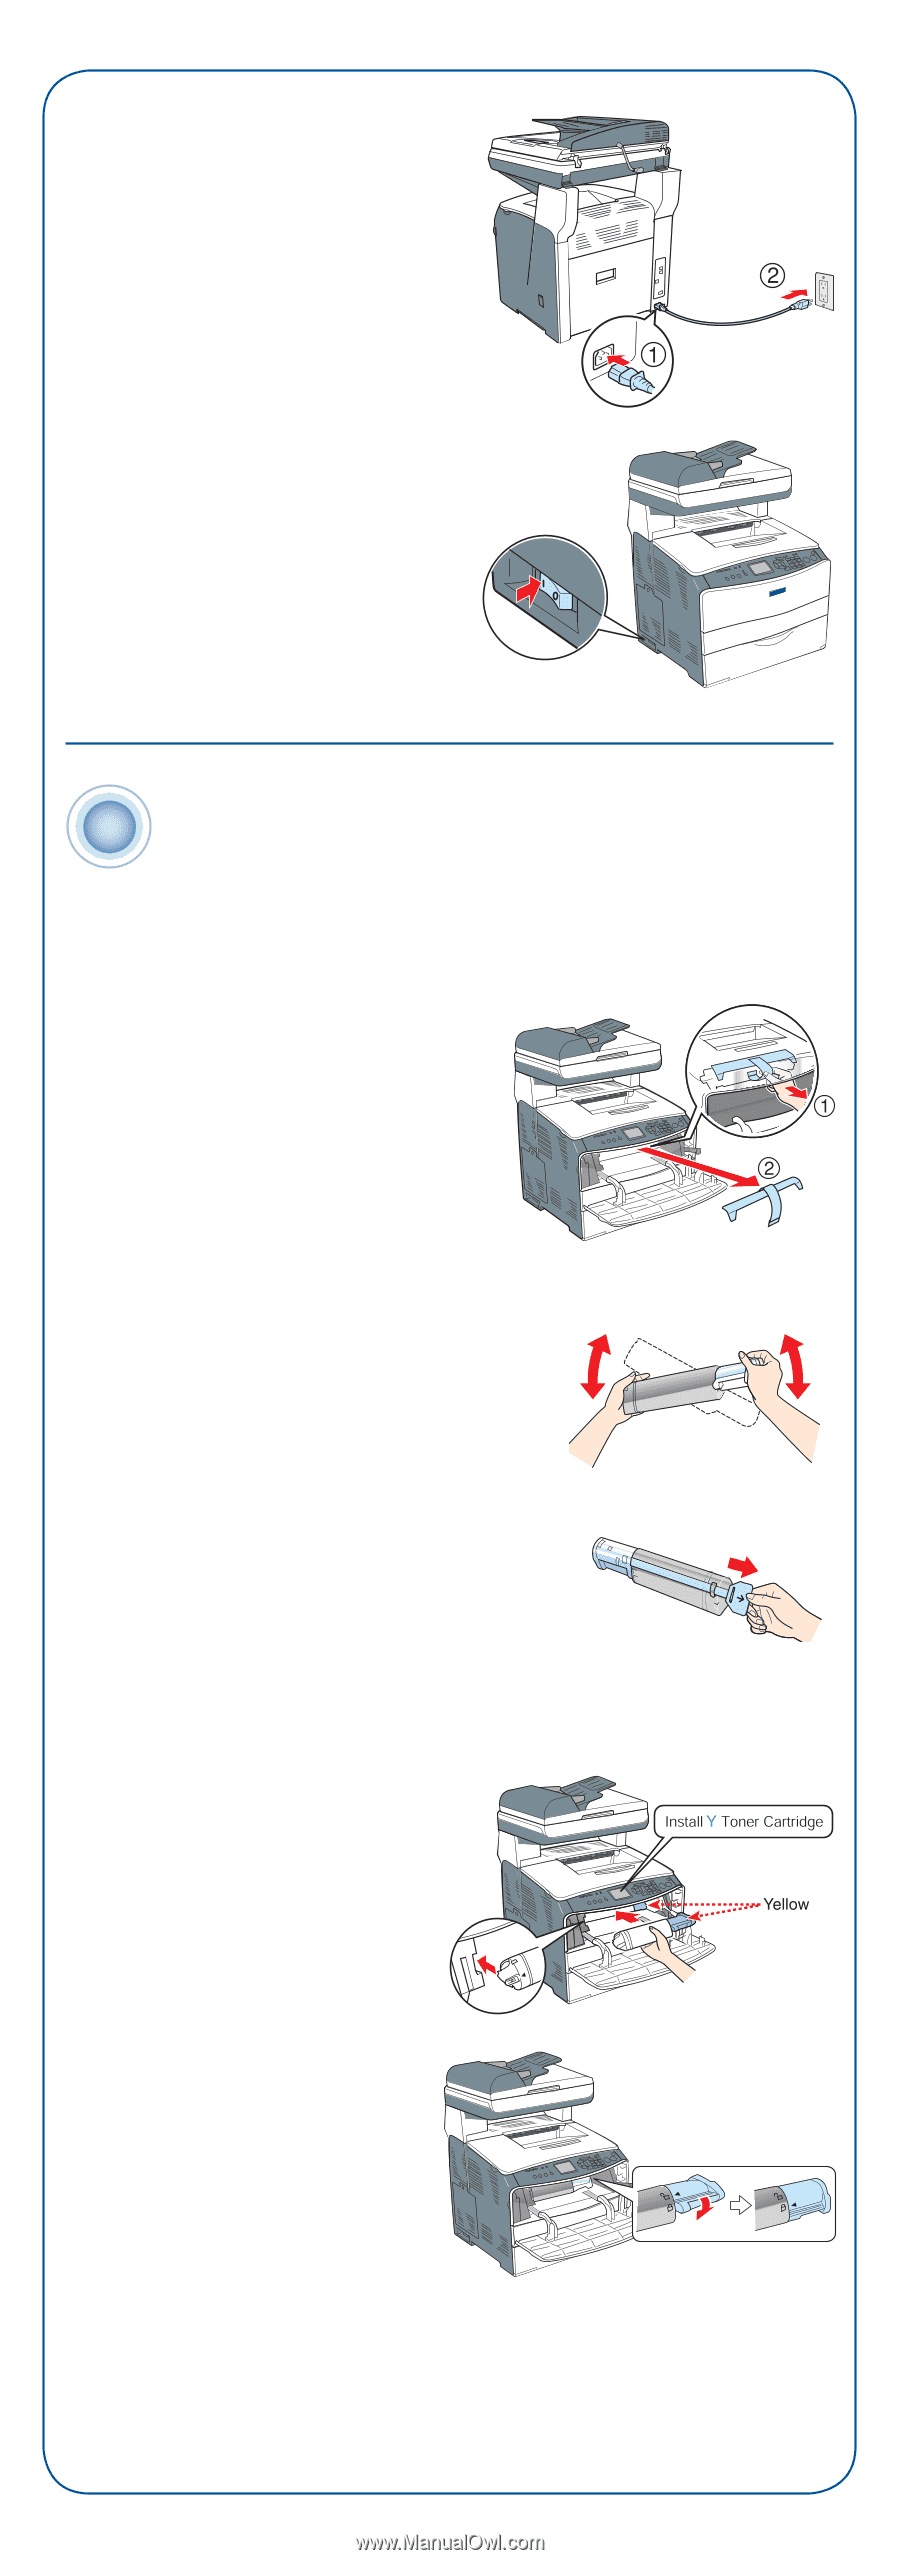
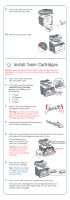
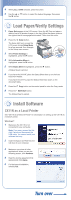
9 Connect the power cord to the CX11N and to an AC outlet. 10 Push the power switch to On. 2 Install Toner Cartridges Caution: Make sure the CX11N is turned on before installing the toner cartridges. Do not install the photoconductor before installing the toner cartridges. 1 Open cover A and remove the tape and plastic insert. 2 In the LCD screen the message Install [X] Toner Cartridge appears, where [X] is one of the following: • Y: Yellow • M: Magenta • C: Cyan • K: Black 3 Remove the toner cartridge from its package and gently shake it. Warning: Do not touch the toner. Keep the toner away from your eyes. If toner gets on your skin or clothes, wash it off with soap and water immediately. 4 Hold the tag and gently pull the toner seal until it comes completely out. 5 Slide the toner cartridge into the tracks inside the printer. Push evenly on both sides until the cartridge stops securely in its slot. If the cartridge doesn't seem to be installed fully, remove it and reinstall it. Caution: Don't force the cartridge into the printer or force the lock lever down, or you may damage the printer. 6 Push down the lever to lock the toner cartridge. Note: The toner cartridge is installed securely when you cannot turn the lock lever any further. 7 Close cover A and confirm the message in the LCD screen. The LCD screen will display the next cartridge that needs to be installed. Open cover A and repeat steps 3 to 7 for each of the remaining toner cartridges.
-
 1
1 -
 2
2 -
 3
3 -
 4
4 -
 5
5 -
 6
6 -
 7
7 -
 8
8
 |
 |