Epson AcuLaser CX11NF Start Here Card - Page 6
CX11N as a Network Printer, Connect the CX11N, Set the IP Address, Dynamic, Static
 |
View all Epson AcuLaser CX11NF manuals
Add to My Manuals
Save this manual to your list of manuals |
Page 6 highlights
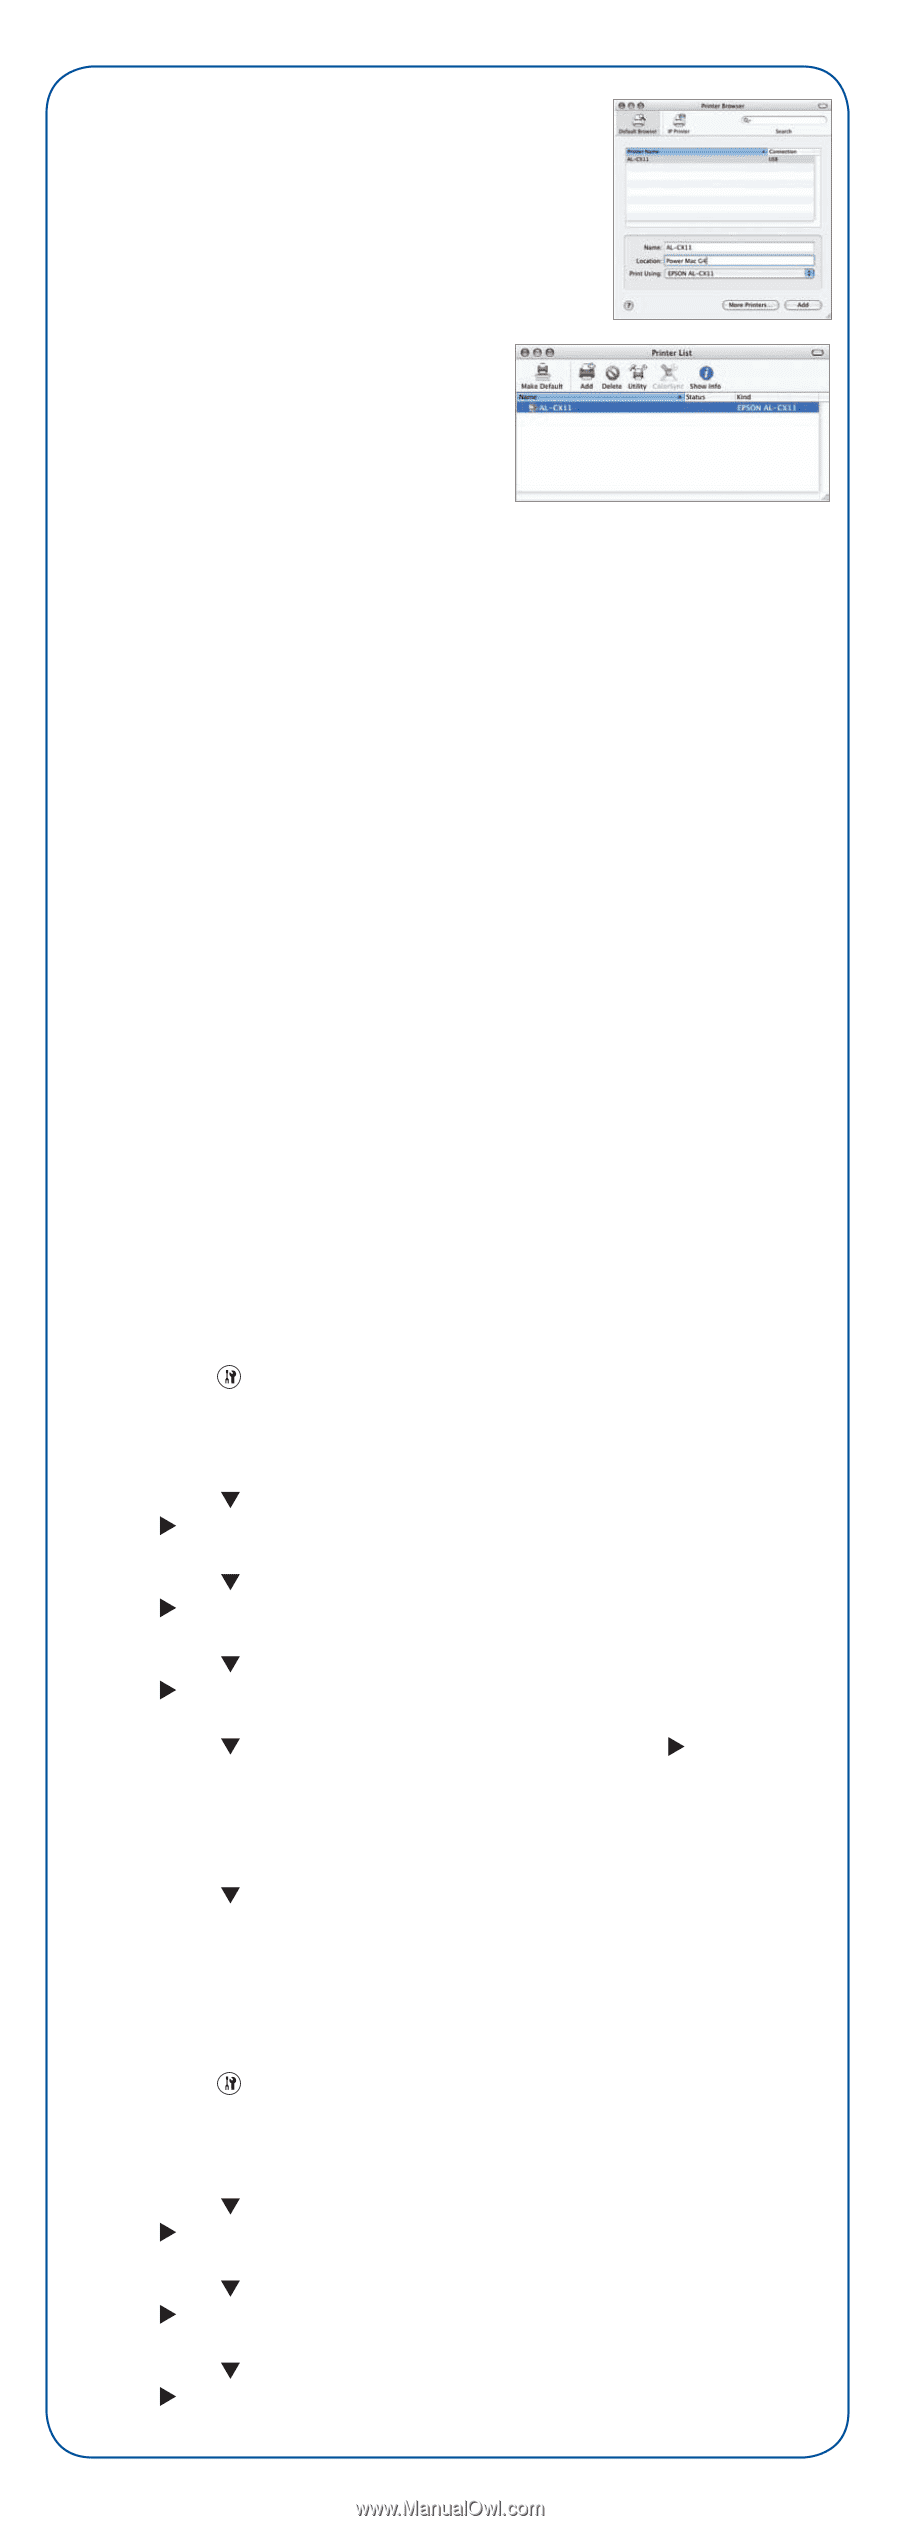
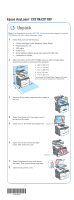
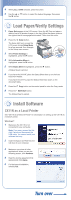
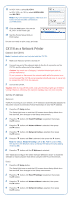
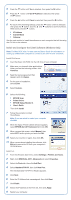
11 In OS X 10.4.x, select AL-CX11. In OS X 10.2.x to 10.3.x, select EPSON USB and AL-CX11. Note: If AL-CX11 doesn't appear, make sure it is turned on and securely connected to your Macintosh. 12 Click the Add button. You see the AL-CX11 in the Printer List. 13 Quit the Printer Setup Utility or Print Center. You are now ready to print, copy, and scan. CX11N as a Network Printer Connect the CX11N Note: A network cable is not included with the CX11N. 1 Make sure that your printer is turned off. 2 Connect one end of the network cable to the RJ-45 connector on the CX11N, and the other end to the network. Caution: You must use a Category 5 shielded twisted-pair cable to prevent malfunction. Do not connect or disconnect the network cable while the printer is on. Do not connect the CX11N and a computer directly. Be sure to use a hub to connect the CX11N to the network. 3 Turn on the CX11N. Caution: After turning off the printer, wait until the status lights go off before turning it back on; otherwise the network interface may not work correctly. Set the IP Address Dynamic If DHCP is running on your network, an IP address is automatically assigned to the printer once it is connected. Follow these steps to view the IP address: 1 Press the Setup button. The Setup light turns on and the LCD screen shows Setup Mode for a few seconds, then changes to the Setup menu screen. 2 Press the button until Host/IF Settings is selected, then press the button. 3 Press the button until Network Menu is selected, then press the button. 4 Press the button until Network Config is selected, then press the button. 5 Press the button until Yes is selected, then press the button. Note: By default, Network Config is set to No. After it is set to Yes, the next time the Network menu is viewed, the Network Config setting reverts to No. 6 Press the button until the IP Address is selected. See "Install and Configure the Client Software (Windows Only)" to install the software on each computer that will be using the CX11N on the network. Static 1 Press the Setup button. The Setup light turns on and the LCD screen shows Setup Mode for a few seconds, then changes to the Setup menu screen. 2 Press the button until Host/IF Settings is selected, then press the button. 3 Press the button until Network Menu is selected, then press the button. 4 Press the button until Network Config is selected, then press the button.
-
 1
1 -
 2
2 -
 3
3 -
 4
4 -
 5
5 -
 6
6 -
 7
7 -
 8
8
 |
 |