Epson BrightLink 585Wi Operation Guide - EasyMP Network Projection - Page 70
Solutions When You Cannot Connect Projectors Using Advanced Connection Mode (Wireless)
 |
View all Epson BrightLink 585Wi manuals
Add to My Manuals
Save this manual to your list of manuals |
Page 70 highlights
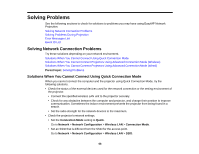
Solutions When You Cannot Connect Projectors Using Advanced Connection Mode (Wireless) When you cannot connect the computer and the projector using Advanced Connection Mode over a wireless network, try the following solutions. If you cannot resolve the problem, contact your network administrator. • Check the status of the external devices used for the network connection or the environment in which the network devices and the projector are located. • Connect the specified wireless LAN unit to the projector securely. • Check for any obstacles between the access point and the computer or projector, and change their position to improve communication. Sometimes, indoor environments prevent the projector from being found in a search. • Make sure that the access point and the computer or projector are not too far apart. Move them closer together and try to connect again. • If the wireless connection is slow or your projected image contains noise, check for interference from other equipment, such as a Bluetooth device or microwave. Move the interfering device farther away or expand your wireless bandwidth. • Set the radio strength for the network devices to the maximum. • Set the IP address, the subnet mask, and the gateway address for the access point correctly. • Make sure the Wireless LAN conforms to 802.11a, 802.11b, 802.11g, or 802.11n. The Wireless LAN is not compatible with other standards such as 802.11. • Check the projector's network settings. • Set the Connection Mode setting to Advanced. • Set the computer, the access point, and the projector to the same SSID. • Set DHCP to Off. When DHCP is set to On, it may take some time to enter LAN standby status if an available DHCP server is not found. • Set the IP address, the subnet mask, and the gateway address for the projector correctly. • Set Wireless LAN Power to On, or Wireless Mode to Wireless LAN On. • Set the wireless LAN system to meet the standards supported by the access point. • When you enable the security setting, set the same passphrase to the access point, the computer, and the projector. • Close network settings on the projector, and then return to the LAN standby screen. 70
-
 1
1 -
2
-
3
-
4
-
5
-
6
-
7
-
8
-
9
-
10
-
11
-
12
-
13
-
14
-
15
-
16
-
17
-
18
-
19
-
20
-
21
-
22
-
23
-
24
-
25
-
26
-
27
-
28
-
29
-
30
-
31
-
32
-
33
-
34
-
35
-
36
-
37
-
38
-
39
-
40
-
41
-
42
-
43
-
44
-
45
-
46
-
47
-
48
-
49
-
50
-
51
-
52
-
53
-
54
-
55
-
56
-
57
-
58
-
59
-
60
-
61
-
62
-
63
-
64
-
 65
65 -
 66
66 -
 67
67 -
 68
68 -
 69
69 -
 70
70 -
 71
71 -
 72
72 -
 73
73 -
 74
74 -
 75
75 -
76
-
77
-
78
-
79
-
80
-
81
-
82
-
83
-
84
-
85
-
86
-
87
-
88
-
89
-
90
-
91
-
92
-
93
-
94
-
95
-
96
-
97
-
98
-
99
-
100
-
101
-
102
-
103
-
104
-
105
-
106
-
107
-
108
-
109
 |
 |
