Epson C11C695201 Basics - Page 23
Printing Photos in Black-and-White or Sepia, Print Settings, Expansion, Color Effect
 |
UPC - 010343866201
View all Epson C11C695201 manuals
Add to My Manuals
Save this manual to your list of manuals |
Page 23 highlights
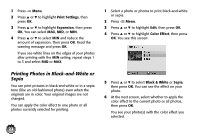
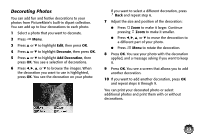
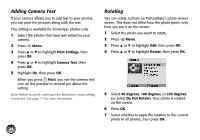
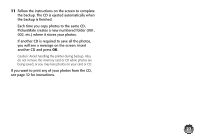
1 Press Menu. 2 Press u or d to highlight Print Settings, then press OK. 3 Press u or d to highlight Expansion, then press OK. You can select MAX, MID, or MIN. 4 Press u or d to select MIN and reduce the amount of expansion. Then press OK. Read the warning message and press OK. If you see white lines on the edges of your photos after printing with the MIN setting, repeat steps 1 to 3 and select MID or MAX. 1 Select a photo or photos to print black-and-white or sepia. 2 Press Menu. 3 Press u or d to highlight Edit, then press OK. 4 Press u or d to highlight Color Effect, then press OK. You see this screen: Printing Photos in Black-and-White or Sepia You can print pictures in black-and-white or in a sepia tone (like an old-fashioned photo) even when the originals are in color. Your original images are not changed. You can apply the color effect to one photo or all photos currently selected for printing. 5 Press u or d to select Black & White or Sepia, then press OK. You can see the effect on your photo. 6 At the next screen, select whether to apply the color effect to the current photo or all photos, then press OK. You see your photo(s) with the color effect you selected. 22
-
 1
1 -
2
-
3
-
4
-
5
-
6
-
7
-
8
-
9
-
10
-
11
-
12
-
13
-
14
-
15
-
16
-
17
-
 18
18 -
 19
19 -
 20
20 -
 21
21 -
 22
22 -
 23
23 -
 24
24 -
 25
25 -
 26
26 -
 27
27 -
 28
28 -
29
-
30
-
31
-
32
-
33
-
34
-
35
-
36
-
37
-
38
-
39
-
40
-
41
-
42
-
43
-
44
-
45
-
46
-
47
-
48
-
49
-
50
-
51
-
52
-
53
-
54
-
55
-
56
-
57
-
58
-
59
-
60
-
61
-
62
-
63
-
64
-
65
-
66
-
67
-
68
-
69
-
70
-
71
-
72
-
73
-
74
-
75
-
76
-
77
-
78
-
79
-
80
-
81
-
82
-
83
-
84
-
85
-
86
-
87
-
88
-
89
-
90
-
91
 |
 |
