Epson CX5600 User Guide
Epson CX5600 - Stylus Color Inkjet Manual
 |
UPC - 010343865341
View all Epson CX5600 manuals
Add to My Manuals
Save this manual to your list of manuals |
Epson CX5600 manual content summary:
- Epson CX5600 | User Guide - Page 1
first select A4 as your paper size as described in step 1. 1. If you are copying a Letter-size document, press the button to turn on the Epson Stylus CX5600 Series. If you are copying an A4-size document, press the button and the Iniciar button simultaneously for 3 seconds to turn on the - Epson CX5600 | User Guide - Page 2
Photos You can copy photos onto 4 × 6-inch Epson photo paper (various types available) using your Epson Stylus CX5600 Series for instant borderless photo reprints. 1. Press the button to turn on the Epson Stylus CX5600 Series. 2. Load 4 × 6-inch Epson photo paper (various types available) in the - Epson CX5600 | User Guide - Page 3
. Draft copies have reduced print quality, but they print faster. 1. Press the Encender button to turn on the Epson Stylus CX5600 Series. 2. Load letter- or A4-size plain paper or Epson Bright White paper in the sheet feeder. Tip: Load only the recommended number of sheets. 3. Place your original - Epson CX5600 | User Guide - Page 4
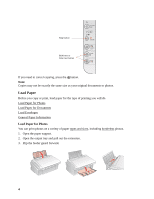
Before you copy or print, load paper for the type of printing you will do. Load Paper for Photos Load Paper for Documents Load Envelopes General Paper Information Load Paper for Photos You can print photos on a variety of paper types and sizes, including borderless photos. 1. Open the paper - Epson CX5600 | User Guide - Page 5
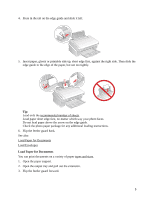
the edge guide. Check the photo paper package for any additional loading instructions. 6. Flip the feeder guard back. See also: Load Paper for Documents Load Envelopes Load Paper for Documents You can print documents on a variety of paper types and sizes. 1. Open the paper support - Epson CX5600 | User Guide - Page 6
paper, printable side up, against the right side. Then slide the edge guide to the edge of the paper, but not too tightly. Tip: Load paper above the arrow on the edge guide. Check the paper package for any additional loading instructions. 6. Flip the feeder guard back. See also: Load Paper for - Epson CX5600 | User Guide - Page 7
air mail envelopes in 4 1/8 × 9 1/2 inch (10,5 × 24,1 cm) (#10) size. 1. Open the paper support and output tray. 2. Pull out the output tray extension. 3. Flip the feeder guard forward. 4. Press in the tab on the edge guide and slide it left. 5. Load up to 10 envelopes against the right side. Load - Epson CX5600 | User Guide - Page 8
6. Slide the edge guide to the edge of the envelopes, but not too tightly. 7. Flip the feeder guard back. See also: Load Paper for Photos Load Paper for Documents General Paper Information Sheet Feeder Capacity Available Epson Papers for the Epson Stylus CX5600 Series Borderless Paper Types and - Epson CX5600 | User Guide - Page 9
Epson High Quality Ink Jet Paper Epson Photo Quality Paper Glossy Epson Photo Paper Glossy Epson Photo Paper Epson Premium Photo Paper Glossy Epson Ultra Premium Photo Paper Glossy Size Part in. (10.2 × S041808 15.2 mm) S041727 Borderless 5 × 7 in. (12.7 × S041464 12.4 cm) Borderless 8 × 10 in. - Epson CX5600 | User Guide - Page 10
type Size Part number Epson Premium Photo Paper Semi-gloss Borderless 4 × 6 in. (10.2 × S041982 15.2 cm) Letter (8.5 × 11 in. [21.6 × 28 S041331 cm]) Epson Presentation Paper Matte Letter (8.5 × 11 in. [21.6 × 28 S041062 cm]) Legal (8.5 × 14 in. [21.6 × 35.6 cm])) S041067 Epson Premium - Epson CX5600 | User Guide - Page 11
Double-sided Epson High Quality Ink Jet Paper Epson Photo Quality Self-Adhesive Sheets Epson Iron-On Cool Peel Transfer Paper Premium Presentation Paper Matte Envelopes Envelope Place Originals for Copying or Scanning Before you copy or scan, place your documents or photos on the scanner. Place - Epson CX5600 | User Guide - Page 12
3. Move the document away from the edges approximately 3 mm to avoid cropping. Note: You can place another document on any remaining portion of the glass at least 12 mm away. 4. Close the document cover gently to keep your documents in place. See also: Place Photos Place Photos You can place one or - Epson CX5600 | User Guide - Page 13
can print documents and photos from your computer. Follow the instructions in these sections for your computer type: Windows Printing Macintosh Printing Before you print, make sure you installed your software and connected the Epson Stylus CX5600 Series to your computer; see the Start Here sheet for - Epson CX5600 | User Guide - Page 14
You can print on your Epson Stylus CX5600 Series using any Windows® printing program. For photos, it's easiest to print using the Windows Photo Gallery on Windows Vista™or the Picture and Fax Viewer on Windows XP. Follow the steps in these sections to print from your Windows computer: Print From - Epson CX5600 | User Guide - Page 15
Status See also: Print From Windows Photo Gallery in Windows Vista Print From the Picture and Fax Viewer in XP Change Default Print Settings Print From Windows Photo Gallery in Windows Vista With Windows Vista, you can quickly print photos using the Windows Photo Gallery. 1. Locate a photo on - Epson CX5600 | User Guide - Page 16
from the drop-down menu that appears. 4. Select EPSON Stylus CX5600 Series, then choose the size and type of paper that you loaded in the printer. Paper size settings You can load paper in these sizes and select the size in the printer software. (Wider papers are for use only when reducing large - Epson CX5600 | User Guide - Page 17
in the lower right corner of the screen. 7. Select Printer Properties. Your printer setting window opens: 8. Select your basic print options, layout, and advanced options as necessary. 9. Click OK. 10. When you return to the Windows Photo Gallery, click Print. Your photo prints. During printing - Epson CX5600 | User Guide - Page 18
Print From a Program Change Default Print Settings Print From the Picture and Fax Viewer in XP With Windows XP, you can quickly print photos using the Picture and Fax Viewer. 1. Locate a photo on your computer. 2. Right-click the photo, highlight Open With, and select Windows Picture and Fax Viewer. - Epson CX5600 | User Guide - Page 19
6. Select EPSON Stylus CX5600 Series and click Printing Preferences. Your printer setting window opens: 7. Select your basic print options, layout, and advanced options as necessary. 8. When you're ready to print, click OK. 9. Click Next. You see this screen: 19 - Epson CX5600 | User Guide - Page 20
10. Select Full page photo print and click Next. Your photo prints. During printing, you can check the print status. See also: Print From a Program Change Default Print Settings Select Basic Options Click the Main tab on the top of the printer settings window to select your basic print options. 1. - Epson CX5600 | User Guide - Page 21
can load paper in these sizes and select the size in the printer software. (Wider papers are for use only when reducing large images × 12.7 cm) 4 × 6 in. (10.2 × 15.2 cm) 5 × 7 in. (12.7 × 12.4 cm) 8 × 10 in. (20.3 × 25.4 cm) Envelope #10 (4 1/8 × 9 1/2 inches [10.5 × 24.1 mm]) 4. If you're printing - Epson CX5600 | User Guide - Page 22
advanced printing options • See a summary of your settings (click Show Settings) • Return to the default settings (click Reset Defaults) • Access the Epson product support website (click Online Support) When you're finished, you're ready to print. Change Print Layout You can select a variety of - Epson CX5600 | User Guide - Page 23
: accesses the poster portions, trim line, and alignment options you can use when you select Poster Printing. 5. To adjust the amount of image expansion when printing borderless photos, adjust the Borderless Expansion slider to Min, Mid, or Max. Note: You may see white borders on your printed photo - Epson CX5600 | User Guide - Page 24
Click the Advanced tab on the top of the printer settings window to select Advanced options. 1. Select the paper Paper size settings You can load paper in these sizes and select the size in the printer software. (Wider papers are for use only when reducing large images with the Reduce/Enlarge - Epson CX5600 | User Guide - Page 25
5 in. (8.9 × 12.7 cm) 4 × 6 in. (10.2 × 15.2 cm) 5 × 7 in. (12.7 × 17.8 cm) 8 × 10 in. (20.3 × 25.4 cm) 4. If you're printing print quality • Black Ink Only: prints color documents or photos in black ink only • Edge Smoothing EPSON Vivid or AdobeRGB. • Gamma: when using Color Controls, adjusts the - Epson CX5600 | User Guide - Page 26
them from the Custom Settings list • Return to the default settings (click Reset Defaults) • Select different print layout settings • Select basic printing options settings, click OK to save them and return to the Print window. Click OK or Print to start printing. During printing, you can check printing - Epson CX5600 | User Guide - Page 27
Settings. You see the printer settings window: 3. Select the print settings you want to use as defaults in all your Windows programs. You can still change the default settings from within a program as needed. Macintosh Printing You can print on your Epson Stylus CX5600 Series using any Macintosh - Epson CX5600 | User Guide - Page 28
print, select the page options and print options, and then print. Select Page Options Open the Page Setup window to select your page options. 1. Open the File menu and select Page Setup. 2. Select Stylus CX5600 as the Format for setting. 3. Select the Paper Size setting for the paper you loaded. 28 - Epson CX5600 | User Guide - Page 29
printer software. 10 (4 1/8 × 9 1/2 inches [10.5 × 24.1 mm]) 4. Choose portrait or one of the landscape orientation options for your document or photo. 5. To reduce or enlarge the size of your printed document or photo, select a different Scale percentage. 6. Click OK to close the Page Setup window - Epson CX5600 | User Guide - Page 30
Stylus CX5600 as the Printer setting. 3. Select Print Settings from the pop-up menu. 4. Select the Media Type setting that matches the paper you loaded. 5. Select Color or Black ink color management options • Adjust the amount of image window, you can click Advanced and select advanced options. 1. - Epson CX5600 | User Guide - Page 31
High Speed to speed up printing (may reduce print quality). 4. To flip the image you're printing, click Mirror Image. (If you are printing on Epson Iron-On Cool Peel Transfer Paper, turn on Mirror Image.) When you're finished, you're ready to print. Change Print Layout You can select - Epson CX5600 | User Guide - Page 32
Binding. When you print, the Epson Stylus CX5600 Series will prompt you to reload window. 1. Select Copies & Pages from the pop-up menu. 2. To print multiple copies of your document, enter the number in the Copies field. 3. To collate the multiple copies into sets of documents, click Collated. 32 - Epson CX5600 | User Guide - Page 33
in your photos by selecting Color Management and ColorSync options from the Print window. 1. Select Color Management from the pop-up menu. 2. Select one • Off (No Color Adjustment) turns off printer software color adjustments so you can use the color adjustments in your program only. 3. If you - Epson CX5600 | User Guide - Page 34
Note: This option is available only when you chose a Paper Size setting of Sheet Feeder Borderless on the Page Setup window. 2. To adjust the borderless expansion, select Min, Mid, or Max in the pop-up menu. Note: You may see white borders on your printed photo if you - Epson CX5600 | User Guide - Page 35
, you can check printing status. Check Printing Status During printing, you can view the progress of your print job, control printing, and monitor ink levels. 1. Click the Stylus CX5600 or Print Center icon when it appears in the dock at the bottom of the screen. In Print Center, double-click - Epson CX5600 | User Guide - Page 36
Solve Problems for solutions. 3. When you're finished, close the window to exit the program. Scan to Your Computer You can scan original documents and photos on your Epson Stylus CX5600 Series and save them as digital files on your computer using the Epson Scan program. Follow the instructions in - Epson CX5600 | User Guide - Page 37
: In some programs, you must select the Epson Stylus CX5600 Series as the "source" first. If you see a Select Source option, choose it and select your Epson Stylus CX5600 Series. 3. Select your Epson Stylus CX5600 Series. Epson Scan starts automatically. Note: With Windows Vista or XP, do not choose - Epson CX5600 | User Guide - Page 38
Now you can select a scan mode. Select a Scan Mode Epson Scan provides a choice of scan modes with different levels of automatic settings. Select the mode from the Mode box: For instructions on scanning in a mode, click the mode name below: Full Auto Mode automatically detects the type of original - Epson CX5600 | User Guide - Page 39
image file is shown in Windows Explorer or the Macintosh Finder. Now you can view and print the image. Scan in Home Mode (Semi-Automatic) Start Epson Scan and make sure Home Mode is selected as the Mode setting. Follow the instructions in these sections to select settings as necessary for your - Epson CX5600 | User Guide - Page 40
Destination 1. Select the way you plan to use your scanned image as the Destination. The Resolution setting is selected based on the Destination you choose. Screen/Web: For images you will e-mail, view on a computer screen, or post on the web. Printer: For images you will print or documents you are - Epson CX5600 | User Guide - Page 41
Epson Scan so you can use them at a larger size, accept the Resolution setting selected by Epson Scan. • You will scan the images at their original size, but then enlarge them later in an image-editing program so you can select the scanned image area and other settings manually. If the checkbox is - Epson CX5600 | User Guide - Page 42
you're finished, you can select your scan size and scan. Select Scanned Image Area In thumbnail preview, your scanned image area is selected automatically. In normal preview, you create the scanned image area by clicking a button. You can adjust the scanned image area by creating and/or moving the - Epson CX5600 | User Guide - Page 43
Marquee Normal preview: Click the auto locate icon to create a marquee. Marquee 2. To move a marquee, click inside the marquee and drag it where you want it. 3. To resize a marquee, place the cursor over a marquee edge or corner, click, and drag the edges where you want them. 43 - Epson CX5600 | User Guide - Page 44
select your scan size and scan. Adjust Image Quality You can adjust exposure, brightness, and other image quality settings before you scan to . Threshold Adjusts the level at which the black areas in text and line art are delineated, improving text recognition in OCR programs. (Available - Epson CX5600 | User Guide - Page 45
on your preview image proportioned for that size. Marquee Note: If you need to rotate the orientation of the scan area marquee, click the orientation icon. 3. If you need to create a scanned image size that is not in the Target Size list, select Customize. 4. Name the custom size, enter the size - Epson CX5600 | User Guide - Page 46
in Windows Explorer or the Macintosh Finder. 5. Now you can view and print your scanned images, attach them to an e-mail, or use them however you like. Scan in Professional Mode (Fully Manual) Start Epson Scan and make sure Professional Mode is selected as the Mode setting. Follow the instructions - Epson CX5600 | User Guide - Page 47
File Destination 1. Select the details of your image and how you want to scan it as the Image Type setting. • 24-bit Color: for color photos • Color Smoothing: for color graphics, such as charts or graphs • 8-bit Grayscale: for black-and-white photos • Black & White: for black text documents or line - Epson CX5600 | User Guide - Page 48
Epson Scan so you can use them at a larger size, accept the Resolution setting selected by Epson Scan. • You will scan the images at their original size, but then enlarge them later in an image-editing program so you can select the scanned image area and other settings manually. If the checkbox is - Epson CX5600 | User Guide - Page 49
you're finished, you can select your scan size and scan. Select Scanned Image Area In thumbnail preview, your scanned image area is selected automatically. In normal preview, you create the scanned image area by clicking a button. You can adjust the scanned image area by creating and/or moving the - Epson CX5600 | User Guide - Page 50
Marquee Normal preview: Click the auto locate icon to create a marquee. Marquee 2. To move a marquee, click inside the marquee and drag it where you want it. 3. To resize a marquee, place the cursor over a marquee edge or corner, click, and drag the edges where you want them. 50 - Epson CX5600 | User Guide - Page 51
quality settings. 6. When you're finished, you can select your scan size and scan. Adjust Image Quality You can adjust exposure, brightness, and other image quality settings before you scan to improve your results. Scroll down to the Adjustments area to view all the options. Click the + icon next - Epson CX5600 | User Guide - Page 52
button to use the settings. Adjusts the level at which the black areas in text and line art are delineated, improving text recognition in OCR programs. (Available only when you select Black & White as the Image Type setting.) Select Scanned Image Size You can scan images at their original size - Epson CX5600 | User Guide - Page 53
Windows) or > (Macintosh) icon to open the tools. • Scale: reduces or enlarges your image by the percentage you enter • Trimming: turns automatic image cropping on or off (see Epson Scan Help for details) • unlock icon: unlocks the width/height proportions of the scanned image size so you can adjust - Epson CX5600 | User Guide - Page 54
After selecting your scan settings, you are ready to scan and view your scanned images. 1. Click Scan. Note: If you started your scan from within a TWAIN-compatible scanning program, your scanned images open in the program window. Click Close to exit Epson Scan. 2. Select the scan file settings you - Epson CX5600 | User Guide - Page 55
the Customize window. 6. Click Scan. Your color-restored scanned image file is shown in Windows Explorer or the Macintosh Finder. Note: If you started your scan from within a TWAIN-compatible scanning program, your scanned images open in the program window. Click Close to exit Epson Scan. Now you - Epson CX5600 | User Guide - Page 56
or the Macintosh Finder. Note: If you started your scan from within a TWAIN-compatible scanning program, your scanned images open in the program window. Click Close to exit Epson Scan. Now you can view and print the image. Scan to a PDF File You can scan a multi-page document and save it in one PDF - Epson CX5600 | User Guide - Page 57
Select your Document Type or Image Type and Destination settings, then preview your image. 5. Click Scan. 6. In the scan file settings window, select a folder for your file and select PDF as the file Type setting. 7. Click OK. 8. The Epson Stylus CX5600 Series scans the first page and displays this - Epson CX5600 | User Guide - Page 58
pages, click Edit Page, then use the icons on the bottom of the editing window. (Click Help for details.) When you're finished, click Save File. 10. Click Close to exit Epson Scan. Now you can view and print the scanned document in Adobe® Acrobat® or Reader®, attach it to an e-mail, and use it - Epson CX5600 | User Guide - Page 59
file and you can edit the images using a program that supports it. TIFF (*.TIF) A file format created for exchanging data between many programs, such as graphic and DTP software. PDF (*.PDF) A document format that can be read on both Windows and Macintosh systems using Adobe Reader or Acrobat - Epson CX5600 | User Guide - Page 60
in one of these sections: Windows Printing Macintosh Printing Note: Also check the Help utility in your printing program for additional printing instructions. Replace Ink Cartridges Your Epson Stylus CX5600 Series and its software will let you know when an ink cartridge is low or expended. If - Epson CX5600 | User Guide - Page 61
expended, run the Ink Cartridge Replacement utility. Follow the instructions in these sections to check and replace your ink cartridges: Check Cartridge Status Purchase Epson Cartridges Replace Cartridges Using the Printer Software Utility Remove and Install Cartridges Check Cartridge Status If one - Epson CX5600 | User Guide - Page 62
the Applications folder on your hard drive. 2. Open the EPSON Printer Utility 2. 3. Select Stylus CX5600 and click OK. 4. Select EPSON StatusMonitor. Purchase Epson Cartridges You can purchase genuine Epson ink cartridges from an Epson authorized reseller. To find the nearest reseller, call your - Epson CX5600 | User Guide - Page 63
your Epson Stylus CX5600 Series not covered by Epson's warranty. Leave your old cartridges in the Epson Stylus CX5600 Series until you are ready to replace them to prevent the print head nozzles from drying out. Replace Cartridges Using the Printer Software Utility When an installed ink cartridge is - Epson CX5600 | User Guide - Page 64
the Ink Cartridge Replacement utility instead of following the instructions below. 2. Open the scanner and make sure its support locks in place. Caution: Do not touch any area shown below. 3. Press the button. The print head moves to the position to indicate which cartridge is low or expended. 64 - Epson CX5600 | User Guide - Page 65
the button again to see if more cartridges are low or expended. If no other cartridges are low or expended, the print head moves to the replacement position on the right. 5. Open the cartridge cover. 6. Squeeze the tab on the cartridge and lift the cartridge straight up to remove it. Dispose of - Epson CX5600 | User Guide - Page 66
, wash them thoroughly with soap and water. If ink gets into your eyes, flush them immediately with water. Keep ink cartridges out of the reach of children. 7. Before opening the new cartridge package, shake it four or five times. 8. Remove the cartridge from the package, but be careful not to touch - Epson CX5600 | User Guide - Page 67
necessary cartridges, close the cartridge cover and push it down until it clicks into place. 12. Hold the scanner while you release the support. Then close the scanner. Caution: Do not try to close the scanner with the scanner support raised, otherwise you may damage the Epson Stylus CX5600 Series - Epson CX5600 | User Guide - Page 68
in the same environment as the Epson Stylus CX5600 Series. Note that there is a valve in the ink supply port, making covers or plugs unnecessary, but care is needed to prevent the ink from staining items that the cartridge touches. Do not touch the ink cartridge ink supply port or surrounding area - Epson CX5600 | User Guide - Page 69
of plain paper in the sheet feeder. 2. Windows: Right-click the printer icon in the bottom right corner of your screen (the taskbar) and select Nozzle Check. Macintosh: Open the Applications folder, open the EPSON Printer Utility 2, select Stylus CX5600, and click OK. Then select Nozzle Check - Epson CX5600 | User Guide - Page 70
cannot clean the print head if an ink cartridge is expended, and may not be able to clean it when a cartridge is low. You must replace the cartridge first. You can clean the print head using the Epson Stylus CX5600 Series control panel or your software. Using the Control Panel 1. Load a few sheets - Epson CX5600 | User Guide - Page 71
Windows: Right-click the printer icon in the bottom right corner of your screen (the taskbar) and select Head Cleaning. Macintosh: Open the Applications folder, open the EPSON Printer Utility 2, select Stylus CX5600, and click OK. Then select Head Cleaning. 3. Follow the on-screen instructions to - Epson CX5600 | User Guide - Page 72
(the taskbar) and select Print Head Alignment. Macintosh: Open the Applications folder, open the EPSON Printer Utility 2, select Stylus CX5600, and click OK. Then select Print Head Alignment. 3. Follow the on-screen instructions to print an alignment sheet. Note: Do not press the button to cancel - Epson CX5600 | User Guide - Page 73
OK. Then select Paper Guide Cleaning. 3. Follow the on-screen instructions to feed the paper slowly through the printer to clean the paper path. 4. Repeat as necessary until the paper comes out clean. Solve Problems If you have a problem using your Epson Stylus CX5600 Series, check these sections - Epson CX5600 | User Guide - Page 74
on any incorrectly installed cartridges. Parts inside the Epson Stylus CX5600 Series are at the end of their service life. Contact Epson for help. There is a problem with the Epson Stylus CX5600 Series. Turn it off, wait a few moments, and turn it back on again. If the error is not resolved, contact - Epson CX5600 | User Guide - Page 75
page does not print, the Epson Stylus CX5600 Series may have a problem. Check for additional solutions. If they don't work, contact Epson. Product Parts Use these illustrations to identify the parts of your product. Edge guide Paper support Feeder guard Scanner lid Control panel buttons Output - Epson CX5600 | User Guide - Page 76
Service only (do not open) Power inlet (for power cable) USB port (for computer cable) Scanner Scanner support Ink cartridge holder (in home position) Problems and Solutions Check these sections for solutions to problems you may have using the Epson Stylus CX5600 Series: Setup Problems Copying - Epson CX5600 | User Guide - Page 77
completely and the ink cartridge cover is closed completely. Also make sure no packing material remains in the Epson Stylus CX5600 Series. Wait a moment, then turn the Epson Stylus CX5600 Series back on to clear the error. Software Installation Problems • Make sure your Epson Stylus CX5600 Series is - Epson CX5600 | User Guide - Page 78
• Run a printer check. If the test page prints, make sure your software is installed correctly. Printing Noise Occurs, Even Though Nothing Prints • Check to see if the print head nozzles are clogged. • The Epson Stylus CX5600 Series won't operate properly if it's tilted or at an angle. Place it on a - Epson CX5600 | User Guide - Page 79
under Hardware and Sound. Windows XP: Click Start, select Control Panel, then select Printers and Faxes (or Printers and Other Hardware and then Printers and Faxes). Windows 2000: Click Start, point to Settings, then select Printers. 2. Right-click EPSON Stylus CX5600 Series and select Printing - Epson CX5600 | User Guide - Page 80
Image setting in the printer driver in the Page Layout window (Windows) or Print Settings windows (Macintosh). If you are printing on Epson Iron-On Cool Peel Transfer Paper, however, the image should be inverted. Blank Pages Print • In Windows, make sure the EPSON Stylus CX5600 Series is selected as - Epson CX5600 | User Guide - Page 81
printing again. • Make sure your printer is selected in Windows, or is set as the active printer in Print Center (Macintosh). • If you're using a switch box or USB hub with your printer, connect the printer directly to your computer. • Turn the Epson Stylus CX5600 Series off, check that the cables - Epson CX5600 | User Guide - Page 82
. • Avoid handling printouts on glossy paper for a few hours to allow the ink to set. • If ink smears on the back of a printout, clean the paper path. • Turn off High Speed mode in the Windows or Macintosh printer software. • If you are using double-sided paper and printing heavily saturated or dark - Epson CX5600 | User Guide - Page 83
printer software. • Your printed colors can never exactly match your on-screen colors. However, you can use a color management system to get as close as possible. Try using the ICM (Windows) or ColorSync (Macintosh) setting. • For best results, use genuine Epson ink and paper. Image Quality Problems - Epson CX5600 | User Guide - Page 84
move the document or the Epson Stylus CX5600 Series while scanning. • Make sure the Epson Stylus CX5600 Series is placed on a flat, stable surface. • Select Unsharp Mask in Epson Scan's Professional Mode. • Adjust the Auto Exposure setting in Epson Scan's Professional Mode. • Increase the Resolution - Epson CX5600 | User Guide - Page 85
Printer Software Uninstall. Note: With Windows Vista, click Continue, then go to the next step. 5. In the next window, select EPSON Stylus CX5600 Series and click OK. Then follow the onscreen instructions. 6. Open the Windows Control Panel, then click Uninstall a program under Programs (Windows - Epson CX5600 | User Guide - Page 86
Help With Other Software Epson Help Epson provides these technical support services: Internet Support Visit Epson's support website for your Epson Stylus CX5600 Series or solutions to common problems. You can download drivers, get FAQs and troubleshooting advice, or e-mail Epson with your questions - Epson CX5600 | User Guide - Page 87
• Description of the problem Then call: Country Argentina Software Software ArcSoft PhotoImpression Online and E-mail www.arcsoft.com [email protected] Clean and Transport Your Product If your Epson Stylus CX5600 Series gets dirty or you need to move it some distance, follow the instructions - Epson CX5600 | User Guide - Page 88
, prepare it for transportation as follows: 1. Turn off the Epson Stylus CX5600 Series. 2. Unplug all the connected cables. 3. Remove all the paper. 4. Close the paper support and output tray. 5. Lift up the scanner and check that the ink cartridge holder is all the way to the right (the home - Epson CX5600 | User Guide - Page 89
: Windows Vista/XP/2000 Network Setup Macintosh Network Setup Windows Vista/XP/2000 Network Setup Install the Epson Stylus CX5600 Series software on the computer to which you connected it. Then follow the instructions in these sections to share it and access it for printing. Set Up Shared Printer - Epson CX5600 | User Guide - Page 90
up the Epson Stylus CX5600 Series as a shared printer. 1. Do one of the following: Windows Vista: Click , click Control Panel, and click Printer under Hardware and Sound. Windows XP: Click Start, click Control Panel, and click Printers and Other Hardware or Printers and Faxes. Windows 2000: Click - Epson CX5600 | User Guide - Page 91
and click Next. 8. Follow the on-screen instructions to complete access to the shared printer. Note: You may need to insert the CD that came with the Epson Stylus CX5600 Series and click Have Disk. Macintosh Network Setup Install the Epson Stylus CX5600 Series software on the Macintosh to which you - Epson CX5600 | User Guide - Page 92
Ink Cartridge Safety General Safety • Be sure to follow all warnings and instructions marked on the Epson Stylus CX5600 Series. • Use only the type of power source indicated on the Epson Stylus CX5600 Series label. • Use only the power cord that comes with the Epson Stylus CX5600 Series. Use of - Epson CX5600 | User Guide - Page 93
not touch the ink cartridge ink supply port or surrounding area. Computer System Requirements To use the Epson Stylus CX5600 Series and its software, your computer system should meet or exceed the requirements in these sections: Windows Requirements Macintosh Requirements Windows Requirements Your - Epson CX5600 | User Guide - Page 94
See these sections for the detailed specifications of your Epson Stylus CX5600 Series: Printing Scanning Paper Ink Cartridges Size and Weight Electrical Environmental Standards Interface See also: Computer System Requirements Important Safety Instructions Printing Paper path Sheet feeder, top entry - Epson CX5600 | User Guide - Page 95
1200 dpi (sub scan) Image data 16 bits per pixel per color internal 8 bits per pixel per color external (maximum) Light source RGB three color LED Paper Use paper under normal conditions: Temperature: 10 to 35 °C Humidity: 20 to 80% RH Note: Since the quality of any particular brand or type of paper - Epson CX5600 | User Guide - Page 96
0.08 to 0.11 mm Weight 64 g/m2 (17 lb) to 90 g/m2 (24 lb) Envelopes Size No. 10 (4.1 × 9.5 inches [10,5 × 24,1 cm]) Paper type Plain bond paper or airmail paper Weight 75 g/m2 (20 lb) to 90 g/m2 (24 lb) Printable Area Note: When printing - Epson CX5600 | User Guide - Page 97
mm minimum Right: 20 mm Ink Cartridges Caution: To ensure good results, use genuine Epson ink cartridges and do not refill them. Other products may cause damage to your printer not covered by Epson's warranty. Color Cyan, Magenta, Yellow, Black Part number: 90 (Black) Part number: 73 (Cyan, Magenta - Epson CX5600 | User Guide - Page 98
W (max.) 220 to 240 V model Copying: Approx. 15.6 W (max. 22 W) Sleep Mode: Approx. 4.5 W Power Off Mode: Approx. 1 W (max.) Environmental Temperature Operation: 10 to 35 °C Storage: -20 to 40 °C 1 month at 40 °C Humidity Operation: 20 to 80% RH Storage: 5 to 85% RH (without condensation) Standards - Epson CX5600 | User Guide - Page 99
or alterations to this product, or (excluding the U.S.) failure to strictly comply with Seiko Epson Corporation's operating and maintenance instructions. Seiko Epson Corporation shall not be liable for any damages or problems arising from the use of any options or any consumable products other than - Epson CX5600 | User Guide - Page 100
100
-
 1
1 -
 2
2 -
 3
3 -
 4
4 -
 5
5 -
 6
6 -
 7
7 -
8
-
9
-
10
-
11
-
12
-
13
-
14
-
15
-
16
-
17
-
18
-
19
-
20
-
21
-
22
-
23
-
24
-
25
-
26
-
27
-
28
-
29
-
30
-
31
-
32
-
33
-
34
-
35
-
36
-
37
-
38
-
39
-
40
-
41
-
42
-
43
-
44
-
45
-
46
-
47
-
48
-
49
-
50
-
51
-
52
-
53
-
54
-
55
-
56
-
57
-
58
-
59
-
60
-
61
-
62
-
63
-
64
-
65
-
66
-
67
-
68
-
69
-
70
-
71
-
72
-
73
-
74
-
75
-
76
-
77
-
78
-
79
-
80
-
81
-
82
-
83
-
84
-
85
-
86
-
87
-
88
-
89
-
90
-
91
-
92
-
93
-
94
-
95
-
96
-
97
-
98
-
99
-
100
 |
 |
1
Copy a Document or Photo
You can copy documents or photos in color or black and white on your Epson Stylus CX5600
Series. You can also make quick draft copies.
Copy Documents
Copy Photos
Copy Draft Documents
Copy Documents
You can copy documents onto letter- or A4-size plain paper or Epson Bright White paper using
your Epson Stylus CX5600 Series just like you would on a copy machine.
Note:
The default paper size for copying and printing documents is Letter. If you are copying an A4-size
document, you must first select A4 as your paper size as described in step 1.
1.
If you are copying a Letter-size document, press the
button to turn on the Epson Stylus
CX5600 Series.
If you are copying an A4-size document, press the
button and the
Iniciar
button
simultaneously for 3 seconds to turn on the Epson Stylus CX5600 Series and to select A4 as
the paper size.
Note:
To change the paper size back to Letter, turn off the Epson Stylus CX5600 Series, then press
the
button and the
Iniciar
button for 3 seconds.
2.
Load
letter- or A4-size plain paper or Epson Bright White paper in the sheet feeder.
Tip:
Load only the recommended number of sheets
.
3.
Place your original document
on the document table.
4.
Press the
Iniciar
button (for black-and-white documents) or the
Iniciar
button
(for color documents) to start copying.