Epson CX7800 Product Information Guide - Page 8
Scanning and Printing Your Photos, Storing the Film Holder, See below to store the film holder. - scan slides
 |
UPC - 010343855687
View all Epson CX7800 manuals
Add to My Manuals
Save this manual to your list of manuals |
Page 8 highlights
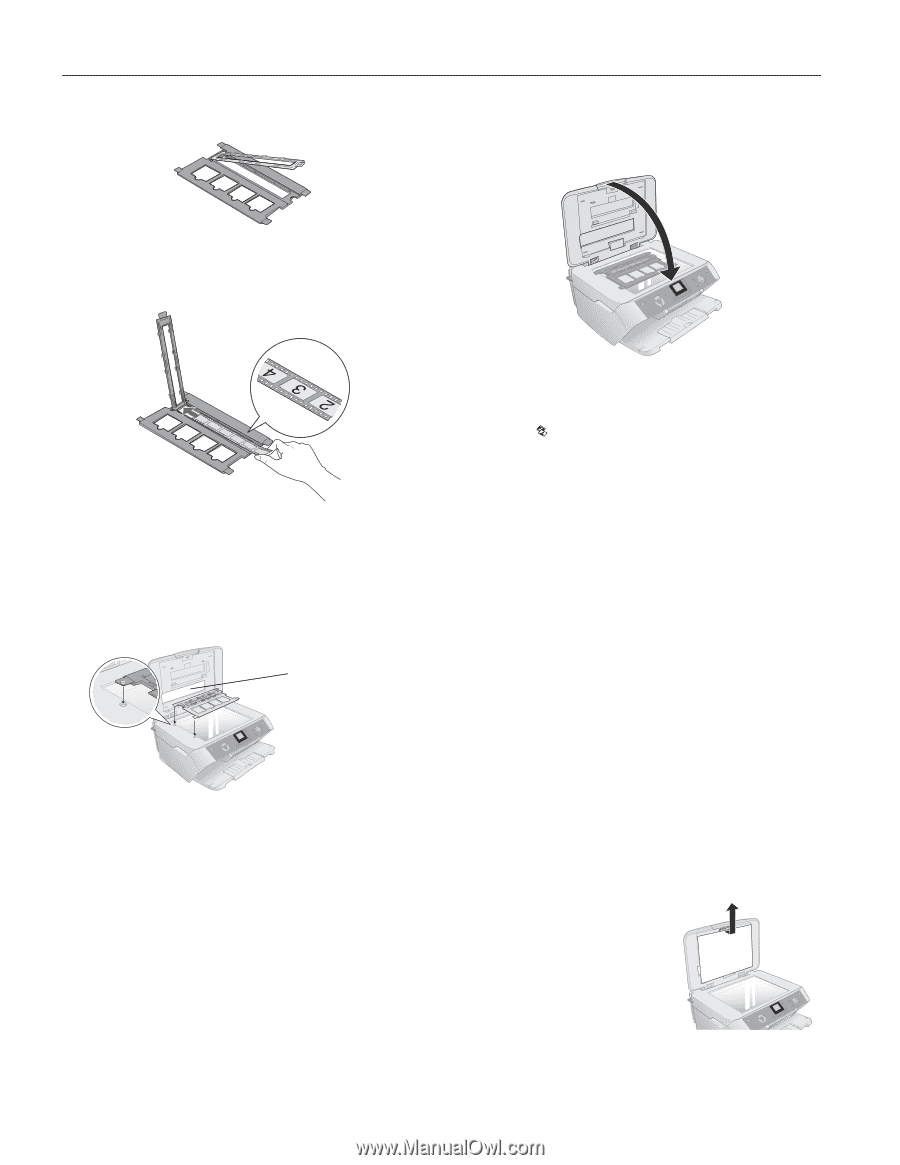
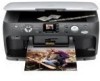
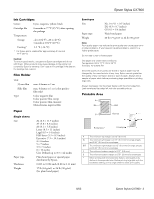
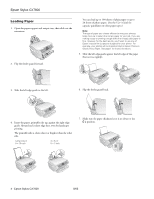
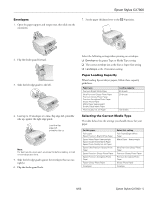
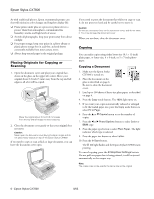
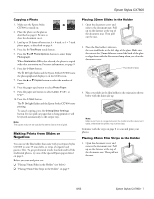
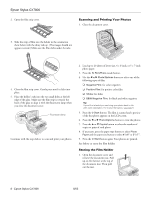
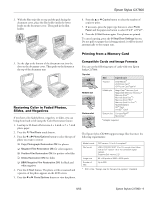
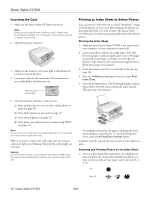
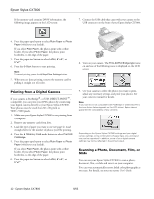
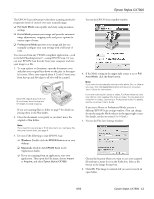
Epson Stylus CX7800 2. Open the film strip cover. Scanning and Printing Your Photos 1. Close the document cover. 3. Slide the strip of film into the holder in the orientation show below with the shiny side up. (The images should not appear reversed.) Make sure the film slides under the tabs. 4. Close the film strip cover. Gently press until it clicks into place. 5. Place the holder's tabs into the two small holes at the left edge of the glass. Make sure the film strip is towards the back of the glass to align it with the fluorescent lamp when you close the document cover. Fluorescent lamp Continue with the steps below to scan and print your photos. 2. Load up to 20 sheets of letter-size, 4 × 6-inch, or 5 × 7-inch photo paper. 3. Press the Film/Photo mode button. 4. Use the l or r Photo/Options button to select one of the following types of film: ❏ Negative Film: for color negatives. ❏ Positive Film: for positive color film ❏ Slides: for slides ❏ B&W Negative Film: for black and white negatives Tip: If your film is faded you can bring your photo back to life with color restoration. For more information, see page 9. 5. Press the x Start button. The film is scanned and a preview of the first photo appears on the LCD screen. 6. Press the l or r Photo/Options button to view the photos. 7. Press the u or d Copies button to select the number of copies to print of each photo. 8. If necessary, press the paper type button to select Photo Paper and the paper size button to select 4"x 6" or 5"x 7". 9. Press the x Start button again. Your photos are printed. See below to store the film holder. Storing the Film Holder 1. Open the document cover and remove the document mat. Pull up on the fastener at the top of the document mat. Then pull out the mat. 8 - Epson Stylus CX7800 8/05
-
 1
1 -
2
-
 3
3 -
 4
4 -
 5
5 -
 6
6 -
 7
7 -
 8
8 -
 9
9 -
 10
10 -
 11
11 -
 12
12 -
 13
13 -
14
-
15
-
16
-
17
-
18
 |
 |