Epson Stylus 1500 User Setup Information - PC
Epson Stylus 1500 Manual
 |
View all Epson Stylus 1500 manuals
Add to My Manuals
Save this manual to your list of manuals |
Epson Stylus 1500 manual content summary:
- Epson Stylus 1500 | User Setup Information - PC - Page 1
other than those designated as Original EPSON Products or EPSON Approved Products by Seiko Epson Corporation. EPSON, EPSON Stylus, and EPSON ESC/P are registered trademarks and EPSON ESC/P 2 is a trademark of Seiko Epson Corporation. Windows printer driver copyright Software 2000 Ltd Oxford, England - Epson Stylus 1500 | User Setup Information - PC - Page 2
with the limits for a Class B digital device, pursuant to Part 15 of the FCC Rules. These limits are designed to provide energy and, if not installed and used in accordance with the instructions, may cause harmful interference to radio or television reception. However des Communications du Canada. ii - Epson Stylus 1500 | User Setup Information - PC - Page 3
Support Services 5 Important Safety Instructions 6 Chapter 1 Setting Up the Printer System Requirements 1-1 Choosing a Location 1-1 Unpacking the Printer 1-2 Attaching the Paper Support and Output Tray 1-3 Plugging In and Turning On the Printer 1-4 Installing the Black Ink Cartridge - Epson Stylus 1500 | User Setup Information - PC - Page 4
and Using the Printer Driver Installing the Windows Printer Driver 2-1 Installing the Driver for Windows 3.1 2-1 Installing the Driver for Windows 95 2-4 Installing a Driver for DOS Programs 2-7 Using the Windows Printer Driver 2-8 Accessing the Driver 2-8 Using the Driver Dialog Box 2-11 - Epson Stylus 1500 | User Setup Information - PC - Page 5
can print up to 16 million colors to produce full-color, photo-quality images. The Stylus 1500 is easy to install and use. You simply set it up and install the Microsoft® Windows® printer driver software as described in this book. The printer has a built-in parallel interface so you can connect it - Epson Stylus 1500 | User Setup Information - PC - Page 6
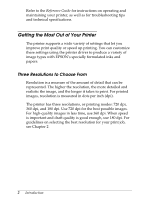
Refer to the Reference Guide for instructions on operating and maintaining your printer, as well as for troubleshooting tips and technical specifications. Getting the Most Out of Your Printer The printer supports a wide variety of settings that let you improve print quality or speed up printing. You - Epson Stylus 1500 | User Setup Information - PC - Page 7
other media, see Chapter 1 of the Reference Guide. Specially Formulated Ink EPSON's black and color ink cartridges are specially formulated to work with EPSON papers and the driver to deliver the best looking images. Always use genuine EPSON ink cartridges and do not refill them. Other products may - Epson Stylus 1500 | User Setup Information - PC - Page 8
library fax service u Product literature on current and new products. You can purchase ink cartridges, paper, parts, printed manuals, and accessories for EPSON products from EPSON Accessories at (800) 873-7766 (U.S. sales only). In Canada, call (800) BUY-EPSON. If you purchased your printer outside - Epson Stylus 1500 | User Setup Information - PC - Page 9
Electronic Support Services If you have a modem, the fastest way to access helpful tips, specifications, drivers, application notes, and bulletins for EPSON products is through the online services below. EPSON Bulletin Board Service You can call the EPSON Bulletin Board Service (BBS) at (310) 782- - Epson Stylus 1500 | User Setup Information - PC - Page 10
wall outlet does not exceed 15 amperes. u Except as specifically explained in the Reference Guide, do not attempt to service the printer yourself. u Unplug the printer and refer servicing to qualified service personnel under the following conditions: If the power cord or plug is damaged; if liquid - Epson Stylus 1500 | User Setup Information - PC - Page 11
Chapter 1 Setting Up the Printer As you follow the instructions in this chapter to set up your printer, refer to the illustrations on the inside front cover to identify the printer's components. System Requirements To use your printer and its driver, we recommend you have the following system - Epson Stylus 1500 | User Setup Information - PC - Page 12
side of the printer. Unpacking the Printer In addition to this guide, your printer box should include two EPSON printer driver diskettes, a Reference Guide, a Setup and Software Guide for Macintosh, a Notice Sheet, and these items: printer output tray paper support black ink cartridge You must - Epson Stylus 1500 | User Setup Information - PC - Page 13
placing the hole on the right side of the support over the right mounting post on the printer. Then push the notch on the left side onto the left mounting post. 1 2 2. Attach the output tray by fitting the notches on the tray over - Epson Stylus 1500 | User Setup Information - PC - Page 14
button protectors on each side. 3. Plug the power cord into a properly grounded electrical outlet. 4. Turn on the printer by pressing the Operate button. The Pause light flashes whiles the printer completes its power-on routine. During the power-on routine, the print head moves back and forth and - Epson Stylus 1500 | User Setup Information - PC - Page 15
steps in this section to install your printer's black ink cartridge. w Warning: The ink cartridge is a self-contained unit. Under ordinary use, ink will not leak from a cartridge. If ink gets on your hands, wash them thoroughly with soap and water. If ink gets into your eyes, flush them immediately - Epson Stylus 1500 | User Setup Information - PC - Page 16
plug into the ink compartment following the instructions on the cartridge. Push the cartridge all the way into the compartment. You will feel some resistance. When the cartridge is correctly installed, the Ink Out O light goes off. Note: If the Ink Out O light remains on, the ink cartridge may not - Epson Stylus 1500 | User Setup Information - PC - Page 17
turn off the printer while the Pause light is flashing. Also, never remove the ink cartridge while ink is being charged in the system. When you need to replace ink cartridges, see Chapter 3 of the Reference Guide for instructions. Be sure to use only genuine EPSON ink cartridges and do not refill - Epson Stylus 1500 | User Setup Information - PC - Page 18
Print Head Follow these steps to install the color print head: 1. Make sure the printer is turned on and the Data light is off. 2. Open the printer cover using the notch in the middle of the cover. 3. Press the Pause unit by hand. Always use the Alt button to move it. 1-8 Setting Up the Printer - Epson Stylus 1500 | User Setup Information - PC - Page 19
5. Raise the blue print head unit release lever as far as it will go. 6. Remove the protective cover from the print head compartment. c Caution: Do not touch the carriage inside the printer; this may damage the printer. Setting Up the Printer 1-9 - Epson Stylus 1500 | User Setup Information - PC - Page 20
damage the print head. 8. Carefully insert the print head unit into the compartment, with the electrical contacts and print head facing the back of the printer. 1-10 Setting Up the - Epson Stylus 1500 | User Setup Information - PC - Page 21
from a cartridge. If ink does get on your hands, wash them thoroughly with soap and water. If ink gets into your eyes, flush them immediately with water. c Caution: Do not open the ink cartridge package until just before you install the cartridge, or the ink may dry up. Setting Up the Printer 1-11 - Epson Stylus 1500 | User Setup Information - PC - Page 22
cartridge clamp. Then remove the protective sheet from the cartridge holder. 2. Open the ink cartridge package. Next, remove the tape seal from the top of the cartridge as shown. c Caution: Do not remove the tape seal from the bottom of the cartridge; ink will leak out. 1-12 Setting Up the Printer - Epson Stylus 1500 | User Setup Information - PC - Page 23
ink cartridge clamp down until it locks in place. You will feel some resistance. c Caution: Once you install the ink cartridge, do not open the clamp or remove the ink cartridge except to replace it with a new one. Otherwise, the cartridge and print head may become unusable. Setting Up the Printer - Epson Stylus 1500 | User Setup Information - PC - Page 24
cartridge.) The first time you install the ink cartridge, the printer automatically charges the ink printer periodically performs a cleaning operation. You may notice the cleaning cycle being performed when the printer has been on for a while without being used or when you turn on the printer - Epson Stylus 1500 | User Setup Information - PC - Page 25
Color printing with the EPSON Stylus 1500 produces amazing images, size and resolution of your images using your printer driver and application software. u Color printing takes time because of by your printer's cyan, magenta, yellow, and black ink-the CMYK method. Your printer driver's Document Type - Epson Stylus 1500 | User Setup Information - PC - Page 26
in matching colors, you can use a color calibration system available with many software applications. If you use a scanner, make sure your scanning software is set to the correct setting for ink jet printers to help you match colors. Also, your application may include image editing capabilities - Epson Stylus 1500 | User Setup Information - PC - Page 27
2. Raise the output tray until it locks in the upright position. 3. Slide the right edge guide to the left as far as it will go. Then slide the left edge guide to match the width of your paper. Setting Up the Printer 1-17 - Epson Stylus 1500 | User Setup Information - PC - Page 28
4. Move the center support to a point midway between the edge guides. Then gently extend the rear edge guide until it stops. 5. Fan a stack of paper; then tap it on of the stack is against the right edge guide. Next, slide the left edge guide against the left edge of the paper. 1-18 Setting Up the - Epson Stylus 1500 | User Setup Information - PC - Page 29
rear edge guide to match the length of your paper. When you load paper in the landscape direction (wider than it is tall), the rear edge guide may not match the length of your paper. In this case, remove the rear edge guide and re-insert it as shown. Setting Up the Printer 1-19 - Epson Stylus 1500 | User Setup Information - PC - Page 30
paper tray is positioned under the output tray. The rear edge guide must be under the output tray to allow room for the paper loaded in the sheet feeder and to prevent a paper jam. Testing the Printer Before continuing, test the printer to ensure it is functioning properly. For the self test, use - Epson Stylus 1500 | User Setup Information - PC - Page 31
problem. You may also need to calibrate your printer. After connecting the printer to your PC and installing the printer driver as explained in the following sections, calibrate your printer using the calibration utility program that came with your printer. See Chapter 3 for instructions. Setting - Epson Stylus 1500 | User Setup Information - PC - Page 32
-pin end of the cable into the computer's parallel interface according to the instructions in your computer manual. 4. Turn on the printer by pressing the Operate button and then turn on your computer. Now see Chapter 2 for instructions on installing and using the printer driver. 1-22 Setting Up the - Epson Stylus 1500 | User Setup Information - PC - Page 33
the Windows Printer Driver A printer driver is software that allows your computer to control the printer. You must install the printer driver on the Windows driver diskette that came with your printer. Also included on the diskette are two utilities: the EPSON Spool Manager and Printer Calibration - Epson Stylus 1500 | User Setup Information - PC - Page 34
Calibration Utility. See Chapter 3 for instructions. The installation program automatically selects the EPSON Stylus 1500 printer as your default printer for Windows applications and assigns the printer driver to port LPT1. If you need to change the default printer driver or the port assignment, see - Epson Stylus 1500 | User Setup Information - PC - Page 35
the Connect dialog box. 7. In the Ports pull-down list, select the port to which you want to assign the EPSON Stylus 1500 printer. (See the Windows Control Panel Help utility for instructions on selecting other options in the Connect dialog box.) 8. Click OK to close the Connect dialog box. 9. Click - Epson Stylus 1500 | User Setup Information - PC - Page 36
software for Windows 95. First you'll install the driver using the Windows 95 plug and-play capabilities; then you'll run the EPSON Printer Driver Setup program to install the printer driver utilities and create an EPSON folder on your hard disk. Note: If you originally installed the Stylus 1500 - Epson Stylus 1500 | User Setup Information - PC - Page 37
If it did not print correctly, there is probably a problem with the printer connection; check the connection and start over.) Your computer finishes loading Windows 95. 15. To run the Setup program and install the rest of the printer software in an EPSON folder, click Start; then select Run. You see - Epson Stylus 1500 | User Setup Information - PC - Page 38
Spool Manager EPSON Stylus Help EPSON Stylus ReadMe 19. Calibrate your printer using the EPSON Calibration Utility. See Chapter 3 for instructions. The installation program automatically selects your printer driver as the default printer for Windows 95 applications and assigns the printer driver to - Epson Stylus 1500 | User Setup Information - PC - Page 39
for DOS Programs Most DOS software programs include drivers for EPSON ESC/P 2™ printers. If the Stylus 1500 driver is not listed in your software, choose the first printer available in the lists below. Also check with your software manufacturer to see if a Stylus 1500 driver is available or is - Epson Stylus 1500 | User Setup Information - PC - Page 40
Windows applications," later in this chapter. Accessing the driver from Windows 3.1 Follow these steps to access the driver from the Windows Control Panel: 1. Double-click the Control Panel icon in the Main program group. 2. Double-click the Printers icon. 2-8 Installing and Using the Printer Driver - Epson Stylus 1500 | User Setup Information - PC - Page 41
. You see the printer driver dialog box shown on page 2-11. Accessing the driver from Windows 95 Follow these steps to access the driver from the Windows 95 My Computer group: 1. Double-click the My Computer icon. 2. Double-click the Printers icon. 3. Double-click the EPSON Stylus 1500 icon. 4. Pull - Epson Stylus 1500 | User Setup Information - PC - Page 42
box similar to the one shown below (depending on your software program). The Print dialog box contains the settings you change most often, including the number of copies and the print range. To access the printer driver settings, choose the Printer, Setup, or Options button. (You may also need to - Epson Stylus 1500 | User Setup Information - PC - Page 43
Box However you accessed the printer driver, you see the following dialog box: (If you do not see this dialog box, the driver has not been installed correctly. See page 2-1 for instructions on installing the driver.) At the top of the screen are tabs that open various dialog boxes. The following - Epson Stylus 1500 | User Setup Information - PC - Page 44
Windows driver settings Dialog box Paper Setting Paper Size (Orientation) Paper Source Copies Document Type Document Types Ink Options A4 210 x 297 3 to 14 in User Defined Portrait Landscape Auto Sheet Feeder Manual Feed Slot Manual Feed Slot (Banner) Tractor Feeder Number (1-99) Collate (On - Epson Stylus 1500 | User Setup Information - PC - Page 45
50% - 0% - +50% Color Matching * Off Vivid Photo-realistic Standard About - Gives driver version information * These options have no default setting; the setting This closes the printer driver and returns you to your application program or Windows. Installing and Using the Printer Driver 2-13 - Epson Stylus 1500 | User Setup Information - PC - Page 46
settings, look them up in this chapter, choose the Help button in the driver dialog box, or select the EPSON Stylus ReadMe icon in the EPSON program group. Paper Settings Paper Size By default, the printer expects letter-size (8.5 × 11 inches) paper. To select a different paper or envelope size - Epson Stylus 1500 | User Setup Information - PC - Page 47
a country other than the United States in the Windows Control Panel International utility, the default paper size may orientation in your software application, not with the driver. Paper Source The default paper source is Auto Sheet Feeder. You may also select Manual Sheet Feed, Manual Sheet Feed ( - Epson Stylus 1500 | User Setup Information - PC - Page 48
dialog box in your software, not with the driver. Do not choose multiple copies in both the Print dialog box and the driver. Note: The Copies printer driver analyze the data on each page of a document and adjust the Ink, Color Matching, and Halftone settings automatically. The driver selects the ink - Epson Stylus 1500 | User Setup Information - PC - Page 49
documents containing only text. Each of the manually set document types select predefined settings for Text Color Matching setting Vivid Photo-realistic Standard Vivid Halftone driver erases the currently selected document type and uses your new settings. Installing and Using the Printer Driver - Epson Stylus 1500 | User Setup Information - PC - Page 50
, the driver erases the currently selected Document Type option and uses the halftone setting you selected. Note: It is recommended that you set halftoning in the driver rather than setting the halftone or dithering options in your software application. 2-18 Installing and Using the Printer Driver - Epson Stylus 1500 | User Setup Information - PC - Page 51
If you prefer to set the halftoning method manually, follow these guidelines: u Use No halftoning to speed printing for text or monochrome line art. Do not use it settings are related to each other and which options are available in the different modes. Installing and Using the Printer Driver 2-19 - Epson Stylus 1500 | User Setup Information - PC - Page 52
turned on and High Speed mode is turned off. For best results at 720 dpi, load EPSON special coated paper for 720 dpi or high-quality glossy paper. For most color printing, select . For best results at 360 dpi, use EPSON special coated paper for 360 dpi. 2-20 Installing and Using the Printer Driver - Epson Stylus 1500 | User Setup Information - PC - Page 53
EPSON ink jet printers. These papers include the following: u EPSON special coated paper for 360 dpi. Use this paper for best results when printing at 360 dpi. u EPSON special coated paper for 720 dpi. Use this paper for best results when printing at 720 dpi. Installing and Using the Printer Driver - Epson Stylus 1500 | User Setup Information - PC - Page 54
). In Canada, call (800) BUY-EPSON for sales locations. Print Options Allows you to turn the MicroWeave and High Speed mode settings on or off. MicroWeave reduces the possibility of banding, the light horizontal lines that can mar an image. When you turn on MicroWeave, the printer produces superior - Epson Stylus 1500 | User Setup Information - PC - Page 55
Settings options allow you to adjust the brightness, contrast, and color matching features of your printed images. It is best to let the printer driver's Automatic Document Type setting select the appropriate image settings for you. If your original image is of poor quality, however, you can adjust - Epson Stylus 1500 | User Setup Information - PC - Page 56
printer's color correction features based on the selected Document Type. Color Matching is automatically set to the most appropriate setting when you select a particular document type or use the Automatic setting. It is best to leave Color Matching set to the driver . u Photo-realistic increases - Epson Stylus 1500 | User Setup Information - PC - Page 57
can manage print queues or perform other operations when you are not sending a print job. Note: You may not see the EPSON Spool Manager icon if the Windows Program Manager window or an application window is maximized. Reduce the window size to reveal the icon. Using the Printer Driver Utilities 3-1 - Epson Stylus 1500 | User Setup Information - PC - Page 58
while trying to print, the problem may be caused by conflicts with other temporary files or directories. You may need to change the default directory for the EPSON Spool Manager. See "Printing Problems" in Chapter 4 of the Reference Guide for more information. 3-2 Using the Printer Driver Utilities - Epson Stylus 1500 | User Setup Information - PC - Page 59
DOS" in Chapter 3 of your Reference Guide. Follow these steps: 1. Double-click the EPSON Printer Calibration icon in the EPSON group. 2. Click OK at the next screen to start the calibration program. 3. Make sure EPSON Stylus 1500 is selected as the printer. Select which print head (black or color - Epson Stylus 1500 | User Setup Information - PC - Page 60
For each pattern you selected, the printer prints a Test Alignment Sheet of multiple vertical lines. In most samples, the vertical lines are slightly misaligned. later that the vertical alignment of your printed pages is off, repeat the calibration procedure. 3-4 Using the Printer Driver Utilities - Epson Stylus 1500 | User Setup Information - PC - Page 61
1-3 paper support, 1-3 Auto sheet feeder, 1-16 to 1-21, 2-12, 2-15 Automatic option, Intro-3, 2-8, 2-12, 2-17 to 2-18, 2-23 to 2-24 B Banding, 2-22 Bidirectional printing, 2-22 Black ink cartridge, installing, 1-5 to 1-7 Brightness setting, 2-13, 2-23 Bulletin Board Service, Intro-5 C Cable, printer - Epson Stylus 1500 | User Setup Information - PC - Page 62
2-16, 2-18 Ink cartridges, see Black ink cartridge, Color ink cartridge Ink smear, preventing, 2-21 Interfaces, Intro-1, 1-22 L Landscape setting, 2-12, 2-15 Lines aligning, see Vertical lines, aligning light horizontal, see Banding Loading paper, 1-16 to 1-20 Location, choosing for printer, 1-1 to - Epson Stylus 1500 | User Setup Information - PC - Page 63
2-15 loading plain paper, 1-16 to 1-20 ordering EPSON, Intro-3, 2-22 orientation setting, 2-12, 2-15 support, 1-2 to 1-3 Paper-release lever, 1-16 Parallel interface, Intro-1, 1-22, 2-5 to 2-6 Pausing print jobs, 3-2 Photo 1-4, 1-20, 1-22 unpacking, 1-2 Printer driver About tab, 2-13 accessing, 2-8, - Epson Stylus 1500 | User Setup Information - PC - Page 64
driver, 2-1, 3-1 to 3-2, 3-4 V Vertical lines, aligning, 2-22, 3-1, 3-3 to 3-4 VGA monitor, 1-1 Vivid option, 2-13, 2-24 W Windows 3.1 accessing driver, 2-8 installing driver, 2-1, 2-3 Windows 95 accessing driver, 2-8 to 2-9 installing driver, 2-4 to 2-6 Windows applications accessing printer driver - Epson Stylus 1500 | User Setup Information - PC - Page 65
Printer Parts printer cover paper-release lever knob tear-off edge edge guides (manual feed slot) center support monochrome print head thickness adjustment lever color print head compartment control panel black ink cartridge compartment page eject guides output tray paper support sprocket-lock
-
 1
1 -
 2
2 -
 3
3 -
 4
4 -
 5
5 -
 6
6 -
 7
7 -
8
-
9
-
10
-
11
-
12
-
13
-
14
-
15
-
16
-
17
-
18
-
19
-
20
-
21
-
22
-
23
-
24
-
25
-
26
-
27
-
28
-
29
-
30
-
31
-
32
-
33
-
34
-
35
-
36
-
37
-
38
-
39
-
40
-
41
-
42
-
43
-
44
-
45
-
46
-
47
-
48
-
49
-
50
-
51
-
52
-
53
-
54
-
55
-
56
-
57
-
58
-
59
-
60
-
61
-
62
-
63
-
64
-
65
 |
 |

INK JET PRINTER
Setup and Software Guide for Windows
®
All rights reserved. No part of this publication may be reproduced, stored in a retrieval
system, or transmitted in any form or by any means, electronic, mechanical, photocopying,
recording, or otherwise, without the prior written permission of Seiko Epson Corporation.
No patent liability is assumed with respect to the use of the information contained herein.
Neither is any liability assumed for damages resulting from the use of the information
contained herein.
Neither Seiko Epson Corporation nor its affiliates shall be liable to the purchaser of this
product or third parties for damages, losses, costs, or expenses incurred by purchaser or
third parties as a result of: accident, misuse, or abuse of this product or unauthorized
modifications, repairs, or alterations to this product, or (excluding the U.S.) failure to
strictly comply with Seiko Epson Corporation’s operating and maintenance instructions.
Seiko Epson Corporation shall not be liable against any damages or problems arising from
the use of any options or any consumable products other than those designated as
Original EPSON Products or EPSON Approved Products by Seiko Epson Corporation.
EPSON, EPSON Stylus, and EPSON ESC/P are registered trademarks and
EPSON ESC/P 2 is a trademark of Seiko Epson Corporation.
Windows printer driver copyright Software 2000 Ltd Oxford, England. Portions copyright
Seiko Epson Corporation.
General Notice: Other product names used herein are for identification purposes only and
may be trademarks of their respective owners. EPSON disclaims any and all rights in
those marks.
The Energy Star emblem does not represent EPA endorsement of any product or service.
Copyright © 1995 by Epson America, Inc.
9/95
Printed on recycled paper with at least 10% post-consumer content