Epson Stylus NX510 Quick Guide - Page 19
Printing Photos From the Index Sheet, Borderless, With Border, Print date on photos, Print
 |
View all Epson Stylus NX510 manuals
Add to My Manuals
Save this manual to your list of manuals |
Page 19 highlights
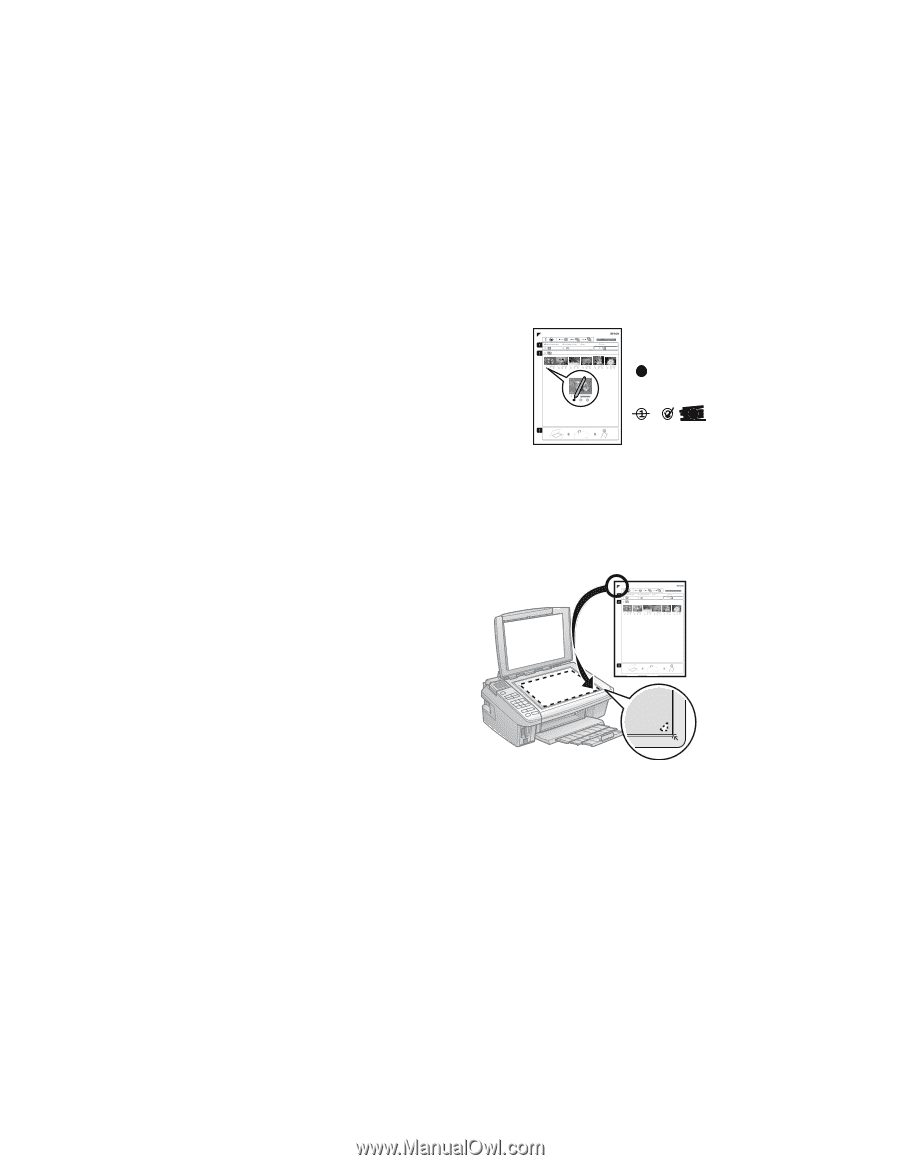
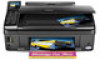
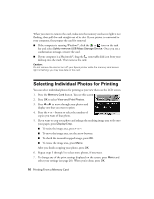
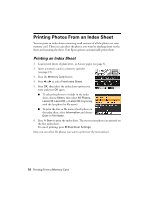
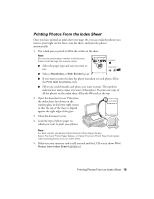
Printing Photos From the Index Sheet Once you have printed an index sheet (see page 18), you can mark the photos you want to print right on the sheet, scan the sheet, and print the photos automatically. 1. Use a dark pen or pencil to fill in the circles on the sheet. Note: Do not use a permanent marker or felt-tip pen; these could damage the scanner glass. Correct: ■ Select the paper type and size you want to use. Incorrect: ■ Select a Borderless or With Border layout. ■ If you want to print the date the photo was taken on each photo, fill in the Print date on photos circle. ■ Fill in one circle beneath each photo you want to print. The numbers indicate how many copies you want of that photo. To print one copy of all the photos on the index sheet, fill in the All circle at the top. 2. Open the document cover. Then place the index sheet face-down on the scanner glass, in the lower right corner so that the top of the sheet is aligned against the right edge of the glass. 3. Close the document cover. 4. Load the type of photo paper on which you want to print your photos. Note: For best results, use Epson Ultra Premium Photo Paper Glossy, Epson Premium Photo Paper Glossy, or Epson Premium Photo Paper Semi-gloss when printing photos from an index sheet. 5. Make sure your memory card is still inserted and the LCD screen shows Print Photos from Index Sheet highlighted. Printing Photos From an Index Sheet 19
-
 1
1 -
2
-
3
-
4
-
5
-
6
-
7
-
8
-
9
-
10
-
11
-
12
-
13
-
 14
14 -
 15
15 -
 16
16 -
 17
17 -
 18
18 -
 19
19 -
 20
20 -
 21
21 -
 22
22 -
 23
23 -
 24
24 -
25
-
26
-
27
-
28
-
29
-
30
-
31
-
32
-
33
-
34
-
35
-
36
-
37
-
38
-
39
-
40
-
41
-
42
-
43
-
44
-
45
-
46
-
47
-
48
-
49
-
50
-
51
-
52
 |
 |