Epson Stylus NX510 Quick Guide - Page 20
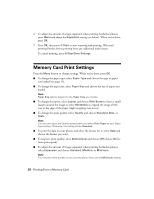
Memory Card Print Settings
 |
View all Epson Stylus NX510 manuals
Add to My Manuals
Save this manual to your list of manuals |
Page 20 highlights
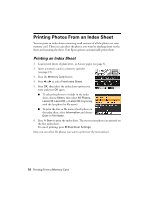
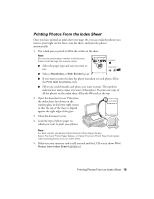
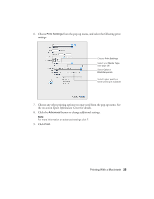
6. To adjust the amount of image expansion when printing borderless photos, press Menu and adjust the Expansion setting (see below). When you're done, press OK. 7. Press OK, then press x Start to start scanning and printing. Wait until printing finishes before printing from any additional index sheets. To cancel printing, press y Stop/Clear Settings. Memory Card Print Settings Press the Menu button to change settings. When you're done, press OK. ■ To change the paper type, select Paper Type and choose the type of paper you loaded (see page 13). ■ To change the paper size, select Paper Size and choose the size of paper you loaded. Note: Paper Size options depend on the Paper Type you choose. ■ To change the layout, select Layout and choose With Border to leave a small margin around the image or select Borderless to expand the image all the way to the edge of the paper (slight cropping may occur). ■ To change the print quality, select Quality and choose Standard, Best, or Draft. Note: You can only adjust the Quality setting when you select Plain Paper as your Paper Type setting. Otherwise, the setting will be Standard. ■ To print the date on your photos and select the format for it, select Date and choose the format you want. ■ To improve print quality, select Bidirectional and choose Off (choose On for faster print speed). ■ To adjust the amount of image expansion when printing borderless photos, select Expansion and choose Standard, Medium, or Minimum. Note: You may see white borders on your printed photo if you use the Minimum setting. 20 Printing From a Memory Card
-
 1
1 -
2
-
3
-
4
-
5
-
6
-
7
-
8
-
9
-
10
-
11
-
12
-
13
-
14
-
 15
15 -
 16
16 -
 17
17 -
 18
18 -
 19
19 -
 20
20 -
 21
21 -
 22
22 -
 23
23 -
 24
24 -
 25
25 -
26
-
27
-
28
-
29
-
30
-
31
-
32
-
33
-
34
-
35
-
36
-
37
-
38
-
39
-
40
-
41
-
42
-
43
-
44
-
45
-
46
-
47
-
48
-
49
-
50
-
51
-
52
 |
 |
