Epson XP-200 User Guide - Page 109
Removing and Installing Ink Cartridges, Do not move the print head by hand; otherwise - scanner
 |
View all Epson XP-200 manuals
Add to My Manuals
Save this manual to your list of manuals |
Page 109 highlights
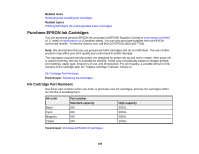
Removing and Installing Ink Cartridges Make sure you have your replacement cartridges handy before you begin. You must install new cartridges immediately after removing the old ones. Caution: Leave your old cartridges in the printer until you are ready to replace them to prevent the print head nozzles from drying out. Do not open ink cartridge packages until you are ready to install the ink. Cartridges are vacuum packed to maintain reliability. 1. Turn on your product. 2. Lift up the scanner unit. Caution: Do not move the print head by hand; otherwise, you may damage your product. Do not touch the flat white cable inside the printer. 3. Press the stop button. • If a cartridge is low or expended, the print head moves that cartridge to the indicator position. Press the stop button again to check for additional low or expended cartridges. When all cartridges have been identified, the print head moves to the replacement position. 109
-
 1
1 -
2
-
3
-
4
-
5
-
6
-
7
-
8
-
9
-
10
-
11
-
12
-
13
-
14
-
15
-
16
-
17
-
18
-
19
-
20
-
21
-
22
-
23
-
24
-
25
-
26
-
27
-
28
-
29
-
30
-
31
-
32
-
33
-
34
-
35
-
36
-
37
-
38
-
39
-
40
-
41
-
42
-
43
-
44
-
45
-
46
-
47
-
48
-
49
-
50
-
51
-
52
-
53
-
54
-
55
-
56
-
57
-
58
-
59
-
60
-
61
-
62
-
63
-
64
-
65
-
66
-
67
-
68
-
69
-
70
-
71
-
72
-
73
-
74
-
75
-
76
-
77
-
78
-
79
-
80
-
81
-
82
-
83
-
84
-
85
-
86
-
87
-
88
-
89
-
90
-
91
-
92
-
93
-
94
-
95
-
96
-
97
-
98
-
99
-
100
-
101
-
102
-
103
-
 104
104 -
 105
105 -
 106
106 -
 107
107 -
 108
108 -
 109
109 -
 110
110 -
 111
111 -
 112
112 -
 113
113 -
 114
114 -
115
-
116
-
117
-
118
-
119
-
120
-
121
-
122
-
123
-
124
-
125
-
126
-
127
-
128
-
129
-
130
-
131
-
132
-
133
-
134
-
135
-
136
-
137
-
138
-
139
-
140
-
141
-
142
-
143
-
144
-
145
-
146
-
147
-
148
-
149
-
150
-
151
-
152
-
153
-
154
-
155
-
156
-
157
-
158
-
159
-
160
-
161
-
162
-
163
-
164
-
165
-
166
-
167
-
168
-
169
-
170
-
171
-
172
-
173
-
174
-
175
-
176
-
177
-
178
-
179
-
180
 |
 |
