Garmin T 5 Mini Dog Device Owners Manual - Page 10
Sending and Receiving Data Wirelessly, Compass, Find Menu
 |
View all Garmin T 5 Mini Dog Device manuals
Add to My Manuals
Save this manual to your list of manuals |
Page 10 highlights
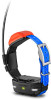
4 Select a location on the track. 5 Select MARK > New. 6 Edit the location information (optional). Navigating to the Start of a Track You can navigate back to the beginning of a track. This can be helpful when finding your way back to camp or the trail head. 1 Select Tools > Track Manager > Current Track > View Map. 2 Select TracBack. The map page opens with your route marked with a magenta line. 3 Navigate using the map (Map, page 6) or the compass (Navigating with the Bearing Pointer, page 6). Archiving a Track Manually You can archive saved tracks to save memory space. 1 Select Tools > Track Manager. 2 Select a track. 3 Select Archive. Archiving Tracks Automatically 1 Select Setup > Tracks > Auto Archive. 2 Select an option. Sending and Receiving Data Wirelessly Before you can share data wirelessly, you must be within 10 feet (3 m) of a compatible Garmin® device. You can share waypoints, geocaches, routes, and tracks wirelessly. 1 Select Tools > Share Wirelessly. 2 Select Send or Receive. 3 Follow the on-screen instructions. Sharing Dog Information Before you can share dog information with another handheld device user, the user must enable their handheld device to receive wirelessly and bring it within range of the sending device and dog collar device. 1 From the dog tracking page, select DOG. 2 Select a dog. 3 Select Share Wirelessly. Your device sends the dog name, unit ID, and update rate information. Receiving Dog Information From the dog tracking page, select DOG > MENU > Receive Wirelessly. Navigation You can navigate routes and tracks, to a waypoint, geocache, photo, or any saved location in the device. You can use the map or the compass to navigate to your destination. Map represents your location on the map. As you travel, the icon moves and leaves a track log (trail). Waypoint names and symbols appear on the map. When you are navigating to a destination, your route is marked with a magenta line on the map. When the map orientation is Track Up, objects on the map appear to rotate around your position. As you travel, the entire map reorients in the direction you are facing. You can stabilize the objects by setting the orientation to North Up (Map Settings, page 9. To open the map, select MAP. Enabling the Map Data Fields 1 Select MAP > MENU > Setup Map > Data Fields. 2 Select an option. Compass The handheld device has a 3-axis, tilt-compensated compass. You can use a bearing pointer or a course pointer to navigate to your destination. Calibrating the Compass NOTE: You must calibrate the electronic compass outdoors. Do not stand near objects that influence magnetic fields, such as cars, buildings, or overhead power lines. The device has a 3-axis electronic compass. You should calibrate the compass after moving long distances, experiencing temperature changes, or changing the batteries. 1 Select DOG > MENU. 2 Select Calibrate Compass > Start. 3 Follow the on-screen instructions. Navigating with the Bearing Pointer When navigating to a destination, points to your destination, regardless of the direction you are moving. 1 While navigating to a destination, select Tools > Compass 2 Turn until points toward the top of the compass, and continue moving in that direction to the destination. Course Pointer The course pointer is most useful if you are navigating on water or where there are no major obstacles in your path. It can also help you avoid hazards near the course, such as shoals or submerged rocks. To enable the course pointer, from the compass, select MENU > Setup Heading > Go To Line (Pointer). The course pointer indicates your relationship to the course line leading to the destination. The course deviation indicator (CDI) provides the indication of drift (right or left) from the course. The scale refers to the distance between dots on the course deviation indicator, which tell you how far off course you are. Find Menu You can use the find menu to search for waypoints, cities, and coordinates. You can download and navigate to photos, tracks, and geocaches. Additional categories appear if you have optional, compatible detailed maps loaded on the device. When you open a category, the list contains items near your current location or the map pointer (if active). Finding a Waypoint by Name 1 From the main menu, select Find > Waypoints > MENU > Spell Search. 2 Enter the name. Matches appear as you select characters in the name. 3 Select the waypoint. 6 Navigation
-
 1
1 -
2
-
3
-
4
-
 5
5 -
 6
6 -
 7
7 -
 8
8 -
 9
9 -
 10
10 -
 11
11 -
 12
12 -
 13
13 -
 14
14 -
 15
15 -
16
-
17
-
18
-
19
-
20
-
21
-
22
 |
 |
