Garmin T 5 Mini Dog Device Owners Manual - Page 17
Accessories and Replacement Parts
 |
View all Garmin T 5 Mini Dog Device manuals
Add to My Manuals
Save this manual to your list of manuals |
Page 17 highlights
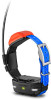
1 Complete an action: • For Windows computers, select the Safely Remove Hardware icon in the system tray, and select your device. • For Mac computers, drag the volume icon to the trash. 2 Disconnect the cable from your computer. Dog Device Battery Replacement Instructions T5 Components Appendix Accessories and Replacement Parts Purchasing Accessories Go to http://buy.garmin.com. Optional Maps You can use additional maps with the device, such as BirdsEye satellite imagery, BlueChart® g2, and City Navigator® detailed maps. Detailed maps may contain additional points of interest, such as restaurants or marine services. For more information, go to http://buy.garmin.com or contact your Garmin dealer. About Memory Cards You can purchase memory cards from an electronics supplier, or purchase pre-loaded Garmin mapping software (www.garmin.com). In addition to map and data storage, the memory card can be used to store files such as maps, images, geocaches, routes, waypoints, and custom POIs. Optional Fitness Accessories You can use optional fitness accessories including a heart rate monitor or a cadence sensor with your device. These accessories use ANT+ wireless technology to send data to the device. Before you can use the fitness accessory with your device, you must install the accessory according to the instructions included with the accessory. Using Optional Fitness Accessories 1 Bring the device within range 10 feet (3 m) of the ANT+ accessory. 2 Select Setup > ANT Sensor. 3 Select Heart Rate Monitor, Bike Cadence Sensor, or Tempe Sensor. 4 Select On, Off, or Search For New. 5 Customize the data fields to view the heart rate or cadence data (Customizing the Data Fields, page 8. Tips for Pairing ANT+ Accessories with Your Garmin Device • Verify that the ANT+ accessory is compatible with your Garmin device. • Before you pair the ANT+ accessory with your Garmin device, move 10 m (32.9 ft.) away from other ANT+ accessories. • Bring the Garmin device within range 3 m (10 ft.) of the ANT+ accessory. • After you pair the first time, your Garmin device automatically recognizes the ANT+ accessory each time it is activated. This process occurs automatically when you turn on the Garmin device and only takes a few seconds when the accessories are activated and functioning correctly. • When paired, your Garmin device receives data from only your accessory, and you can go near other accessories. Back plate Power key Battery connector Battery cover Battery Power connector Removing the Old Battery Before you replace the battery, you must remove all dirt, water, and debris from the device. You must also have a small Phillips screwdriver. 1 Remove the six screws from the outer edges of the back plate. NOTE: You should leave the two inner screws in place. 2 Pry off the back plate. 3 Disconnect the battery connector and power connector. 4 Remove the screws that secure the battery cover. 5 Remove the battery cover and the battery. Remember the orientation of the battery. You must install the new battery the same way. After you remove the old battery, contact your local waste disposal department to properly recycle the battery. Installing the New Battery Before you replace the battery, you must remove the old battery (Removing the Old Battery, page 13). You also must have a small Phillips screwdriver. You may need a small flat screwdriver. 1 Install the new battery using the same orientation as the old battery. The connector should face the end nearest the power key, and the bump where the wires connect to the battery should face toward the side with the charging clip contacts. Appendix 13
-
 1
1 -
2
-
3
-
4
-
5
-
6
-
7
-
8
-
9
-
10
-
11
-
 12
12 -
 13
13 -
 14
14 -
 15
15 -
 16
16 -
 17
17 -
 18
18 -
 19
19 -
 20
20 -
 21
21 -
 22
22
 |
 |
