HP 2120 HP StorageWorks Disk System 2120 Users Guide (5697-5367, March 2005) - Page 14
Installing the Disk System, Connect the SCSI Cables, See Table 5 below. - us
 |
View all HP 2120 manuals
Add to My Manuals
Save this manual to your list of manuals |
Page 14 highlights
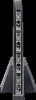
14 HP StorageWorks Disk System 2120 Keep in mind that the host bus adapter should have the highest SCSI address priority. See Table 5 below. TABLE 5 SCSI Address Priority SCSI ID 7 6 5 4 3 2 1 0 15 14 13 12 11 10 9 8 Priority Highest Lowest Installing the Disk System See the installation instructions enclosed with your rackmount kit. Connect the SCSI Cables 1 Make sure that the host system has been powered down. 2 Connect one end of an Ultra SCSI cable (included in the shipping box) to the host system. For the SCSI port location on your host system, refer to your host system's documentation. 3 Connect the other end of the SCSI cable to one of the LVD/SE ports on the rear of the disk system. FIGURE 8 SCSI Port Locations LVD/SE SCSI Port LVD/SE SCSI Port
-
 1
1 -
2
-
3
-
4
-
5
-
6
-
7
-
8
-
 9
9 -
 10
10 -
 11
11 -
 12
12 -
 13
13 -
 14
14 -
 15
15 -
 16
16 -
 17
17 -
 18
18 -
 19
19 -
20
-
21
-
22
-
23
-
24
-
25
-
26
-
27
-
28
-
29
-
30
-
31
-
32
-
33
-
34
-
35
-
36
-
37
-
38
 |
 |
