HP 2710p Multimedia - Windows Vista - Page 15
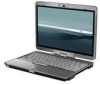
If you are capturing multiple business card images, remove the business card and insert another
 |
UPC - 884420088295
View all HP 2710p manuals
Add to My Manuals
Save this manual to your list of manuals |
Page 15 highlights
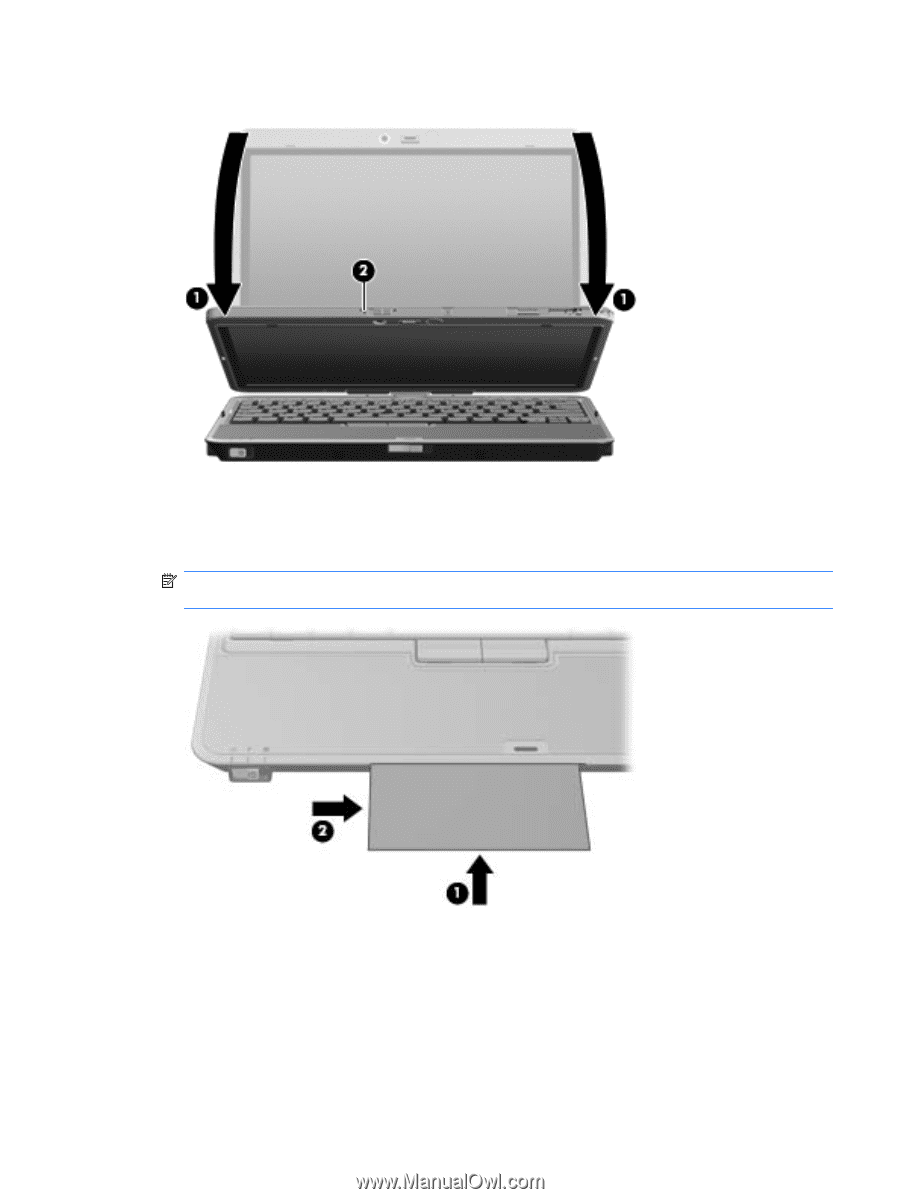
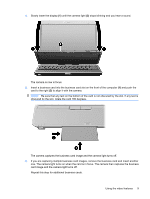
4. Slowly lower the display (1) until the camera light (2) stops blinking and you hear a sound. The camera is now in focus. 5. Insert a business card into the business card slot on the front of the computer (1) and push the card to the right (2) to align it with the camera. NOTE: Be sure that any text on the bottom of the card is not obscured by the slot. If any text is obscured by the slot, rotate the card 180 degrees. The camera captures the business card image and the camera light turns off. 6. If you are capturing multiple business card images, remove the business card and insert another one. The camera light turns on when the card is in focus. The camera then captures the business card image and the camera light turns off. Repeat this step for additional business cards. Using the video features 9
-
 1
1 -
2
-
3
-
4
-
5
-
6
-
7
-
8
-
9
-
 10
10 -
 11
11 -
 12
12 -
 13
13 -
 14
14 -
 15
15 -
 16
16 -
 17
17 -
 18
18 -
 19
19 -
 20
20 -
21
-
22
 |
 |