HP 60 HP StorageWorks 60 Modular Smart Array Enclosure Maintenance and Service - Page 24
I/O module
 |
View all HP 60 manuals
Add to My Manuals
Save this manual to your list of manuals |
Page 24 highlights
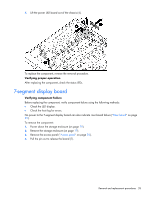
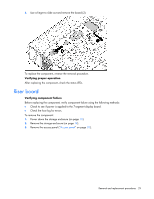
Remove the component as indicated. To replace the component, reverse the removal procedure. Verifying proper operation After replacing the component, check the status LED. I/O module Verifying component failure Before replacing the component, verify component failure using the following methods: • Check the status LED ("Rear panel LEDs and buttons" on page 35). • Check the host log for errors. CAUTION: To prevent improper cooling and thermal damage, do not operate the storage enclosure unless all bays are populated with either a component or a blank. To remove the component: 1. Power down the storage enclosure (on page 19). 2. Disconnect any SAS cables connected to the I/O module. 3. Squeeze the lever (1) and rotate down (2). Removal and replacement procedures 24
-
 1
1 -
2
-
3
-
4
-
5
-
6
-
7
-
8
-
9
-
10
-
11
-
12
-
13
-
14
-
15
-
16
-
17
-
18
-
 19
19 -
 20
20 -
 21
21 -
 22
22 -
 23
23 -
 24
24 -
 25
25 -
 26
26 -
 27
27 -
 28
28 -
 29
29 -
30
-
31
-
32
-
33
-
34
-
35
-
36
-
37
-
38
-
39
-
40
-
41
-
42
 |
 |
