HP BL10e HP ProLiant BL e-Class Integrated Administrator User Guide - Page 137
Setting Up IP Security, From: Enclosure IA-00508BEBA571 <[email protected]>
 |
UPC - 808736933599
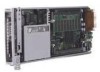
View all HP BL10e manuals
Add to My Manuals
Save this manual to your list of manuals |
Page 137 highlights
Setting Up the System Example e-mail: ----SAMPLE START---Subject: HP AlertMail-010: (CRITICAL) Power Supply #1: Failed Date: Wed, 23 Apr 2003 15:02:22 +0200 From: Enclosure IA-00508BEBA571 To: user@userdomain X-OS: HP Integrated Administrator X-Priority: 1 Content-Type: text/plain; charset=us-ascii EVENT (26 May 07:09): Power Supply #1 Status has changed to: Failed Enclosure, IA-00508BEBA571, has detected that a power supply in bay 1 has changed from status OK to Failed. The power supply should be replaced with the appropriate spare part. You can ensure that the center wall assembly is operating correctly by swapping the two power supplies. Make sure that there are no bent pins on the power supply connectors before reinserting and that each power supply is fully seated. An amber LED on the power supply indicates either an over-voltage, overtemperature, or loss of AC power has occurred. A blinking LED on the power supply indicates a current limit condition. Enclosure Status: Degraded Enclosure Management URL: - PLEASE DO NOT REPLY TO THIS EMAIL - ----SAMPLE END---- Setting Up IP Security IP security allows an administrator to define a set of IP addresses that are the only ones allowed to connect to the services provided (SSH, HTTP, TELNET, SNMP). This means that an administrator can make sure only a certain set of machines have access to Integrated Administrator. A maximum of five IP addresses can be entered. 5-24 HP ProLiant BL e-Class Integrated Administrator User Guide
-
 1
1 -
2
-
3
-
4
-
5
-
6
-
7
-
8
-
9
-
10
-
11
-
12
-
13
-
14
-
15
-
16
-
17
-
18
-
19
-
20
-
21
-
22
-
23
-
24
-
25
-
26
-
27
-
28
-
29
-
30
-
31
-
32
-
33
-
34
-
35
-
36
-
37
-
38
-
39
-
40
-
41
-
42
-
43
-
44
-
45
-
46
-
47
-
48
-
49
-
50
-
51
-
52
-
53
-
54
-
55
-
56
-
57
-
58
-
59
-
60
-
61
-
62
-
63
-
64
-
65
-
66
-
67
-
68
-
69
-
70
-
71
-
72
-
73
-
74
-
75
-
76
-
77
-
78
-
79
-
80
-
81
-
82
-
83
-
84
-
85
-
86
-
87
-
88
-
89
-
90
-
91
-
92
-
93
-
94
-
95
-
96
-
97
-
98
-
99
-
100
-
101
-
102
-
103
-
104
-
105
-
106
-
107
-
108
-
109
-
110
-
111
-
112
-
113
-
114
-
115
-
116
-
117
-
118
-
119
-
120
-
121
-
122
-
123
-
124
-
125
-
126
-
127
-
128
-
129
-
130
-
131
-
 132
132 -
 133
133 -
 134
134 -
 135
135 -
 136
136 -
 137
137 -
 138
138 -
 139
139 -
 140
140 -
 141
141 -
 142
142 -
143
-
144
-
145
-
146
-
147
-
148
-
149
-
150
-
151
-
152
-
153
-
154
-
155
-
156
-
157
-
158
-
159
-
160
-
161
-
162
-
163
-
164
-
165
-
166
-
167
-
168
-
169
-
170
-
171
-
172
-
173
-
174
-
175
-
176
-
177
-
178
-
179
-
180
-
181
-
182
-
183
-
184
-
185
-
186
-
187
-
188
-
189
-
190
-
191
-
192
-
193
-
194
-
195
-
196
-
197
-
198
-
199
-
200
-
201
-
202
-
203
-
204
-
205
-
206
-
207
-
208
-
209
-
210
-
211
-
212
-
213
-
214
-
215
-
216
-
217
-
218
-
219
-
220
-
221
-
222
-
223
-
224
-
225
-
226
-
227
-
228
 |
 |
