HP DreamColor Z27x User Guide 1
HP DreamColor Z27x Manual
 |
View all HP DreamColor Z27x manuals
Add to My Manuals
Save this manual to your list of manuals |
HP DreamColor Z27x manual content summary:
- HP DreamColor Z27x | User Guide 1 - Page 1
HP DreamColor Z27x Display User Guide - HP DreamColor Z27x | User Guide 1 - Page 2
to change without notice. The only warranties for HP products and services are set forth in the express warranty statements accompanying such products and services. Nothing herein should be construed as constituting an additional warranty. HP shall not be liable for technical or editorial errors - HP DreamColor Z27x | User Guide 1 - Page 3
About This Guide This guide provides information on monitor features, setting up the monitor, and technical specifications. WARNING! Text set off in this manner indicates that failure to follow directions could result in bodily harm or loss of life. - HP DreamColor Z27x | User Guide 1 - Page 4
iv About This Guide - HP DreamColor Z27x | User Guide 1 - Page 5
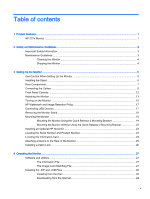
the Cables ...8 Front Panel Controls ...12 Adjusting the Monitor ...13 Turning on the Monitor ...15 HP Watermark and Image Retention Policy 17 Connecting USB Devices ...17 Removing the Monitor Stand ...18 Mounting the Monitor ...19 Mounting the Monitor Using the Quick Release 2 Mounting Bracket 19 - HP DreamColor Z27x | User Guide 1 - Page 6
38 Next 4K Corner 38 Scroll 4K Region 38 Using Picture-in-Picture (PIP) and Picture-beside-Picture (PBP 38 Using PIP as a Confidence Monitor 39 Use Video Levels (16-235 39 Overscan Within PIP 39 Digital Cinema Options 39 Changing the Bezel Button Functions 39 Changing the Bezel Function - HP DreamColor Z27x | User Guide 1 - Page 7
...57 Z27x Model ...57 Recognizing Preset Display Resolutions 58 Z27x Model ...58 Appendix B Support and Troubleshooting ...60 Solving Common Problems ...60 Button Lockouts ...61 Product Support ...62 Preparing to Call Technical Support 62 Appendix C LCD Monitor Quality and Pixel Policy 63 vii - HP DreamColor Z27x | User Guide 1 - Page 8
viii - HP DreamColor Z27x | User Guide 1 - Page 9
) or a thirdparty measurement device ● Built-in support for the Klein K10-A Photo Research PR-6xx, 7xx series, and Konica Minolta CA-310 measurement devices ● Updatable monitor firmware to enable HP to quickly and easily provide solutions to identified problems and provide custom solutions ● Four - HP DreamColor Z27x | User Guide 1 - Page 10
inputs ● Software and documentation disc that includes monitor drivers, product documentation, and Windows-based calibration software user guide for your product, go to http://www.hp.com/support, and select your country. Select Drivers & Downloads, and then follow the on-screen instructions. 2 - HP DreamColor Z27x | User Guide 1 - Page 11
injury, read the Safety and Comfort Guide. It describes proper workstation, setup, to properly support your HP LCD monitor. WARNING! LCD monitors that are instructions. If the monitor is not operating properly or has been dropped or damaged, contact an authorized HP dealer, reseller, or service - HP DreamColor Z27x | User Guide 1 - Page 12
not in use. You can substantially increase the life expectancy of the monitor by using a screen saver program and turning off the monitor when not in use. NOTE: Monitors with a "burned-in image" are not covered under the HP warranty. ● Slots and openings in the cabinet are provided for ventilation - HP DreamColor Z27x | User Guide 1 - Page 13
devices, then follow the instructions below. NOTE: Be sure the master power switch, located on the rear panel of the monitor, is in the off position. The master power switch turns off all power to the monitor. Use Caution When Setting Up the Monitor To prevent damage to the monitor, do not touch the - HP DreamColor Z27x | User Guide 1 - Page 14
. If this occurs the screen will not recover to its normal condition. The monitor uses the HP Quick Release 2 for easy mounting and unmounting of the monitor panel. To mount the panel onto the stand: 1. Lay the monitor panel face down on a flat surface covered by a clean, dry cloth. 2. Slide the - HP DreamColor Z27x | User Guide 1 - Page 15
. Analog Audio Out DisplayPort 1 Connects headphones or optional HP Speaker Bar to the monitor. Connects a DisplayPort cable to the monitor. HDMI DisplayPort 2 Connects an HDMI cable to the monitor. Connects a DisplayPort cable to the monitor. RJ-45 Network Connector DreamColor USB 2.0 Ports - HP DreamColor Z27x | User Guide 1 - Page 16
the desired input source. ● For DisplayPort digital operation, connect the DisplayPort signal cable to the DisplayPort connector on the rear of the monitor and the other end to the DisplayPort connector on the computer (cable provided). NOTE: There are two DisplayPort connectors on the rear of - HP DreamColor Z27x | User Guide 1 - Page 17
● For HDMI digital operation, connect the HDMI signal cable to the HDMI connector on the rear of the monitor and the other end to the HDMI connector on the computer (cable provided). Connecting the Cables 9 - HP DreamColor Z27x | User Guide 1 - Page 18
to the USB hub connector on the rear panel of the computer, and the other end to the upstream USB connector on the monitor. NOTE: The monitor supports USB 3.0. For optimal performance, connect the USB cable to a USB 3.0 port on the computer, if available. 5. Connect a live network connector to the - HP DreamColor Z27x | User Guide 1 - Page 19
other end to an electrical wall outlet. NOTE: The master power switch on the rear of the monitor must be in the On position before pressing the power button on the front of the monitor. WARNING! To reduce the risk of electric shock or damage to the equipment: Plug the power cord - HP DreamColor Z27x | User Guide 1 - Page 20
. NOTE: Be sure the master power switch on the rear of the monitor is in the ON position to turn on the monitor. NOTE: To view an OSD menu simulator, visit the HP Customer Self Repair Services Media Library at http://www.hp.com/go/sml. NOTE: You can adjust the bezel button brightness and - HP DreamColor Z27x | User Guide 1 - Page 21
Adjusting the Monitor 1. Tilt the monitor's panel forward or backward to set it to a comfortable eye level. 2. Swivel the monitor to the left or right for the best viewing angle. Adjusting the Monitor 13 - HP DreamColor Z27x | User Guide 1 - Page 22
's top bezel edge should not exceed a height that is parallel to your eye height. A monitor that is positioned low and reclined may be more comfortable for users with corrective lenses. The monitor should be repositioned as you adjust your working posture throughout the work day. 4. You can pivot - HP DreamColor Z27x | User Guide 1 - Page 23
OSD from portrait to landscape, open the OSD and select Image Adjustment > On-Screen Menu Rotation > Portrait. Turning on the Monitor 1. Set the master power switch on the rear of the monitor to the On position. 2. Press the power button on the computer to turn it on. 3. Press the power button on - HP DreamColor Z27x | User Guide 1 - Page 24
is not in use for a prolonged period of time. Image retention is a condition that may occur on all LCD screens. Monitors with a "burned-in image" are not covered under the HP warranty. * A prolonged period of time is 12 consecutive hours of a static image. NOTE: If pressing the power button has no - HP DreamColor Z27x | User Guide 1 - Page 25
hours per day that result in image retention damage are not covered under the HP warranty. To avoid image retention damage, always turn off the monitor when it is not in use or use the power management setting, if supported on your system, to turn off the display when the system is idle - HP DreamColor Z27x | User Guide 1 - Page 26
face down on a flat surface covered by a clean, dry cloth. 3. Press down on the latch near the bottom center of the monitor to unlock the HP Quick Release 2 (1). 4. Swing the bottom of the stand up until the mounting plate clears the recess in the panel (2). 5. Slide the stand out of the - HP DreamColor Z27x | User Guide 1 - Page 27
2 mounting bracket or you can attach the monitor panel to a mounting fixture without the HP Quick Release 2 mounting bracket. NOTE: This apparatus is intended to be supported by UL or CSA Listed wall mount bracket. CAUTION: This monitor supports the VESA industry standard 100 mm mounting holes - HP DreamColor Z27x | User Guide 1 - Page 28
2. Remove the four screws from the mounting plate to separate the mounting plate from its cover. 3. Remove the four screws from the VESA holes located on the rear of the monitor panel. 20 Chapter 3 Setting Up the Monitor - HP DreamColor Z27x | User Guide 1 - Page 29
the wall or swing arm of your choice using the four screws that were removed from the VESA holes on the rear of the monitor panel. 5. Place the monitor panel on the mounting bracket you've installed by aligning its recess with the mounting bracket, then sliding it down over the top - HP DreamColor Z27x | User Guide 1 - Page 30
Without Using the Quick Release 2 Mounting Bracket To mount the monitor panel directly to a mounting fixture without using the HP Quick Release 2 mounting bracket, use the four screws removed from the VESA holes on rear of the monitor panel and install them to attach the mounting device to the - HP DreamColor Z27x | User Guide 1 - Page 31
HP Hood Kit The HP LCD Hood Kit is a monitor option designed to block the glare from overhead lighting. The hood helps to improve the color and contrast performance of the monitor Improves the monitor color and contrast performance 1. Assemble the hood according to the instructions included with the - HP DreamColor Z27x | User Guide 1 - Page 32
the display head. You may need these numbers when contacting HP about the monitor model. NOTE: You may need to partially pivot the display on the back of the monitor). The card pulls out from behind the USB connectors on the left side of the panel. Warranty support information (model number, serial - HP DreamColor Z27x | User Guide 1 - Page 33
be used to mount a device such as an SDI or HDMI converter. 1. Remove the plugs from the VESA mounting holes on the rear of the monitor. NOTE: You may need to use a small screwdriver to pry the plugs out. 2. Mount the device to the rear of the - HP DreamColor Z27x | User Guide 1 - Page 34
Installing a Cable Lock You can secure the monitor to a fixed object with an optional cable lock available from HP. 26 Chapter 3 Setting Up the Monitor - HP DreamColor Z27x | User Guide 1 - Page 35
Development Kit (SDK) for Linux, Windows, and Mac ● sample StudioCal XML calibration files NOTE: If the monitor does not include a disc, the items listed above can be downloaded from the HP monitors support Web site. See Downloading from the Internet on page 28 in this chapter. The Information File - HP DreamColor Z27x | User Guide 1 - Page 36
the disc in the computer optical drive. The disc menu is displayed. 2. View the HP Monitor Software Information file. 3. Select Install Monitor Driver Software. 4. Follow the on-screen instructions. 5. Ensure that the proper resolution and refresh rates appear in the Windows Display control panel - HP DreamColor Z27x | User Guide 1 - Page 37
http://www.hp.com/support and select the country region. b. Select the Drivers & Downloads link then enter Z27x in the search box and click the Go button. c. Select your model then select your language and operating system. d. Check the latest firmware revisions listed for "HP Z27x Firmware Update - HP DreamColor Z27x | User Guide 1 - Page 38
further you adjust luminance away from the calibrated value, the less-accurate the luminance value reported by the OSD will be. HP recommends that you calibrate your monitor to the desired working luminance. To adjust luminance: 1. Press any button on the front bezel. 2. Press the bottom Open Menu - HP DreamColor Z27x | User Guide 1 - Page 39
. Use Video Levels (16-235) This option is designed to support the accurate display of "video legal" signals that include footroom below 709 headroom and footroom. Without this option enabled when viewed in a computer monitor the blacks and shadows are lighter, the whites are darker, and colors - HP DreamColor Z27x | User Guide 1 - Page 40
Aspect Ratio (Proportional) This option will maintain the aspect ratio of the source input, making the image as large as possible, centering it in the monitor, and using 0% black to fill the unused areas of the screen. For example, a source input that is narrower than 16×9 will be displayed at full - HP DreamColor Z27x | User Guide 1 - Page 41
option should be used when horizontal center extractions are desired as part of the dailies or review screening process. Pixel-for-Pixel This option is to be used for source video that has a lower resolution than the monitor's native resolution of 2560×1440 and you wish to view the image without any - HP DreamColor Z27x | User Guide 1 - Page 42
Figure 4-2 Fill to Aspect Ratio Figure 4-3 Fill to Entire Screen Figure 4-4 Fill to Screen Width 34 Chapter 4 Operating the Monitor - HP DreamColor Z27x | User Guide 1 - Page 43
key for easy access. Refer to Changing the Bezel Button Functions on page 39 for instructions on mapping the bezel button function keys. Working with 2K and 4K Digital Cinema Image Formats The Z27x has direct support for the 2048×1080 and 4096×2160 image formats (containers) as specified in the - HP DreamColor Z27x | User Guide 1 - Page 44
available because 3840 × 2160 is not a DCI container size. To access the digital cinema display options: 1. Connect a computer or video device to the monitor that is configured to output a 2048 × 1080 or 4096 × 2160 resolution. 2. Press any button on the front bezel. 3. Press the bottom Open Menu - HP DreamColor Z27x | User Guide 1 - Page 45
tuned to provide a naturalistic scaling without any sharpness or edge enhancement. When a 4096 × 2160 or 3840 × 2160 signal is input into the monitor, the following scaling options are available via the 4K Sources section of the Digital Cinema Options page. If DCI aspect ratio cropping has been - HP DreamColor Z27x | User Guide 1 - Page 46
-up will vanish, but the area of interest will continue to be displayed. Using Picture-in-Picture (PIP) and Picture-beside-Picture (PBP) The monitor supports both PIP, where one source is overlaid over another, and PBP, where one source is positioned adjacent to one another either horizontally (for - HP DreamColor Z27x | User Guide 1 - Page 47
are correct and nothing will be cut off on a consumer television. Digital Cinema Options If you display a 2048 × 1080 signal as a PIP, you can instruct the monitor to display either the full DCI container or crop the PIP to either the 1.85:1 or 2.39:1 aspect ratio. If cropping to an aspect ratio - HP DreamColor Z27x | User Guide 1 - Page 48
disabled this command will be displayed as "PIP On" and when enabled this command will displayed as "PIP Off." Refer to Using PIP as a Confidence Monitor on page 39 for more information on this usage. ● Swap Primary / PIP Inputs - use this option to quickly swap the Primary and PIP inputs. Use - HP DreamColor Z27x | User Guide 1 - Page 49
when ambient lighting is reduced. Red should be used when operating the monitor in low-light environments. The white LED color can negatively impact your or Switch to Red at 70 cd/m 2. Using Auto-Sleep Mode The display supports an OSD (On-Screen Display) option called Auto-Sleep Mode, that allows you - HP DreamColor Z27x | User Guide 1 - Page 50
state sleep mode, the monitor screen is blanked, the backlight is turned off and the power LED indicator turns amber. The monitor draws less than 0.5W active. NOTE: OSD menu items that are grayed out are not supported with the selected video input and settings. The tables in the following sections - HP DreamColor Z27x | User Guide 1 - Page 51
Level 1 Level 2 Level 3 Level 4 ● Name of White Point (ex. D65) Gamma (x.x or sRGB) Switch coordinate display to xy/u'v' (allows you to switch the information to display as either CIE 1931 xy or CIE 1976 u'v') Back Reset to Last Calibration Reset to Factory Calibration Back Video Input - HP DreamColor Z27x | User Guide 1 - Page 52
Frame by 5% Show Blue Channel Only On-Screen Menu Rotation Advanced Level 3 Landscape Portrait Back Overdrive Deinterlacer 44 Chapter 4 Operating the Monitor Level 4 Crop to DCI 2.39:1 Aspect Ratio Shop Cropped Region Set Cropped Region Opacity For 4K Sources: Obey Aspect Ratio Display Option - HP DreamColor Z27x | User Guide 1 - Page 53
Level 1 PIP Control Menu Level 1 PIP Control Level 2 Level 3 Cadence Detection Back Display Mode Information Back Level 4 The cadence detector will decode film cadences in video rate sources (ex: 2:3 pulldown). Disable to check for cadence errors in the source. Enable Disable Back Level 2 PIP - HP DreamColor Z27x | User Guide 1 - Page 54
Level 3 Do you want the display to go to sleep when there is no active video input? Enable Disable Back Level 4 46 Chapter 4 Operating the Monitor - HP DreamColor Z27x | User Guide 1 - Page 55
color spaces? Enable Disable Back Do you want DisplayPort connections to switch to low power mode when the monitor sleeps or remain active so the monitor can respond to communication from the host? Low Power Always Active Back Level 1 Management (continued) Level 2 DisplayPort Compatibility - HP DreamColor Z27x | User Guide 1 - Page 56
Level 2 Manage Internal Processor Firmware Update Support Calibration Support Remote Management Services Level 3 Level 4 Back Do you the internal remote management web server? Enable Disable Back IP Configuration Mode DHCP Manual IPv4 Address: xxx.xxx.xxx.xxx IPv4 Subnet Mask: xxx.xxx.xxx.xxx - HP DreamColor Z27x | User Guide 1 - Page 57
Level 1 Level 2 Back Level 3 Reset Administrator Password Level 4 Using the On-Screen Display Menu 49 - HP DreamColor Z27x | User Guide 1 - Page 58
Region Next 4K Corner Pip On / Off Swap Primary / PIP Inputs Next PIP Corner Show Display Information Show Color Space Information 50 Chapter 4 Operating the Monitor - HP DreamColor Z27x | User Guide 1 - Page 59
Level 1 Level 2 Function Button Mode Bezel Button Color Bezel Button Brightness Bezel Button Auto-Fade Back Level 3 Level 4 Test Pattern Generator Empty (No Function) Back Open Button Label First Execute Command on First Press Back Always White Always Red Auto-Switch to Red at 70 cd/ m2 Back - HP DreamColor Z27x | User Guide 1 - Page 60
is covered in the HP DreamColor Z27x Advanced User Guide. The Z27x has been recalibrated from time to time to ensure color accuracy. HP recommends that the Z27x be recalibrated every one thousand via the Show Display Information command. HP supports a variety of color measurement instruments, - HP DreamColor Z27x | User Guide 1 - Page 61
Guide or the Calibration Best Practices white paper for the recommended configuration of these instruments. The HP DreamColor Calibration solution is available directly from HP.com and HP resellers. Contact the manufacturers of the other supported instruments for pricing off the monitor will - HP DreamColor Z27x | User Guide 1 - Page 62
you how you wish to calibrate the monitor. Recalibrate the Current Preset This option bezel button. NOTE: If using the HP DreamColor Calibration Solution, be sure to rotate the StudioCal XML option, documented in the Z27x Advanced User Guide. The following standard options are provided for you to - HP DreamColor Z27x | User Guide 1 - Page 63
environment used in film post-production and dailies screening NOTE: Further information on these standard values is provided in the Z27x Advanced User Guide. Once all of the options are selected the display will show a calibration target. Align your instrument with the center of the crosshairs then - HP DreamColor Z27x | User Guide 1 - Page 64
1. Press any of the five front bezel buttons on the right side of the front bezel to activate the buttons. 2. Press the bottom Open Menu button to open the OSD. 3. In the OSD, select Management > Auto EDID Update and then select either Enable or Disable. 56 Chapter 4 Operating the Monitor - HP DreamColor Z27x | User Guide 1 - Page 65
10 inches 117.44 inches 9.49 inches 25.49 inches Operating Temperature Storage Temperature Power Source Input Terminal 5 to 35° C -20 to 60° C 41 to 95° F -4 to 140 additional specifications on this product, go to http://www.hp.com/go/productbulletin and search for your specific display model to - HP DreamColor Z27x | User Guide 1 - Page 66
Recognizing Preset Display Resolutions The display resolutions listed below are the most commonly used modes and are set as factory defaults. This monitor automatically recognizes these preset modes and they will appear properly sized and centered on the screen. Z27x Model Preset Pixel Format 1 - HP DreamColor Z27x | User Guide 1 - Page 67
information, refer to Using the Digital Cinema Display Options on page 36. NOTE: To use presets 34 through 37 listed above, the presets must be supported by the graphics card. You also may only be able to use DisplayPort 1 and DisplayPort 1 must be set to DisplayPort 1.2 mode in the OSD (Management - HP DreamColor Z27x | User Guide 1 - Page 68
Support and Troubleshooting Solving Common Problems The following table lists possible problems, the possible cause of each problem, and the recommended solutions. Problem Set Input Auto-Switch Source to Disable and manually select the input. Monitor will not turn on. Master power switch on rear - HP DreamColor Z27x | User Guide 1 - Page 69
Problem Displayed colors do not look correct. Calibration failed. Possible Cause Monitor is not calibrated. Incorrect setup or equipment failure. Solution Recalibrate monitor or restore factory calibration. Redo calibration. Button Lockouts When the Primary OSD or button labels are not displayed, - HP DreamColor Z27x | User Guide 1 - Page 70
support telephone numbers ● Locate an HP service center Preparing to Call Technical Support If you cannot solve a problem using the troubleshooting tips in this section, you may need to call technical support. Have the following information available when you call: ● Monitor model number ● Monitor - HP DreamColor Z27x | User Guide 1 - Page 71
The TFT monitor uses high-precision technology, manufactured according to HP standards, to guarantee trouble-free monitor should be viewed under normal operating conditions, in normal operating mode at a supported resolution and refresh rate, from a distance of approximately 50 cm (20 in). HP
-
 1
1 -
 2
2 -
 3
3 -
 4
4 -
 5
5 -
 6
6 -
 7
7 -
8
-
9
-
10
-
11
-
12
-
13
-
14
-
15
-
16
-
17
-
18
-
19
-
20
-
21
-
22
-
23
-
24
-
25
-
26
-
27
-
28
-
29
-
30
-
31
-
32
-
33
-
34
-
35
-
36
-
37
-
38
-
39
-
40
-
41
-
42
-
43
-
44
-
45
-
46
-
47
-
48
-
49
-
50
-
51
-
52
-
53
-
54
-
55
-
56
-
57
-
58
-
59
-
60
-
61
-
62
-
63
-
64
-
65
-
66
-
67
-
68
-
69
-
70
-
71
 |
 |

HP DreamColor Z27x Display
User Guide