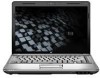
HP Dv4-1124nr HP Pavilion dv4 Entertainment PC - Display Replacement Guide - Page 14
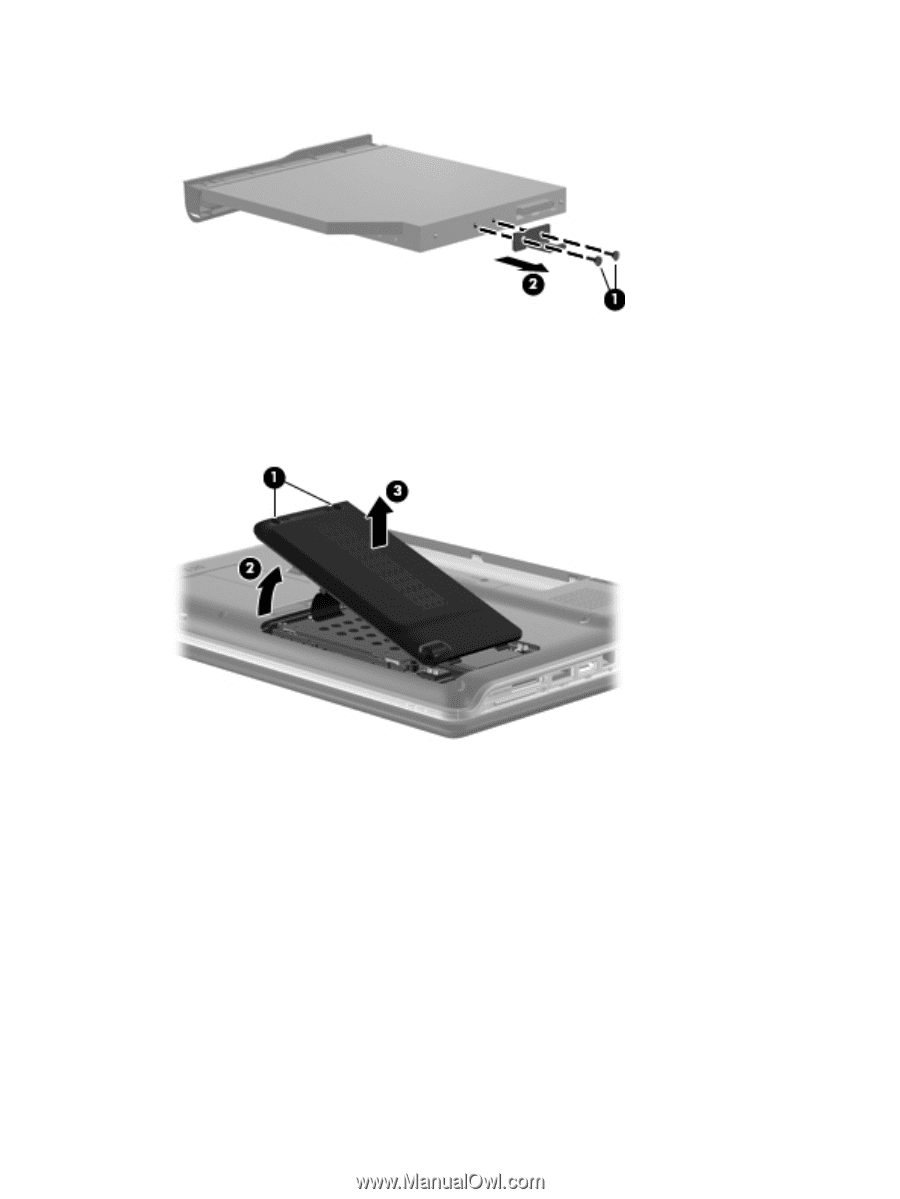
that secure the hard drive to the computer., Remove the three black Phillips PM2.0×4.0 screws
 |
UPC - 884420609841
View all HP Dv4-1124nr manuals
Add to My Manuals
Save this manual to your list of manuals |
Page 14 highlights
12. Remove the optical drive bracket (2). 13. Position the computer with the front toward you. 14. Loosen the two Phillips PM2.5×6.0 captive screws (1) that secure the hard drive bay cover to the computer. 15. Lift the left side of the hard drive bay cover (2), swing it to right, and remove the cover (3). The hard drive bay cover is included in the Plastics Kit, spare part number 486833-001. 16. Remove the three black Phillips PM2.0×4.0 screws (1) that secure the hard drive to the computer. 17. Use the Mylar tab (2) to slide the hard drive away from the hard drive connector (3). 8 Chapter 1 Removal and replacement procedures ENWW
-
 1
1 -
2
-
3
-
4
-
5
-
6
-
7
-
8
-
 9
9 -
 10
10 -
 11
11 -
 12
12 -
 13
13 -
 14
14 -
 15
15 -
 16
16 -
 17
17 -
 18
18 -
 19
19 -
20
-
21
-
22
-
23
-
24
-
25
-
26
-
27
-
28
-
29
-
30
-
31
-
32
-
33
-
34
-
35
-
36
-
37
-
38
 |
 |
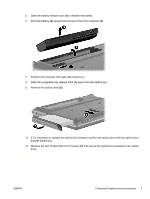
12.
Remove the optical drive bracket
(2)
.
13.
Position the computer with the front toward you.
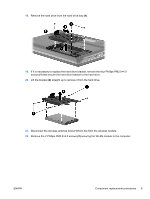
14.
Loosen the two Phillips PM2.5×6.0 captive screws
(1)
that secure the hard drive bay cover to the
computer.
15.
Lift the left side of the hard drive bay cover
(2)
, swing it to right, and remove the cover
(3)
. The hard
drive bay cover is included in the Plastics Kit, spare part number 486833-001.
16.
Remove the three black Phillips PM2.0×4.0 screws
(1)
that secure the hard drive to the computer.
17.
Use the Mylar tab
(2)
to slide the hard drive away from the hard drive connector
(3)
.
8
Chapter 1
Removal and replacement procedures
ENWW